AppsFlyer is a mobile measurement partner (MMP) that attributes app installs and in-app events to your marketing campaigns. Connecting AppsFlyer as a SignalSight source lets you receive postbacks in real time and forward them to Meta, TikTok, Google, and other destinations — with deduplication and delivery handled in one place.
Before you start
You need a SignalSight account and an AppsFlyer account with apps published on the marketplaces you plan to connect. No API key is required — authentication is handled through the AppsFlyer Partner Marketplace. New users can begin with Account Creation.
Get Started
The setup has two parts: install SignalSight from the AppsFlyer Partner Marketplace, then create a tracker in SignalSight with your marketplace details. Postbacks, permissions, and event selection are configured in AppsFlyer — SignalSight handles routing to your destinations.
Install SignalSight in AppsFlyer
Before creating the SignalSight tracker, install the SignalSight integration from the AppsFlyer Partner Marketplace. This authorizes AppsFlyer to send install and in-app event postbacks to SignalSight.
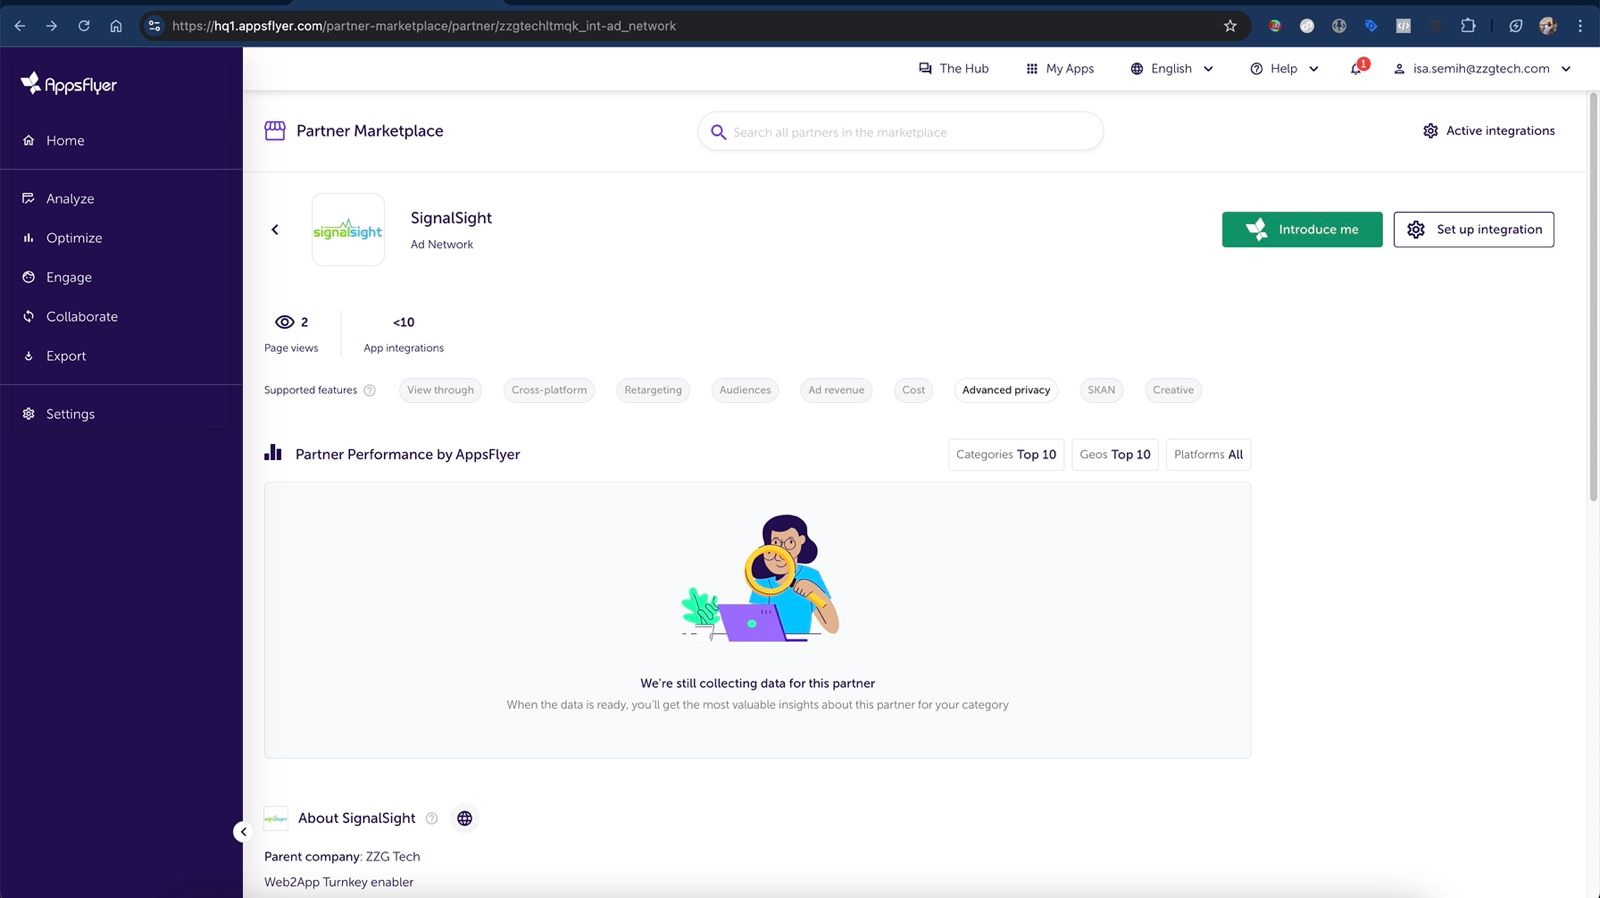
- In AppsFlyer, open Collaborate → Partner Marketplace and search for SignalSight.
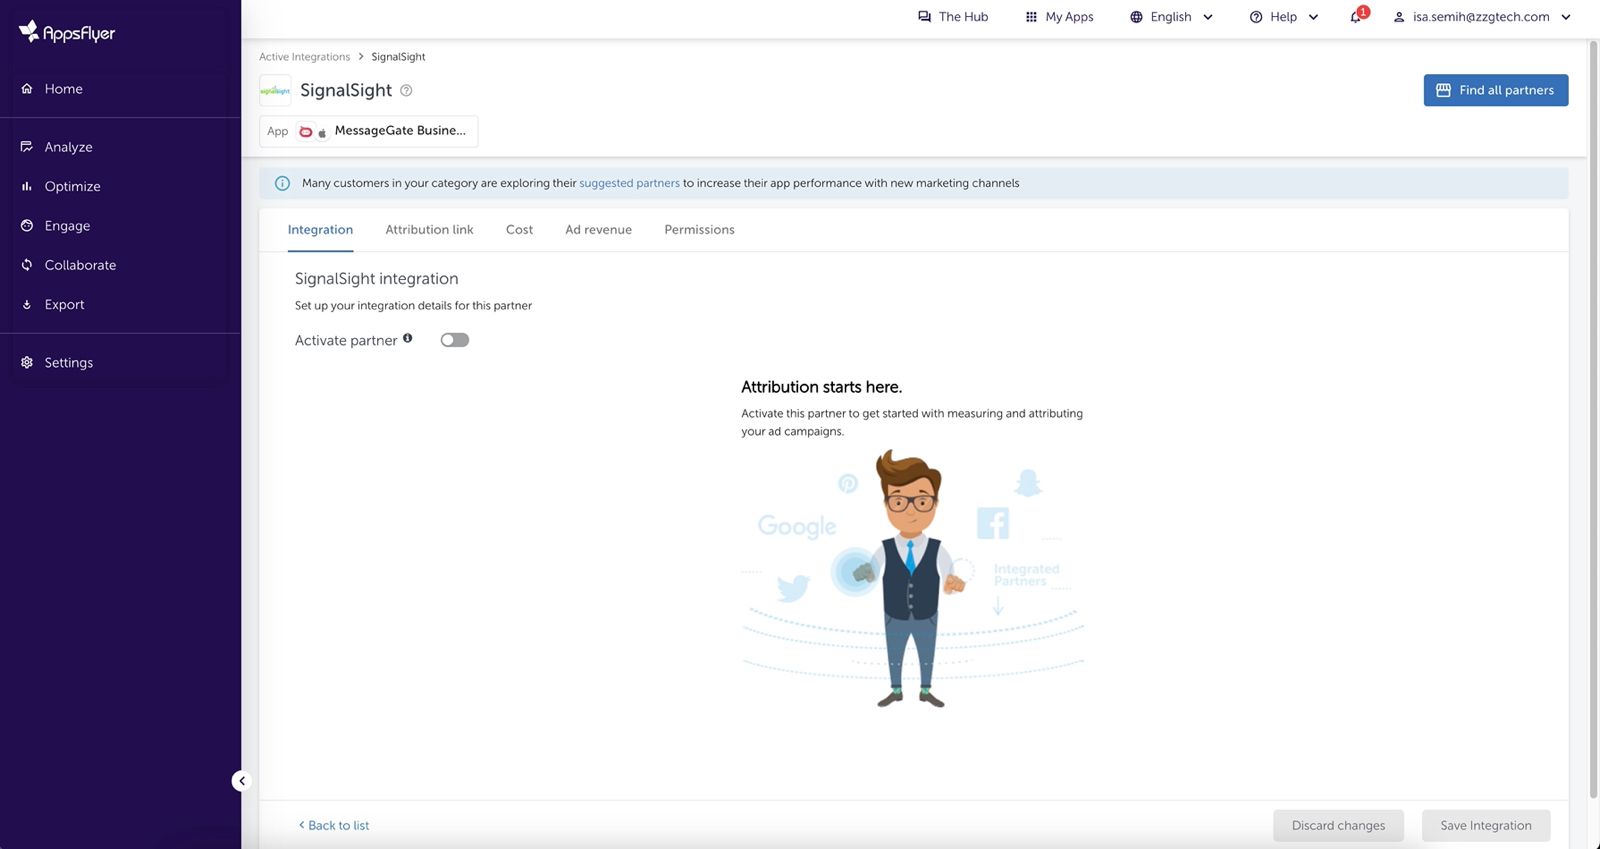
- Select your app and click Install (or Set up integration) to activate the partner connection.
- Complete the initial marketplace setup screens. You will return to AppsFlyer after the SignalSight tracker is created to configure postbacks.
Create a Tracker in SignalSight
Open Signal → Trackers and click Create Tracker to launch the wizard.
Step 1 — AppsFlyer Source
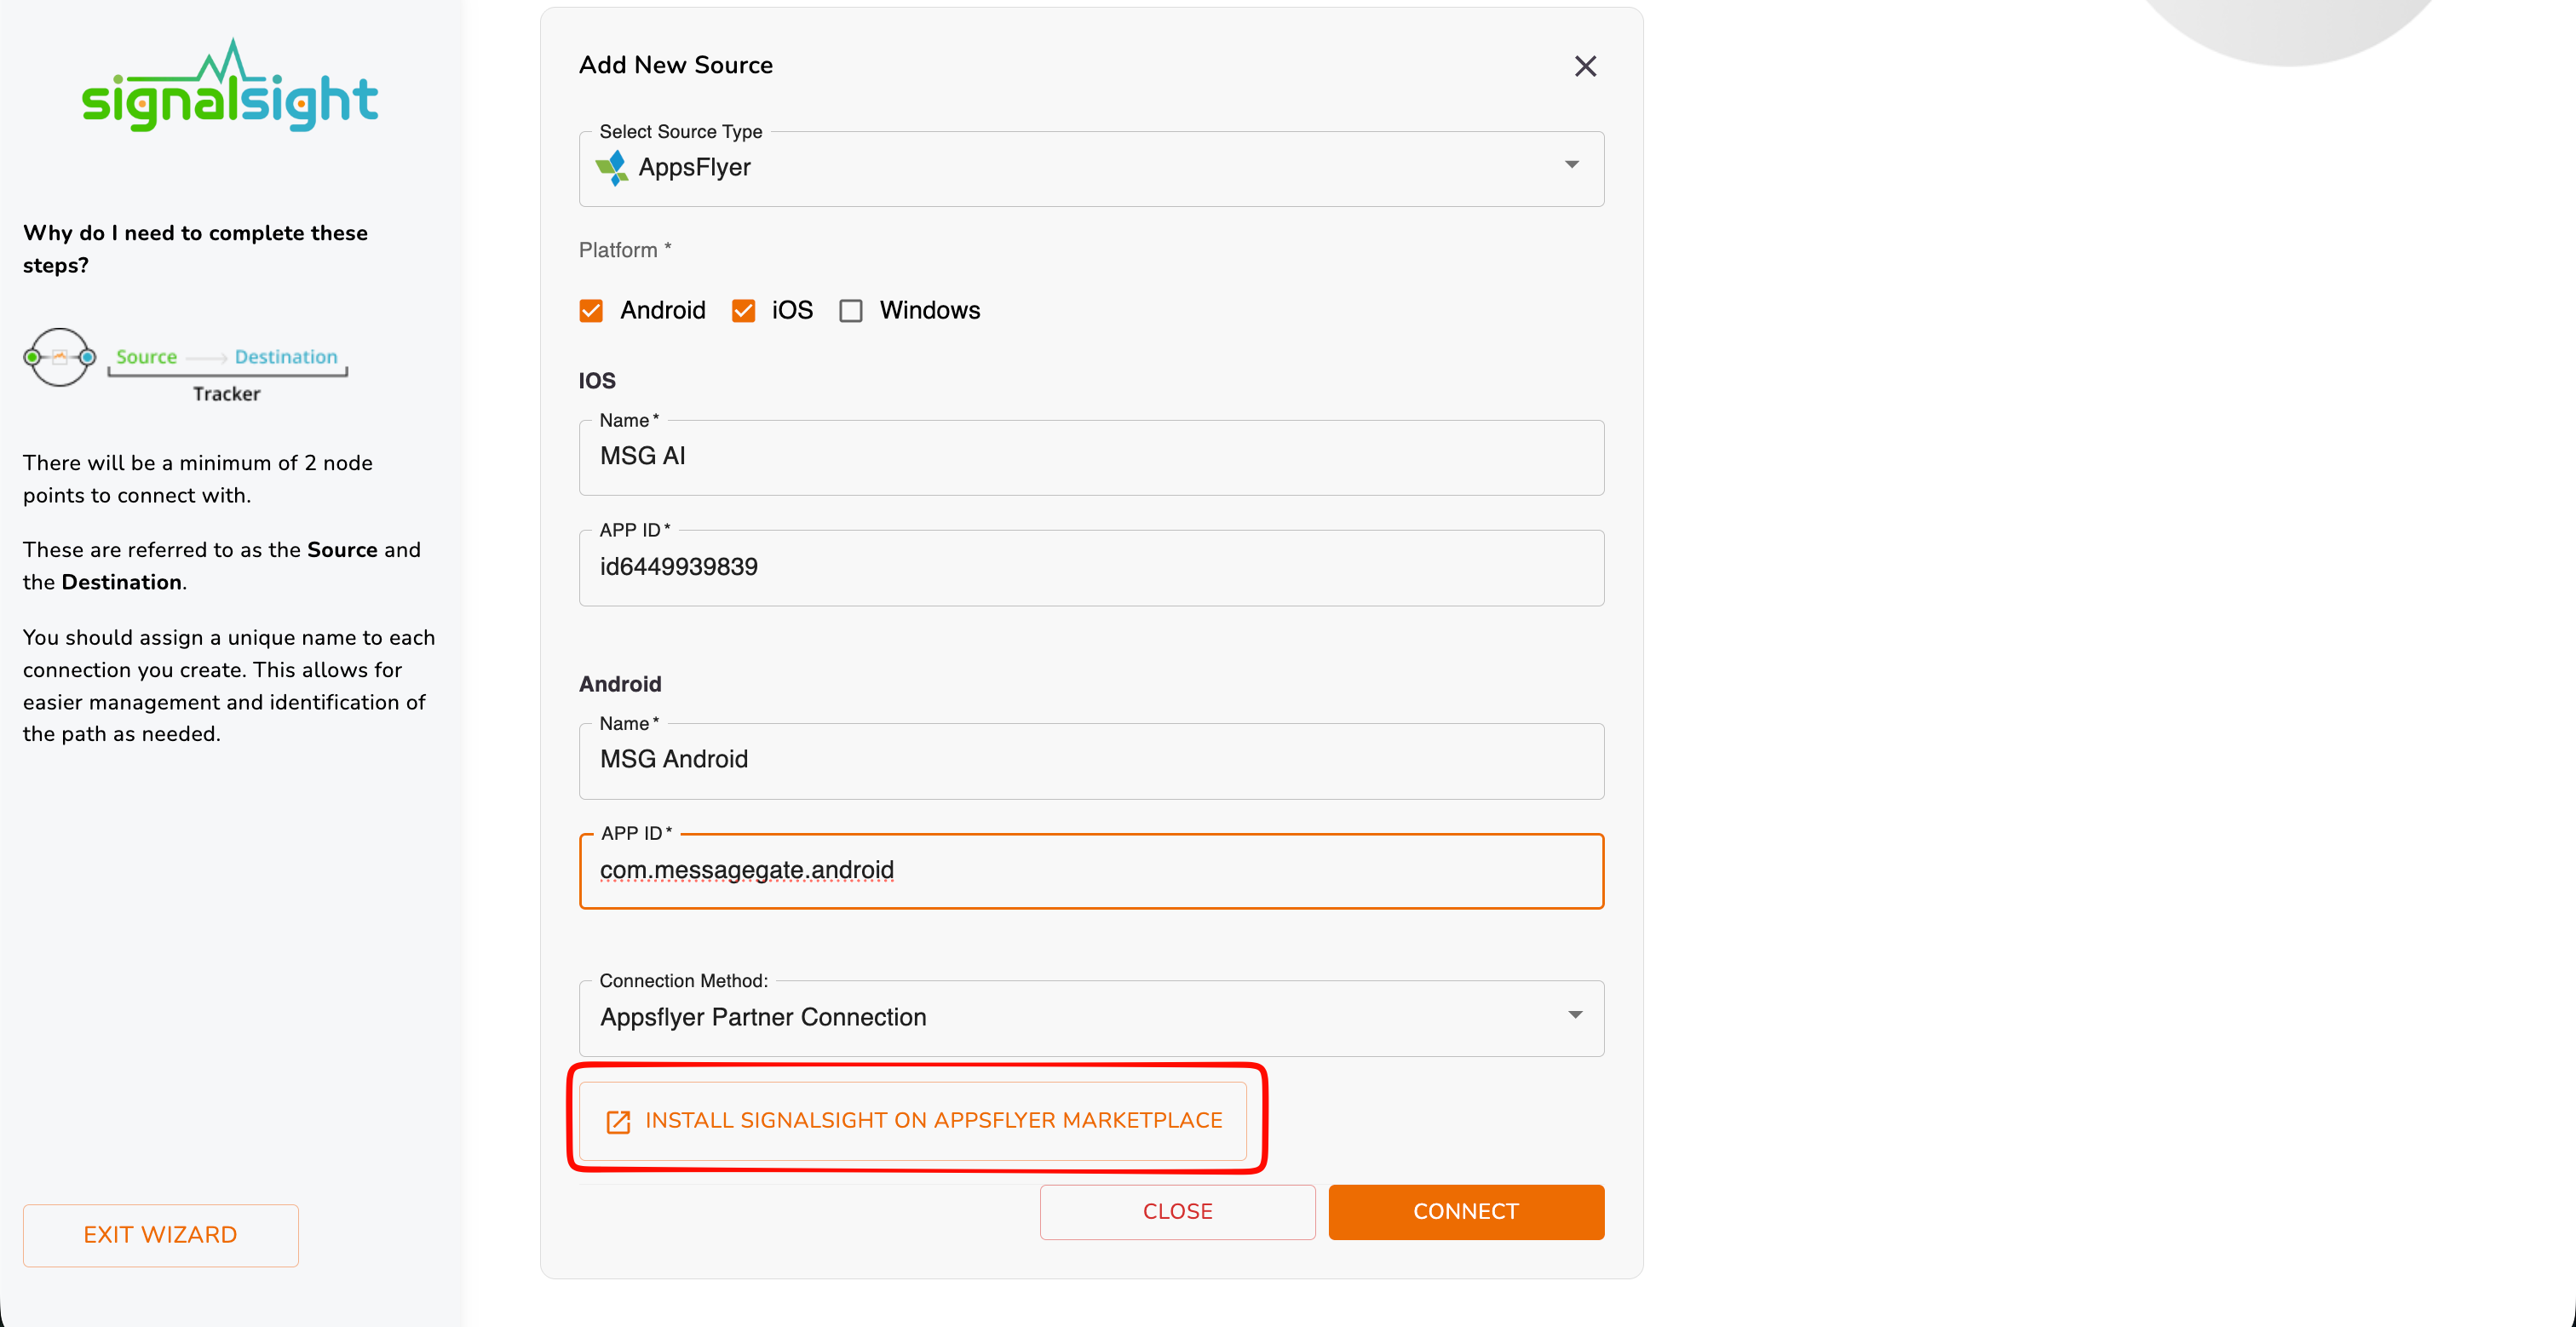
- On the source selection screen, choose AppsFlyer as your source type.
- Under Platform, select every marketplace you want to connect — Android, iOS, and/or Windows as applicable.
- For each selected platform, enter a Name and the Marketplace ID:
- Android — your Google Play package name (e.g.
com.example.app). - iOS — your App Store ID (e.g.
id6449939839).
- Android — your Google Play package name (e.g.
- Click Connect to link the marketplace install with your SignalSight tracker and continue through the wizard.
Note
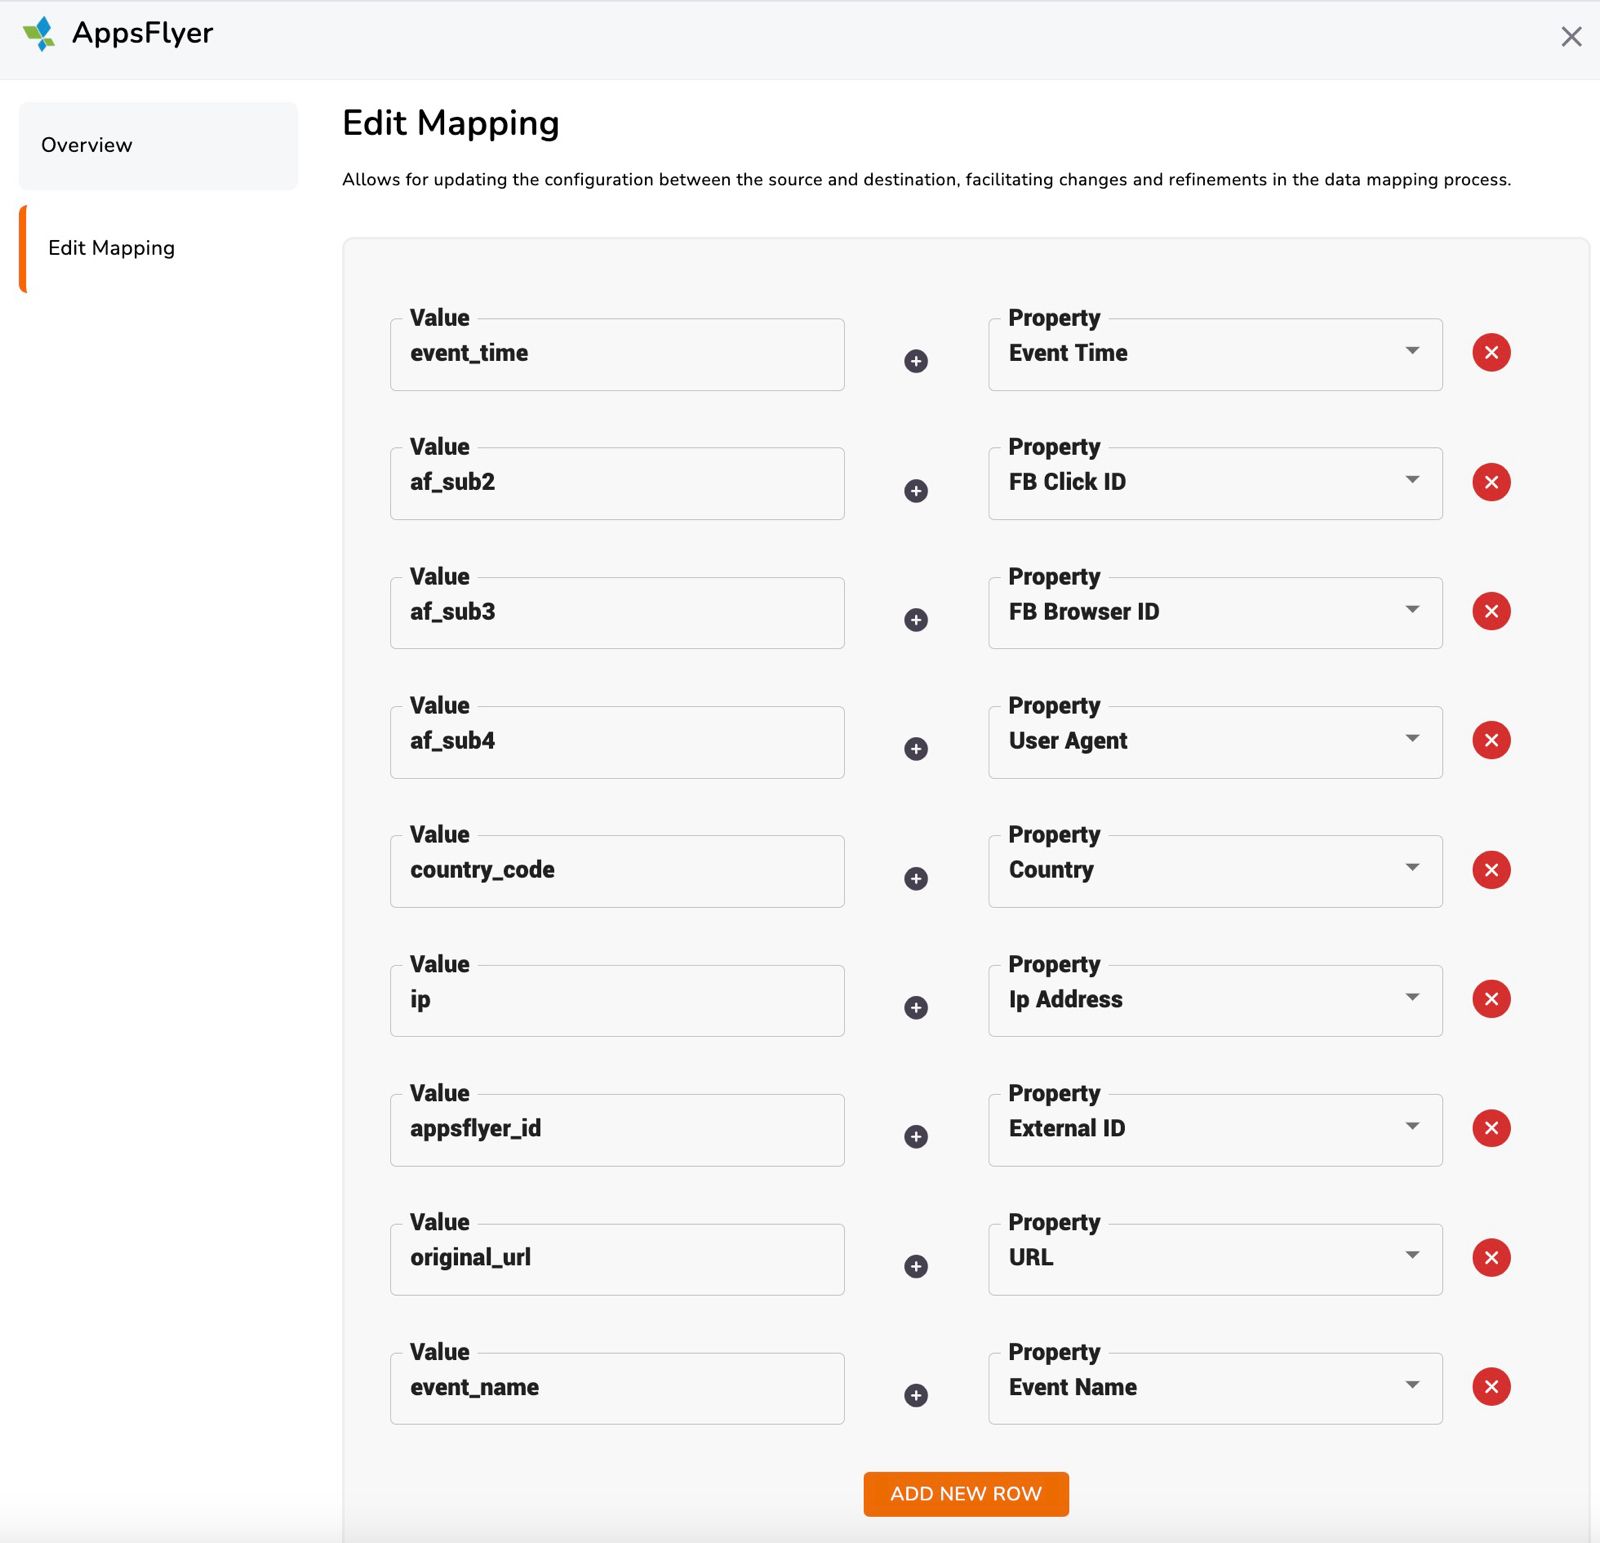
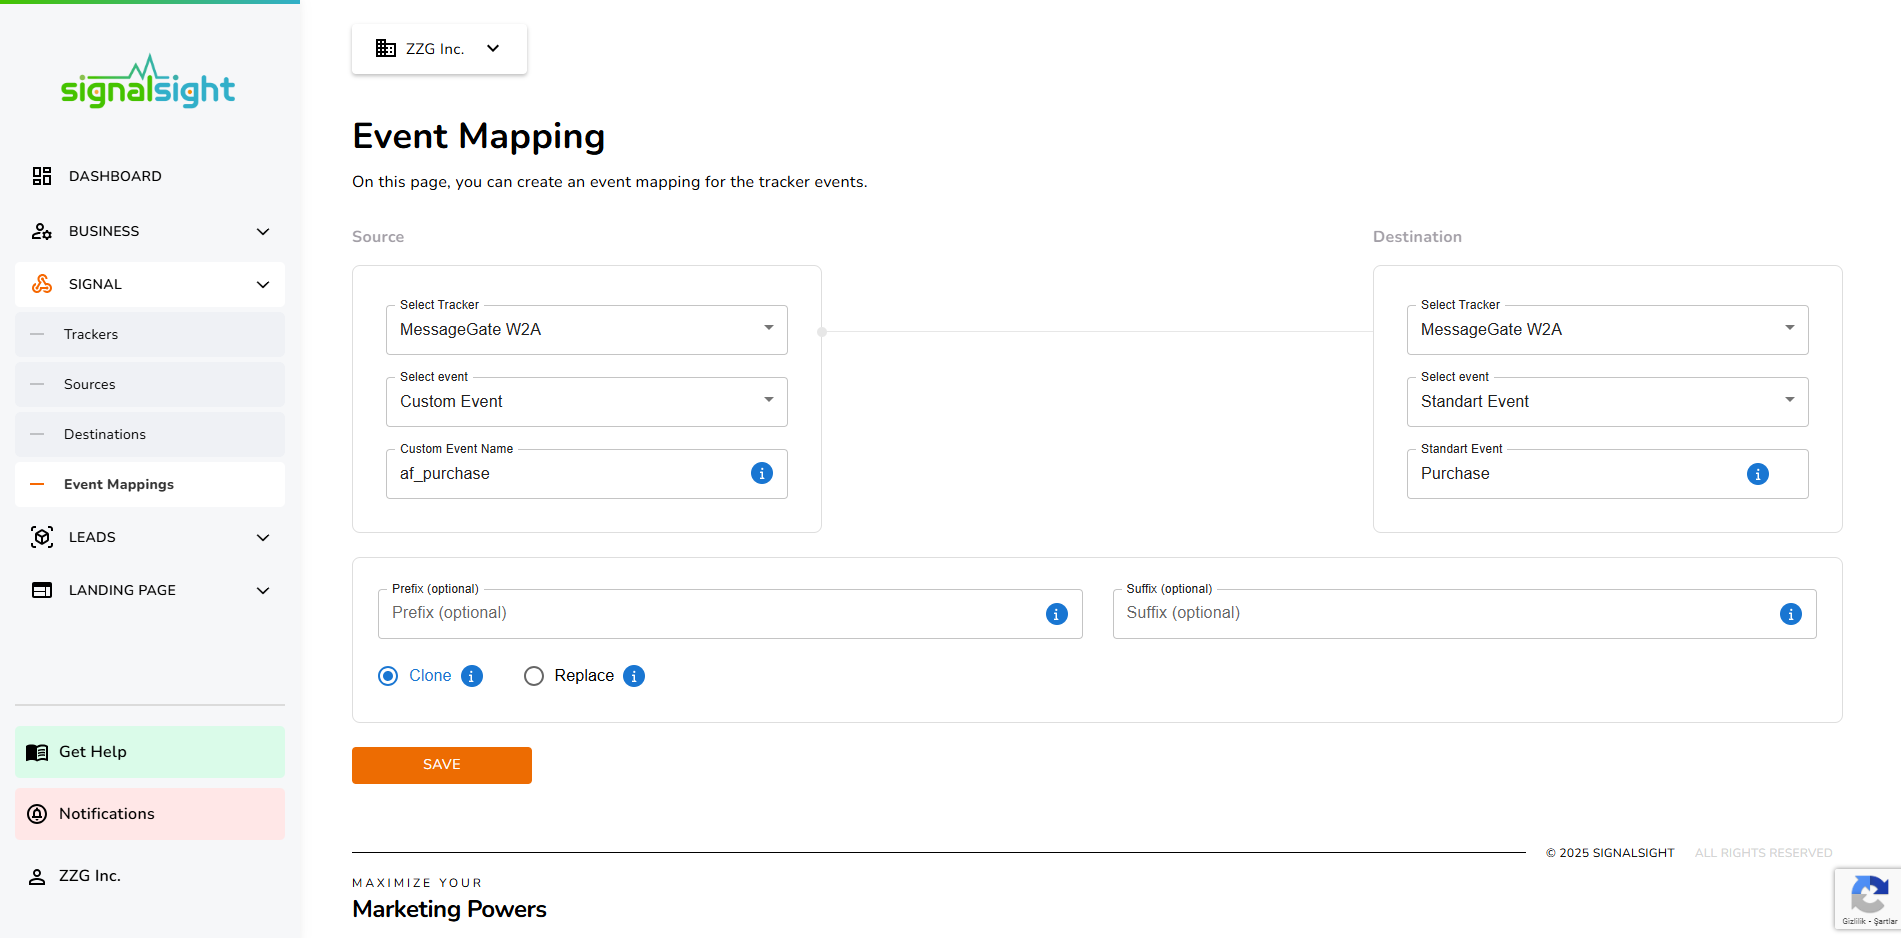
Event mapping is not required during setup. After the tracker is created, use Edit Mapping on the tracker detail page to configure how AppsFlyer events map to your destinations.
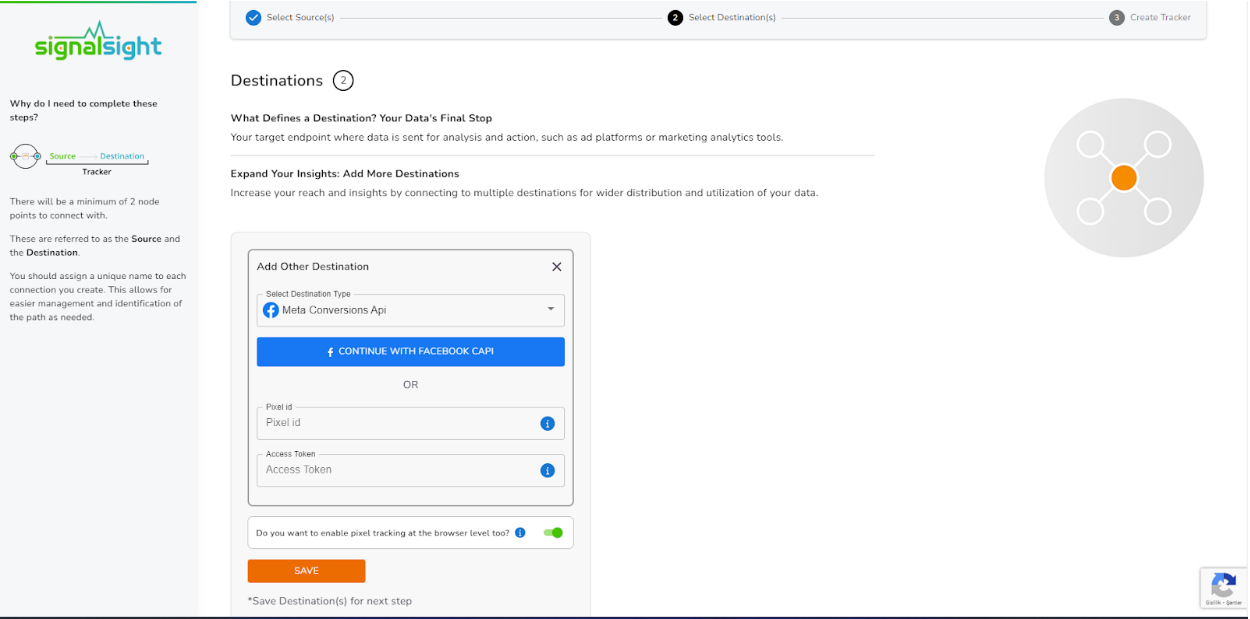
Step 2 — Choose a Destination
Select where AppsFlyer data should be sent — Meta Conversions API, TikTok Events API, Google, or other supported destinations. Configure each destination with the credentials required by that platform.
Step 3 — Name and Complete
Give your tracker a name, review the source and destination summary, and click Complete to finish the wizard.
Configure Postbacks in AppsFlyer
Return to the SignalSight integration in AppsFlyer and configure which events are forwarded to SignalSight. Complete these settings so install and in-app events reach your destinations.
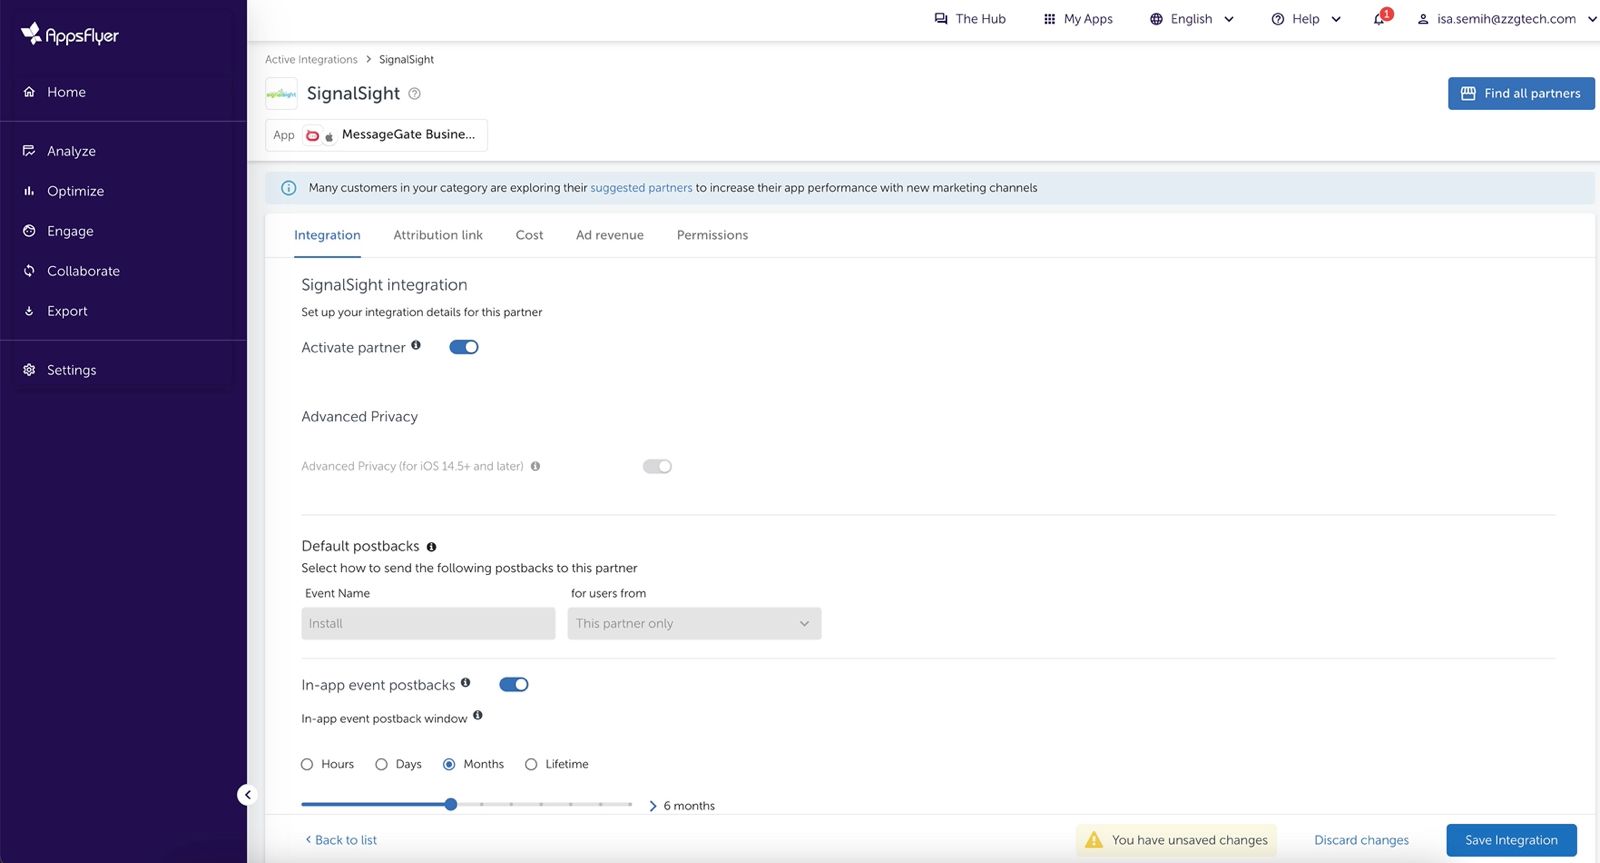
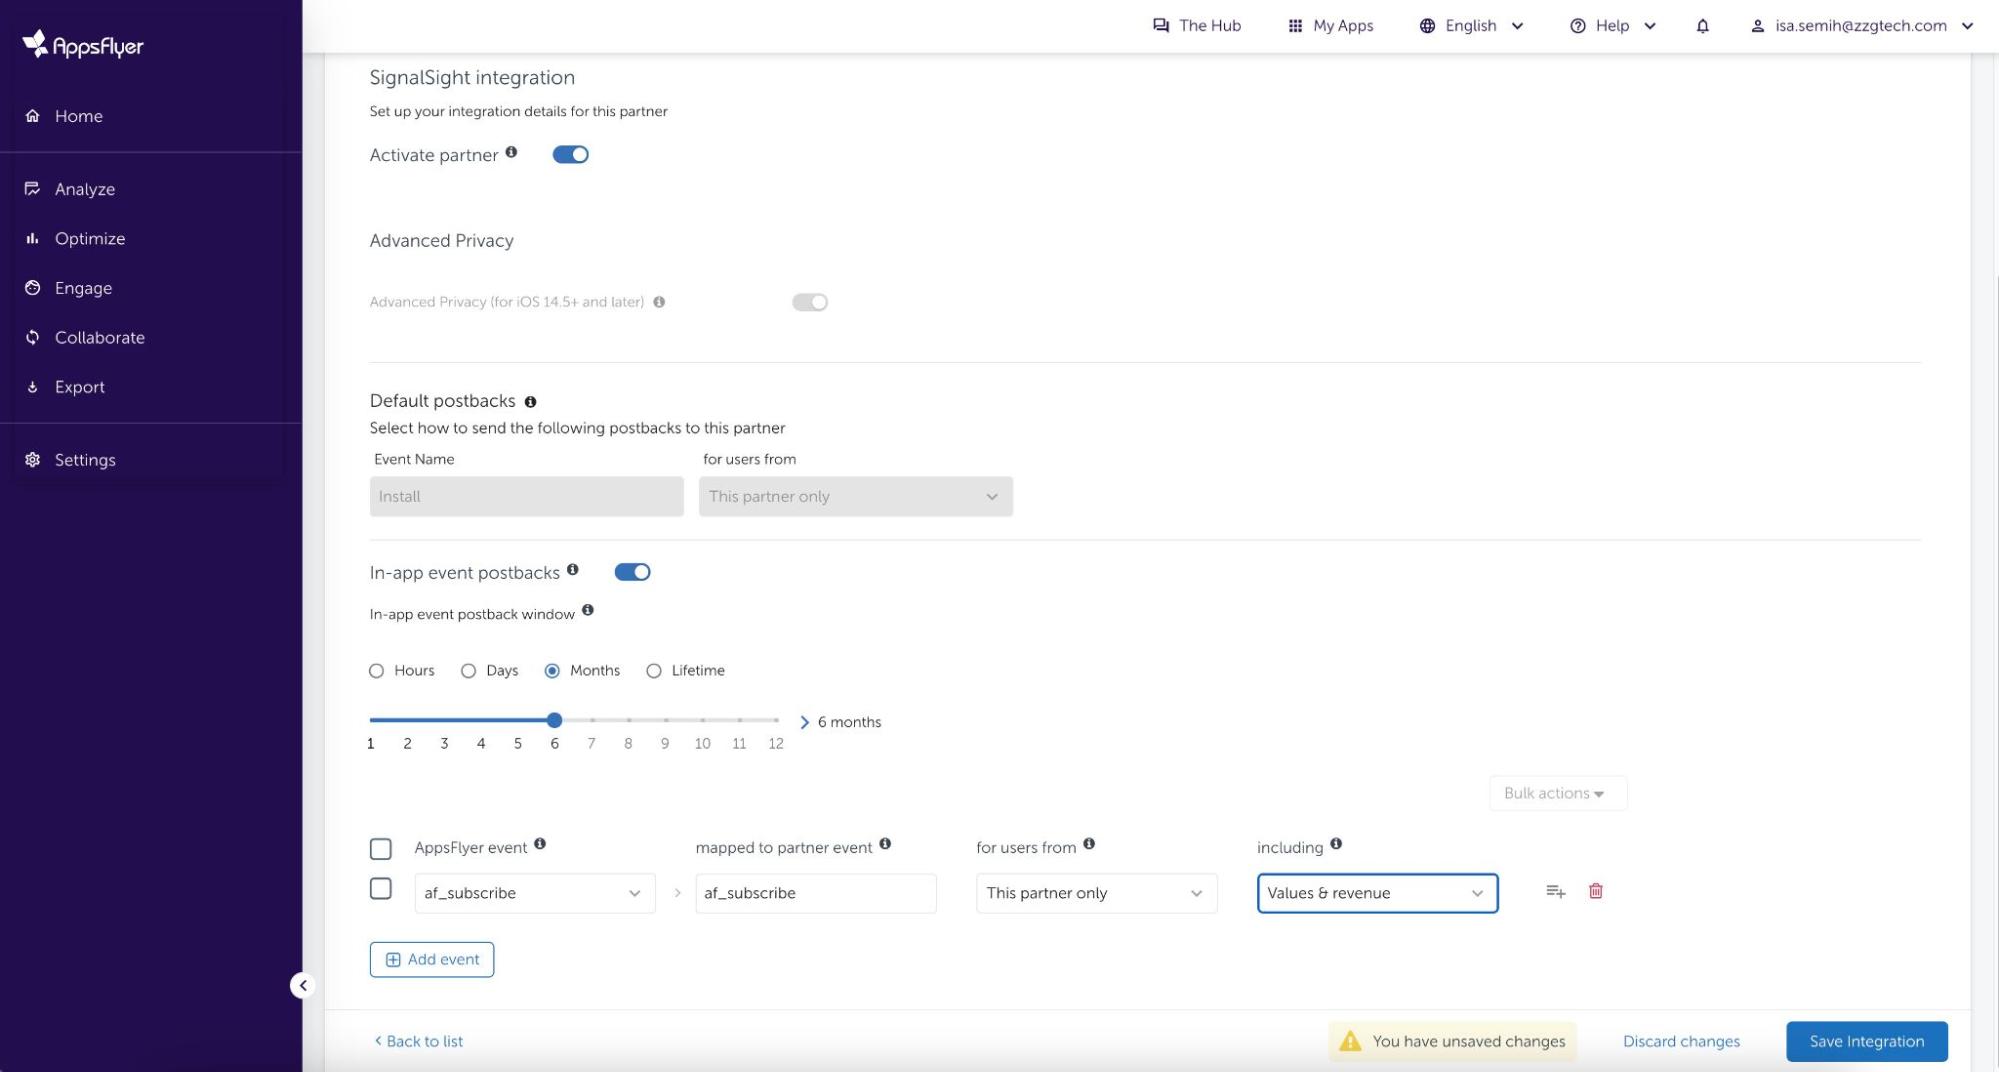
Default Postbacks
- Open the SignalSight integration and go to the Integration tab → Default Postbacks.
- Enable the Install postback and set the source to This partner only.
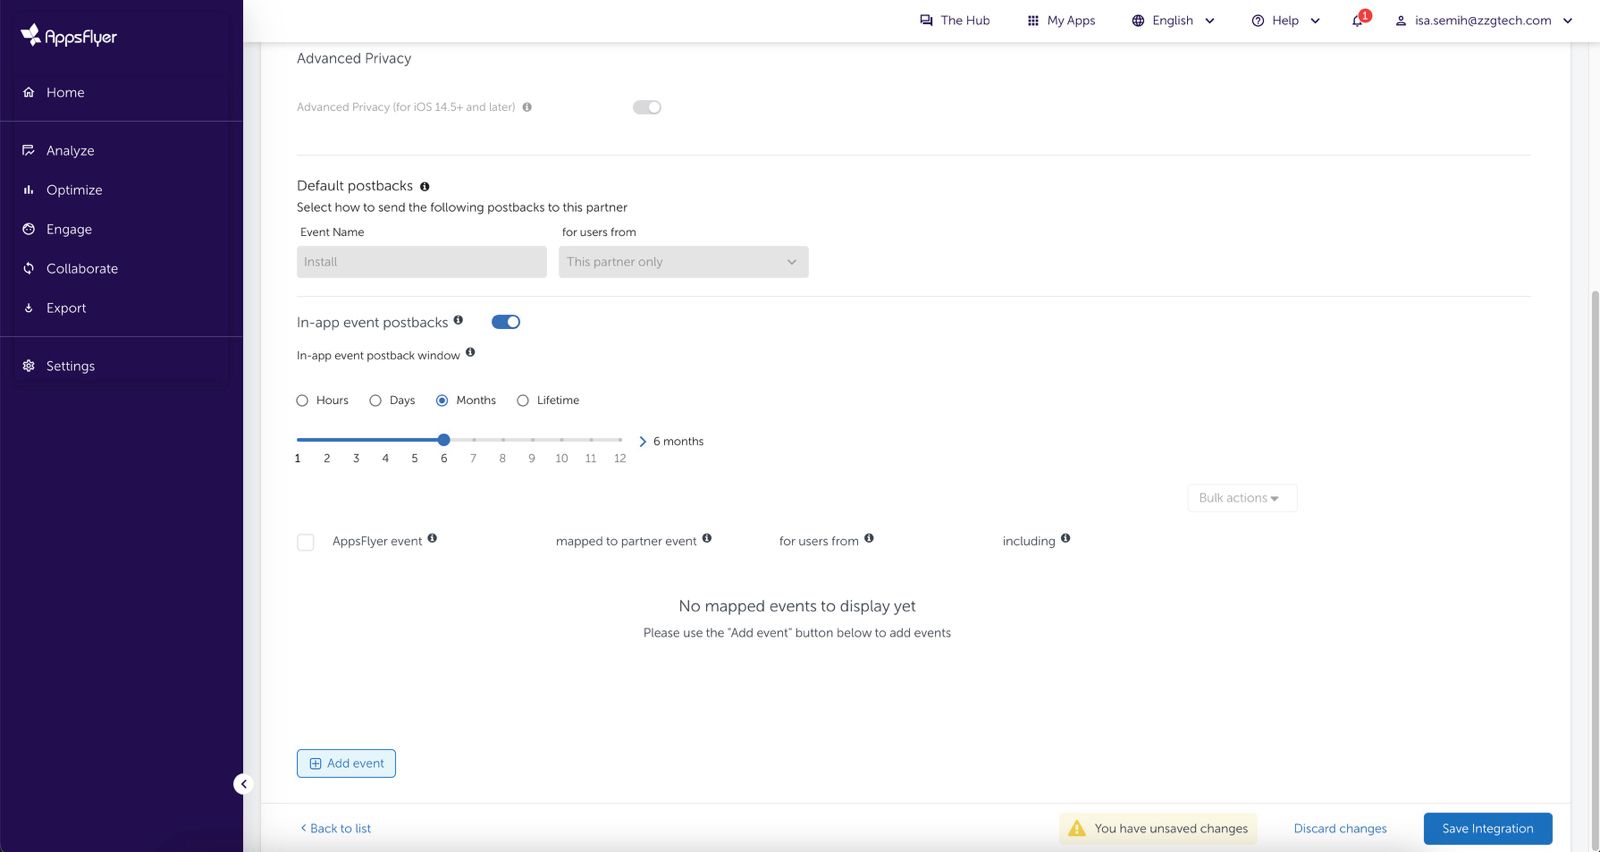
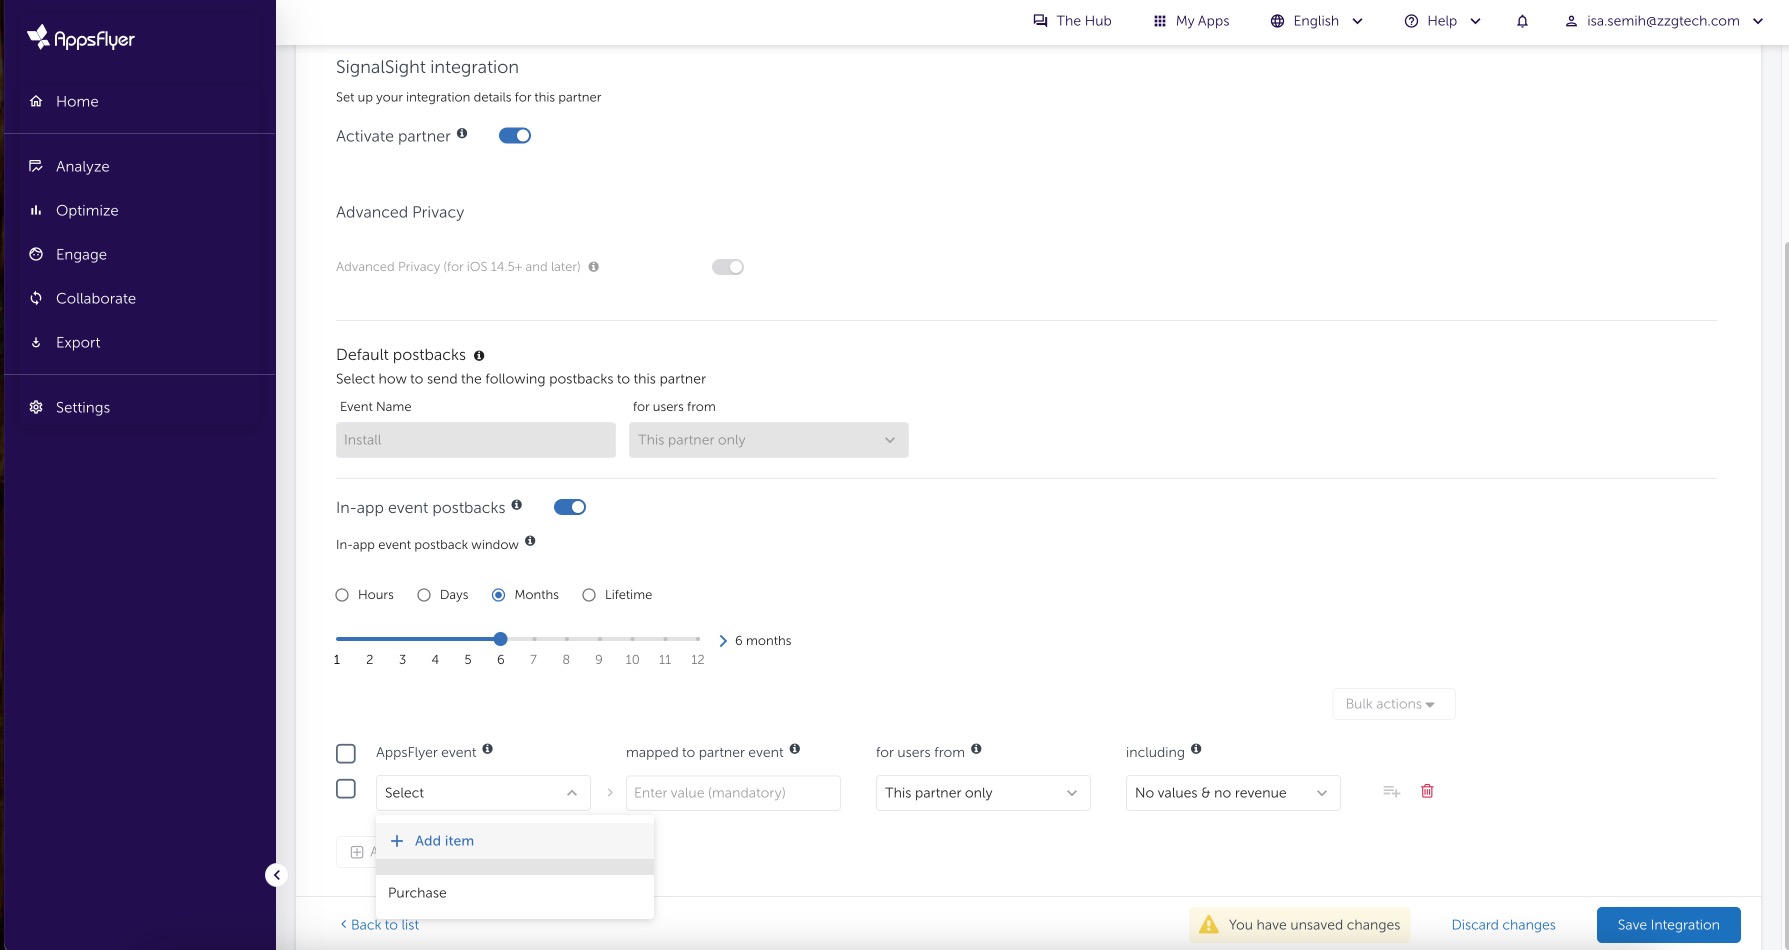
In-App Event Postbacks
- Enable In-App Event Postbacks and set an appropriate postback window (e.g. 6 months).
- Add the in-app events you want to forward — such as
af_purchaseoraf_subscribe— and map each to the corresponding partner event.
Privacy and Permissions
- Turn Advanced Privacy off for this integration so event parameters reach SignalSight correctly.
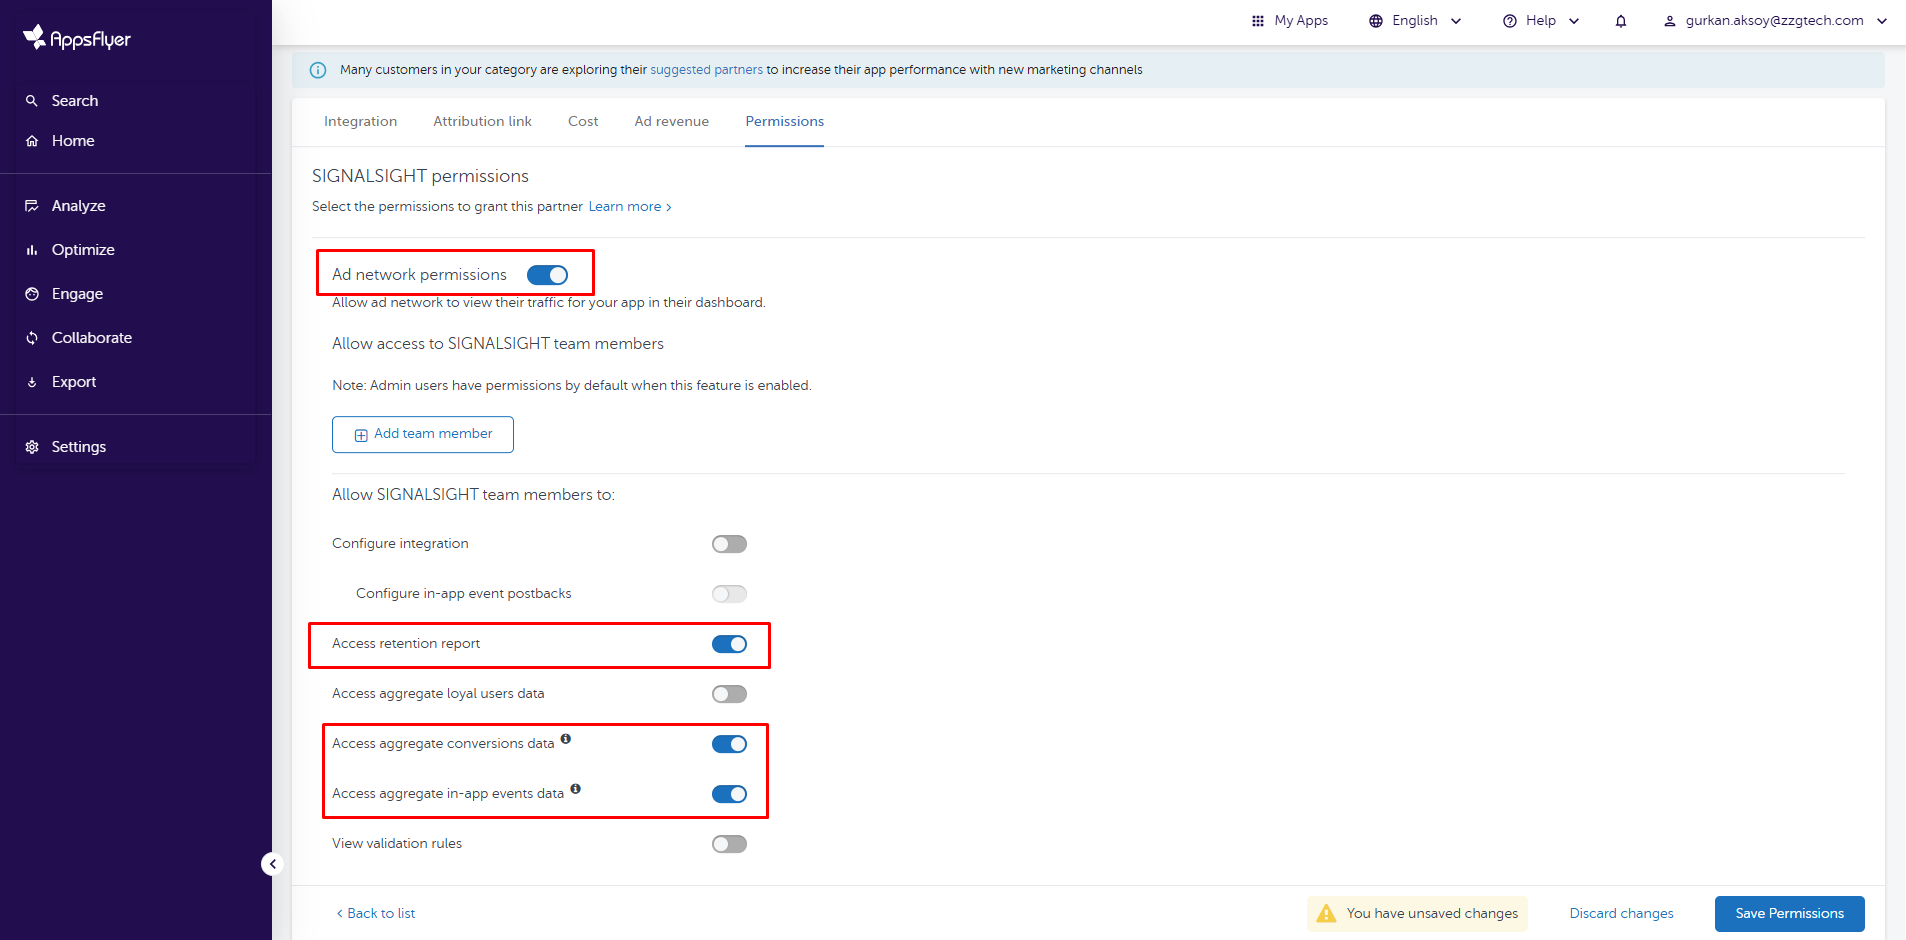
- Under the Permissions tab, enable the access permissions shown in the interface.
Manage Your Tracker
Open the tracker at any time to update event mapping via Edit Mapping, review delivery history, or run a test. Avoid changing mappings on live campaigns that have already completed learning, as this can restart the optimization phase on ad platforms.
Web2App and Landing Pages
If AppsFlyer is your MMP, you can pair this source with a SignalSight landing page to route users from web campaigns into your app store listing. See Landing Page Creation or AppsFlyer — Web2App for the full Web2App workflow.
Do I need an AppsFlyer API key?
No. SignalSight connects through the AppsFlyer Partner Marketplace. Install SignalSight as a partner integration in AppsFlyer, then complete the tracker setup in SignalSight with your Marketplace IDs.
What order should I follow?
Install SignalSight from the AppsFlyer Partner Marketplace first, then create and complete the tracker in SignalSight. Return to AppsFlyer afterward to configure default and in-app event postbacks.
When do I configure event mapping?
Mapping is optional during the wizard. Use Edit Mapping on the tracker detail page after the tracker is created to configure how AppsFlyer events map to your destinations.
How is this different from AppsFlyer Web2App?
This guide covers AppsFlyer as a general event source. The Web2App guide adds landing page creation and full campaign routing on top of the same marketplace connection.