
Enable seamless app install and in-app event tracking across Meta, TikTok, and more via SignalSight's Web2App integration with AppsFlyer.
Get Started
Before connecting AppsFlyer, prepare your ad platform to receive events. This usually means creating a Web Pixel — the destination for install and in-app event data. This guide focuses on Meta, but similar steps apply to TikTok, Snapchat, and other platforms.
Create a Web Pixel
- Go to Meta Event Manager
- Create a Web Pixel
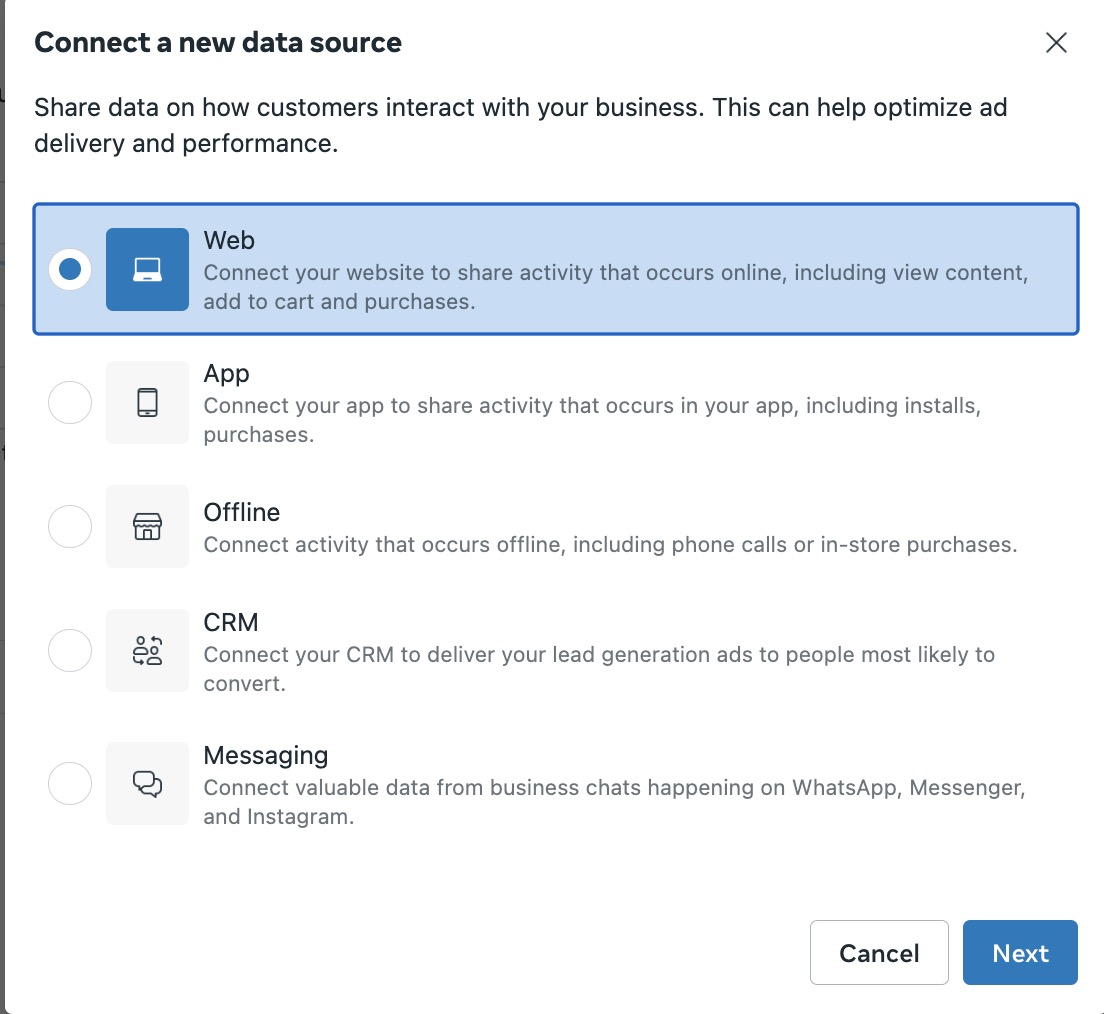
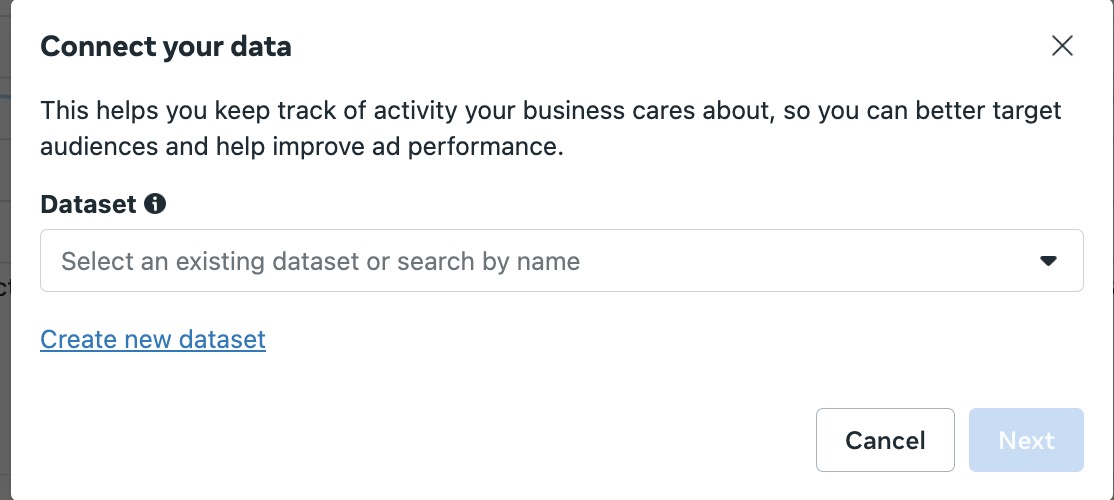
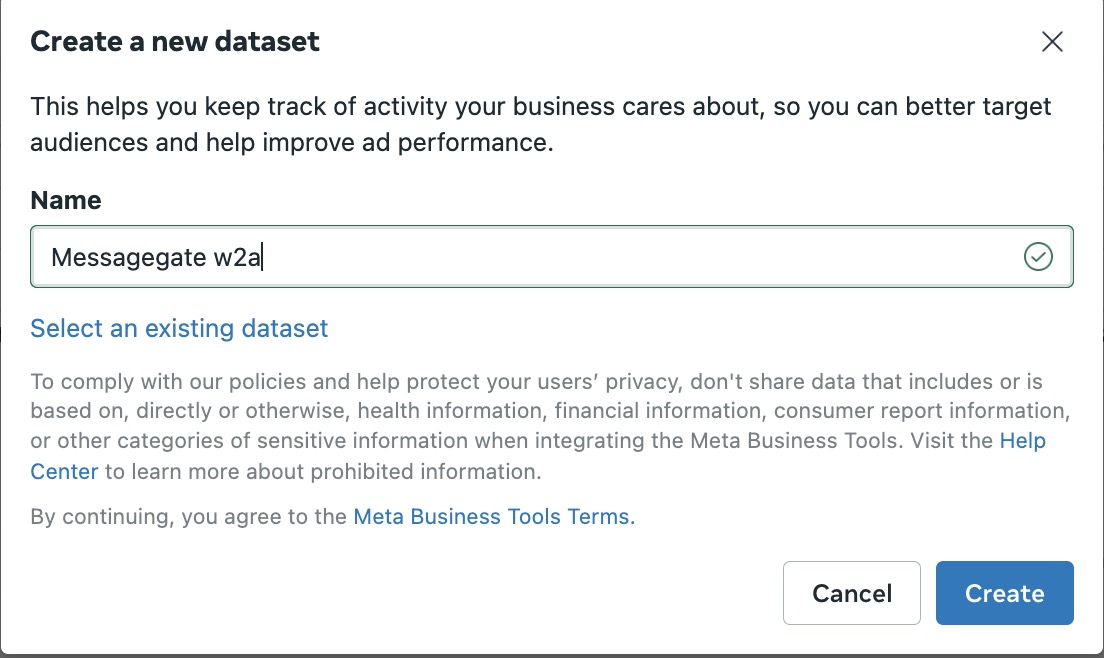
- Save the Pixel ID and Access Token — you'll need both when configuring the SignalSight tracker.
AppsFlyer Integration
SignalSight connects to AppsFlyer via the Partner Marketplace — a fast, UI-driven setup with no custom scripts. Postbacks, event selection, and permissions are all managed in the AppsFlyer dashboard.
Once active, SignalSight attributes traffic from your landing pages and forwards install and in-app events to Meta through the Web2App workflow.
AppsFlyer Marketplace Integration
Access the SignalSight Dashboard
- Log into SignalSight and navigate to Trackers under the Signal section.
- Click Create New Tracker.

Configure the Tracker
- Source:
- Select AppsFlyer as the source.
- Enter the app's package name and save.
Click "INSTALL SignalSight on AppsFlyer Marketplace" to complete the AppsFlyer-side setup.
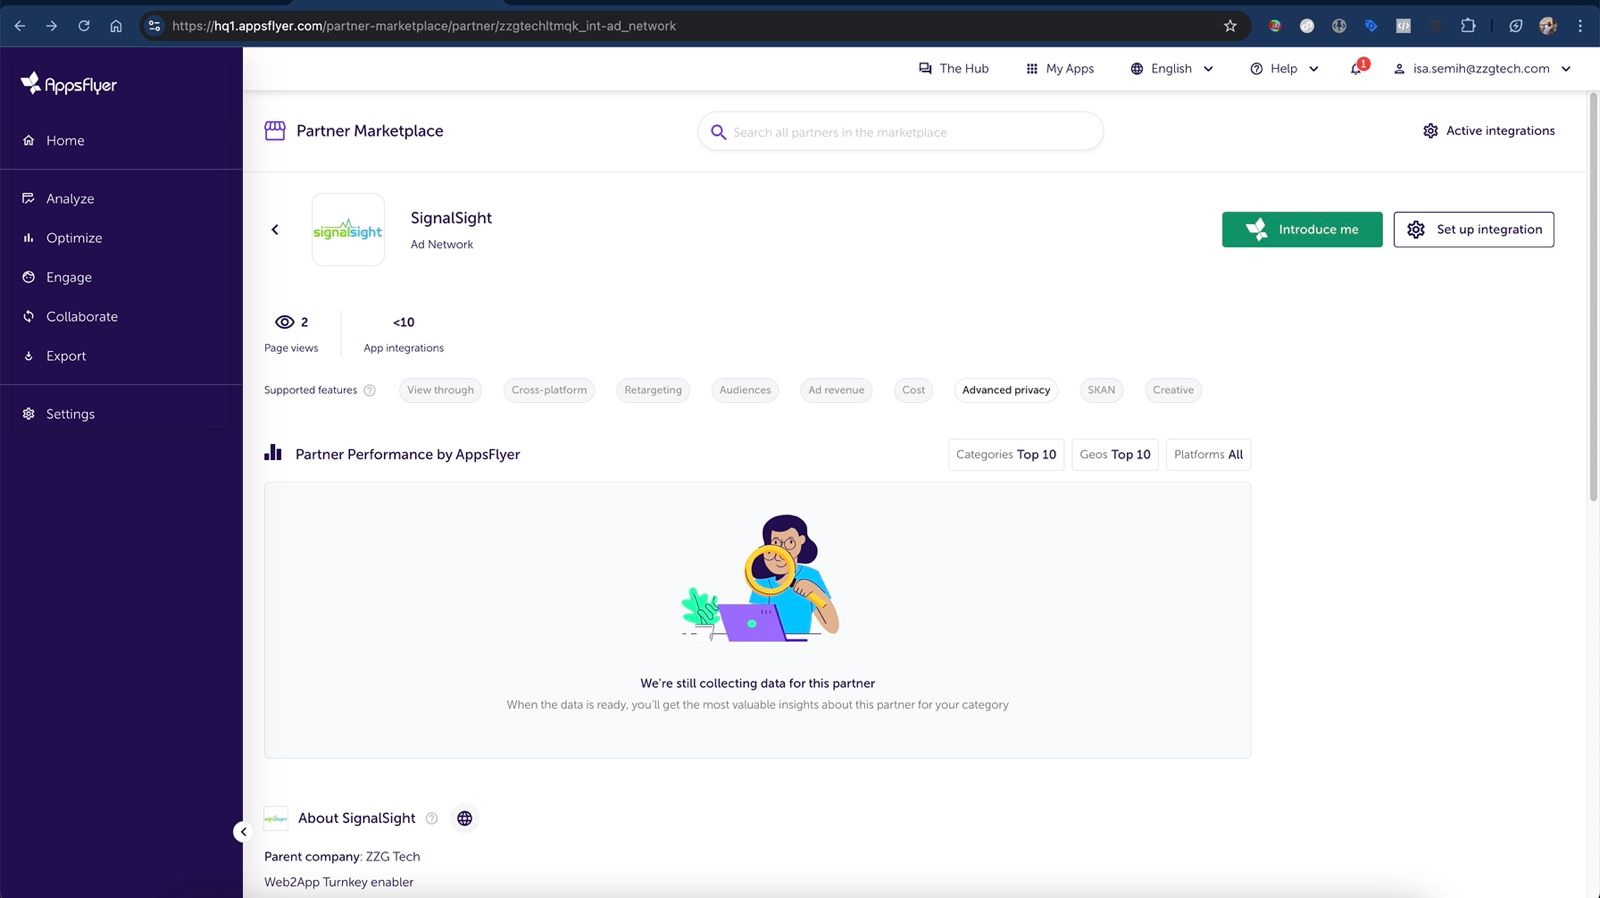
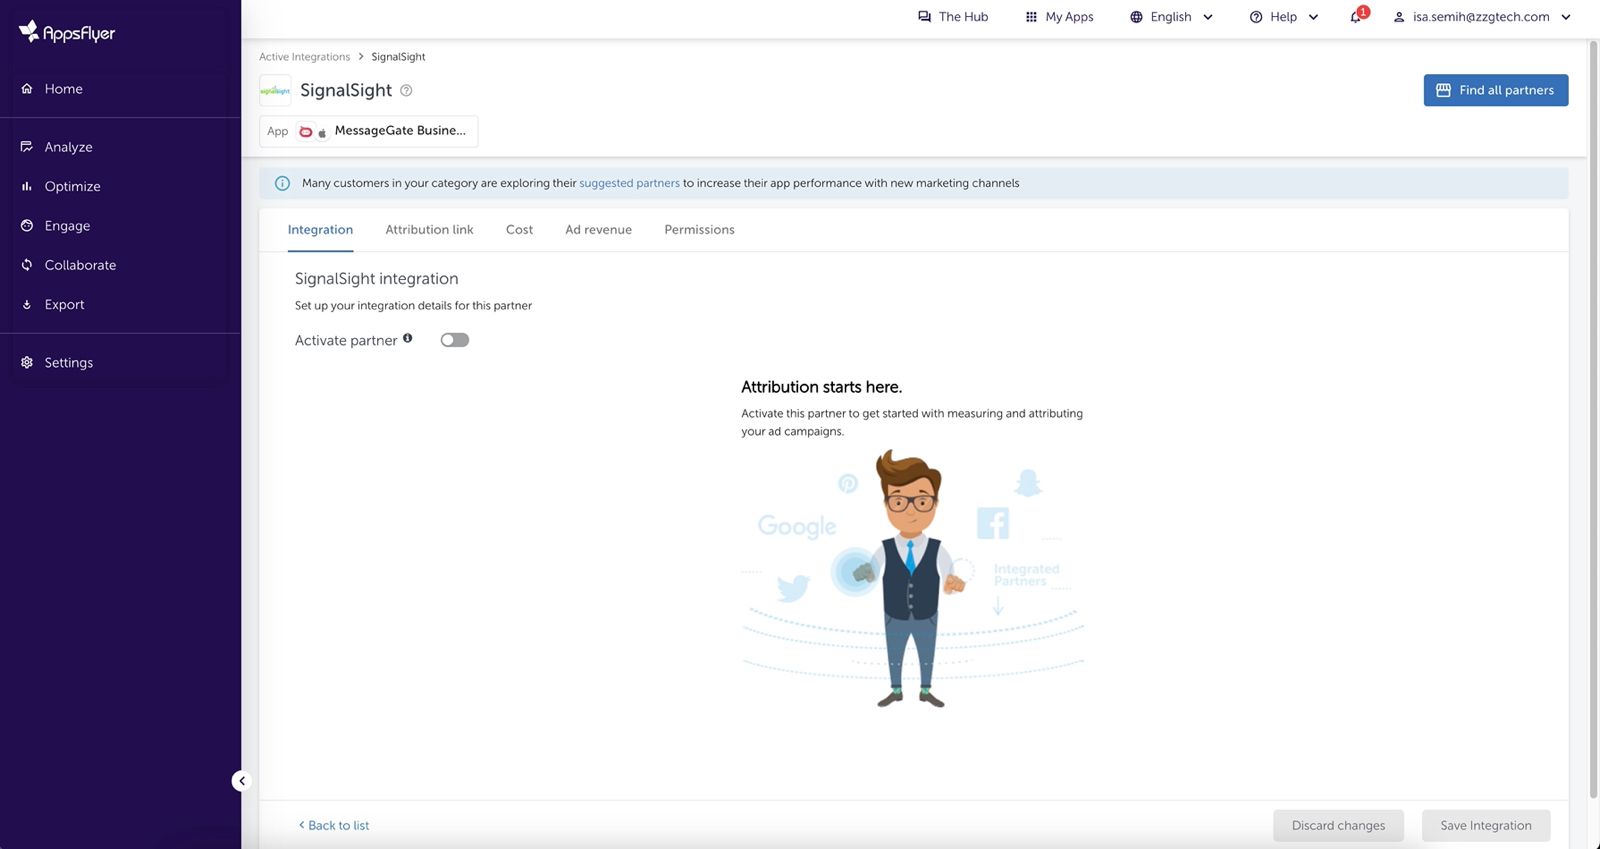
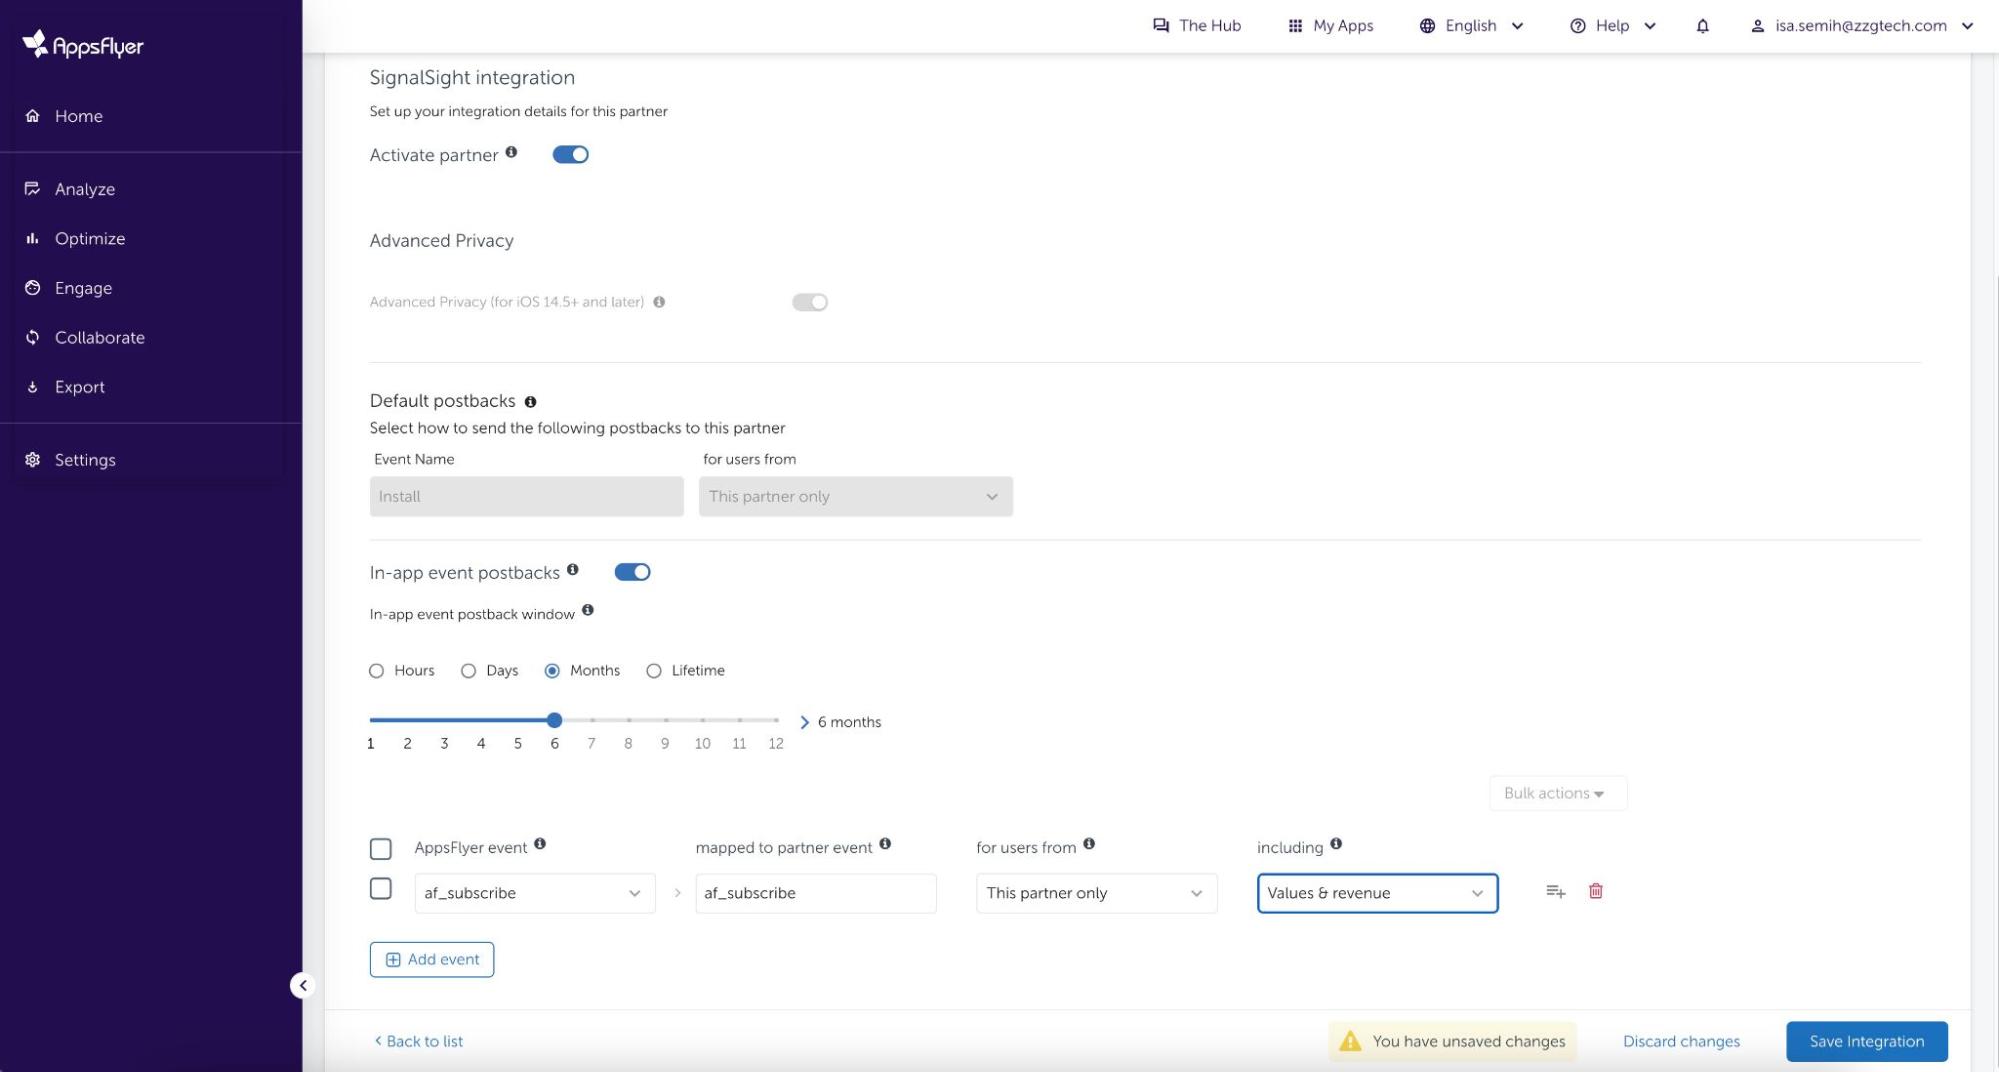
Configure Default Postbacks
- Under the Integration tab, open Default Postbacks.
- Set the
Installevent for attribution. Restrict the source to This partner only.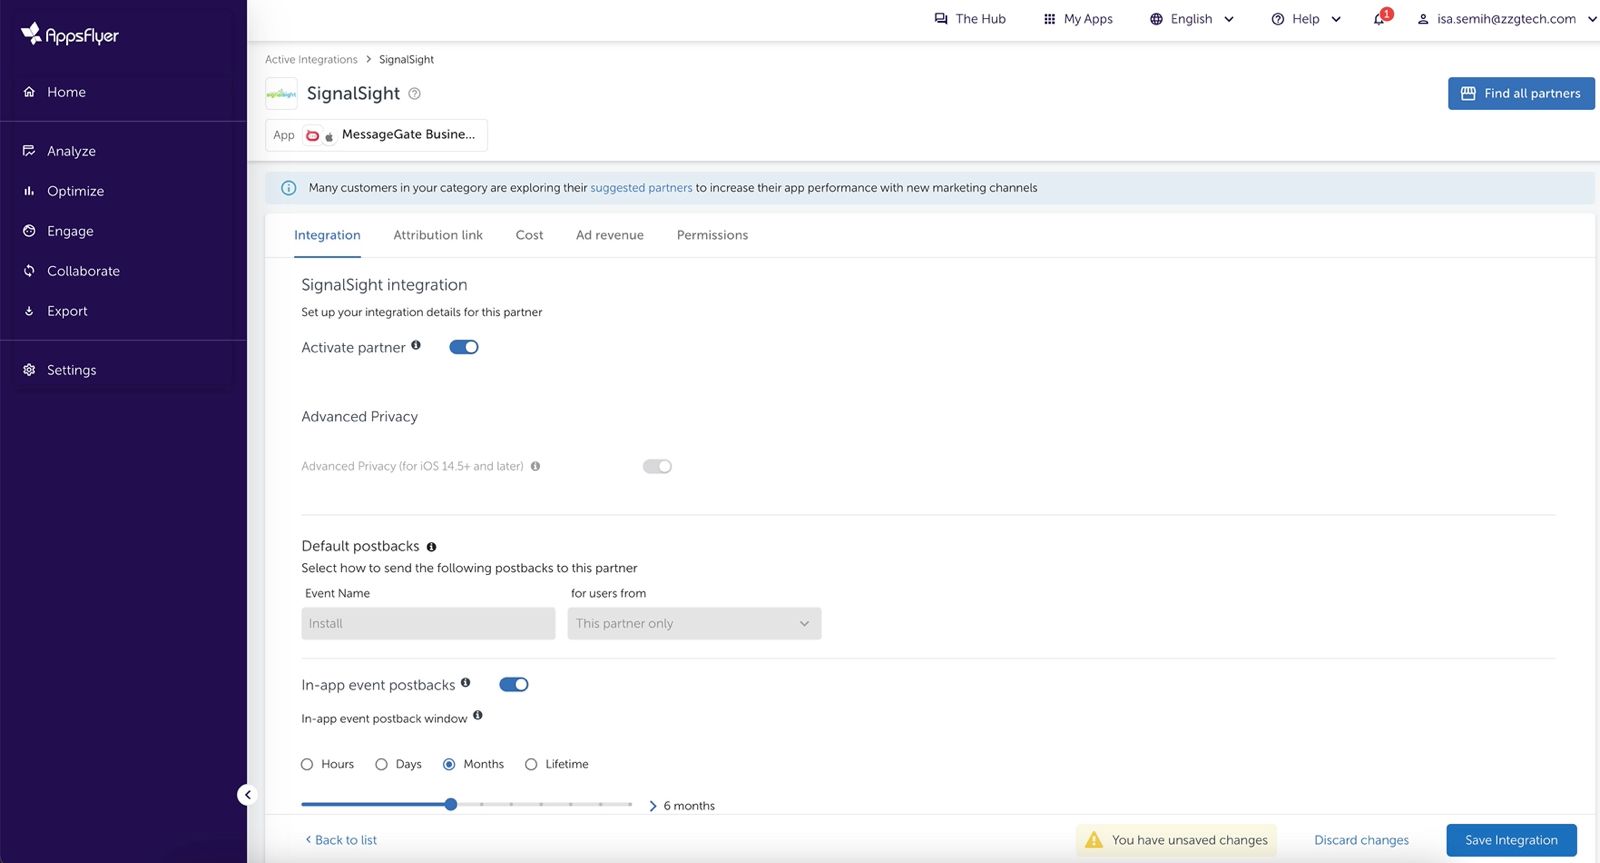
Set Up In-App Event Postbacks
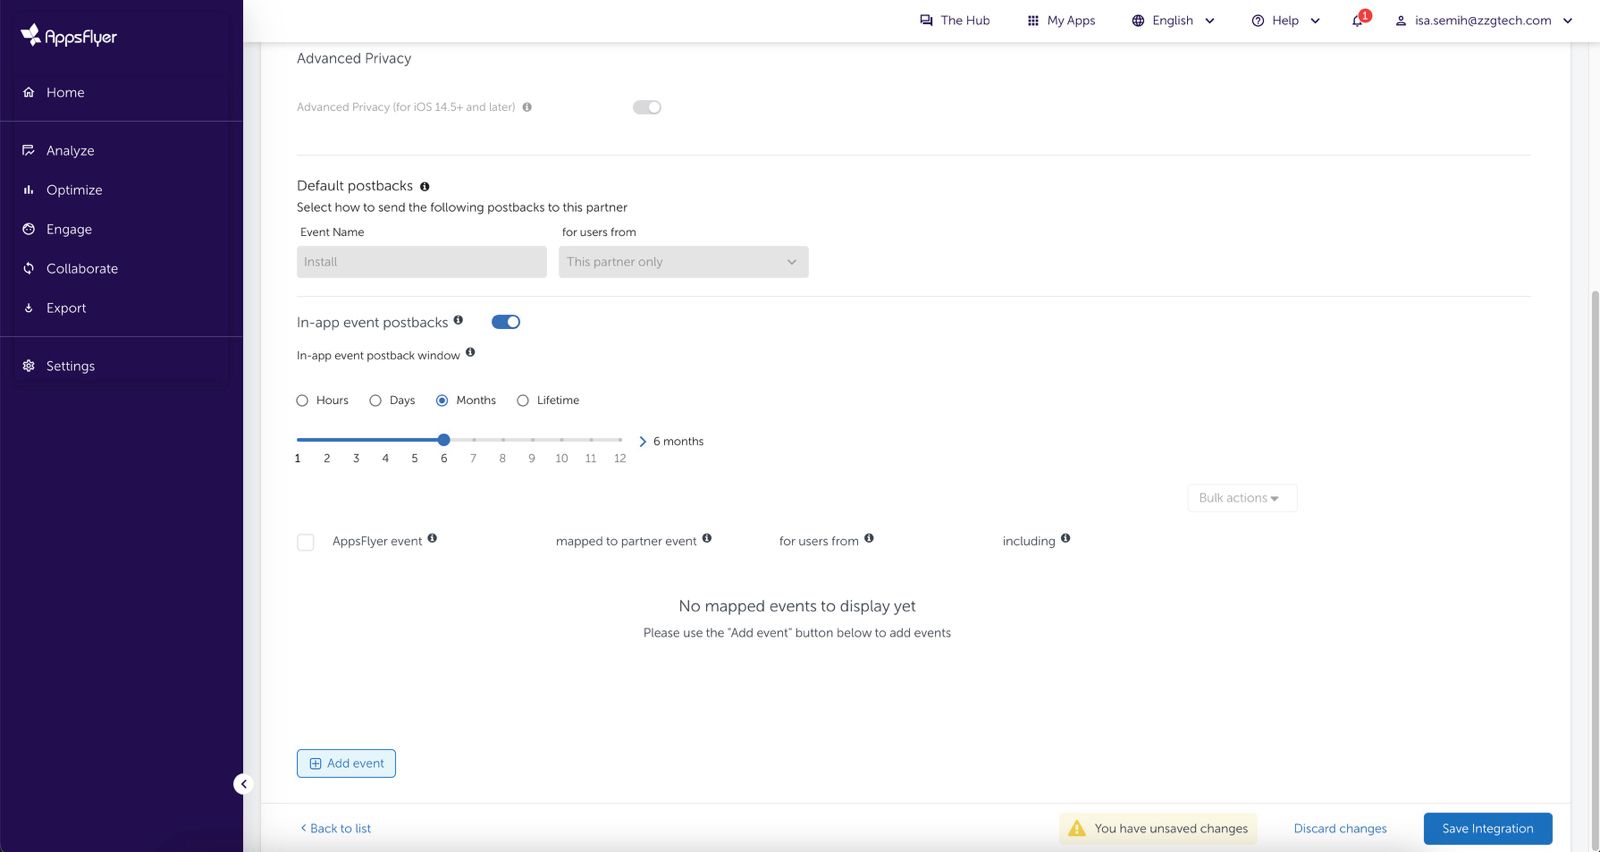
- Enable In-App Event Postbacks.
- Set the Postback Window to a suitable period (e.g., 6 months).
- Add the in-app events you want to forward:
- Pick an AppsFlyer event such as
af_subscribeoraf_purchase. - Map it to the corresponding partner event.
- Choose whether to include value/revenue.
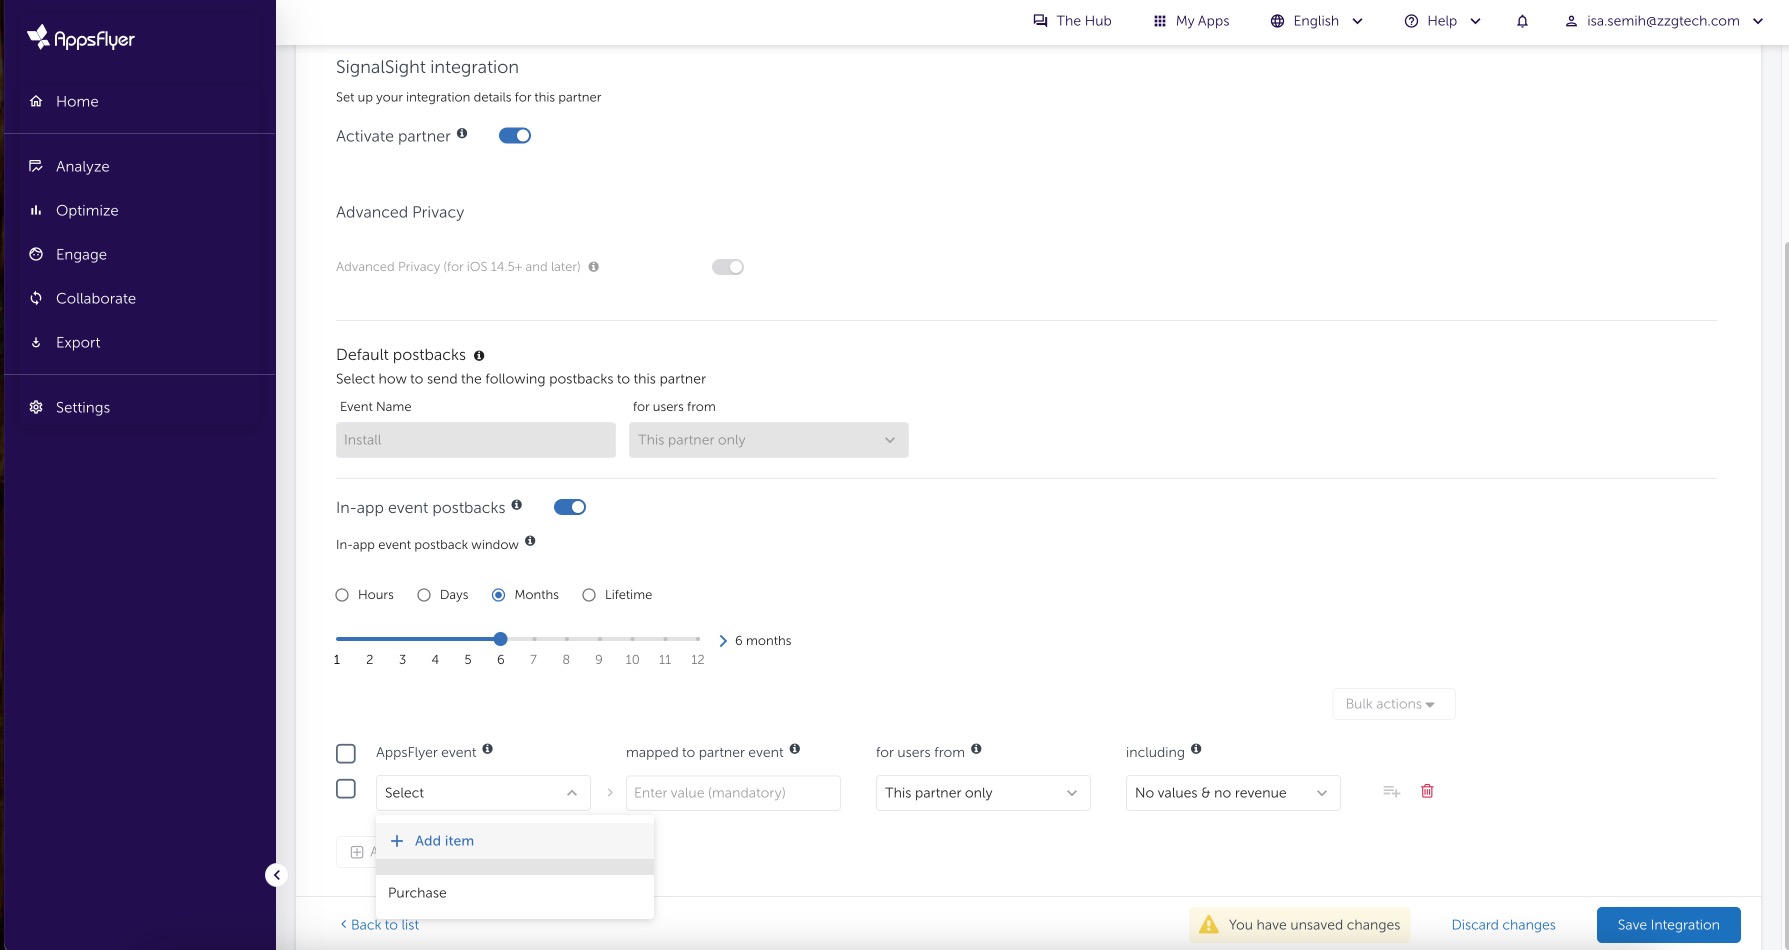
- Pick an AppsFlyer event such as
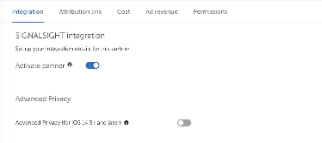
Advanced Privacy
Turn Advanced Privacy off for this integration.
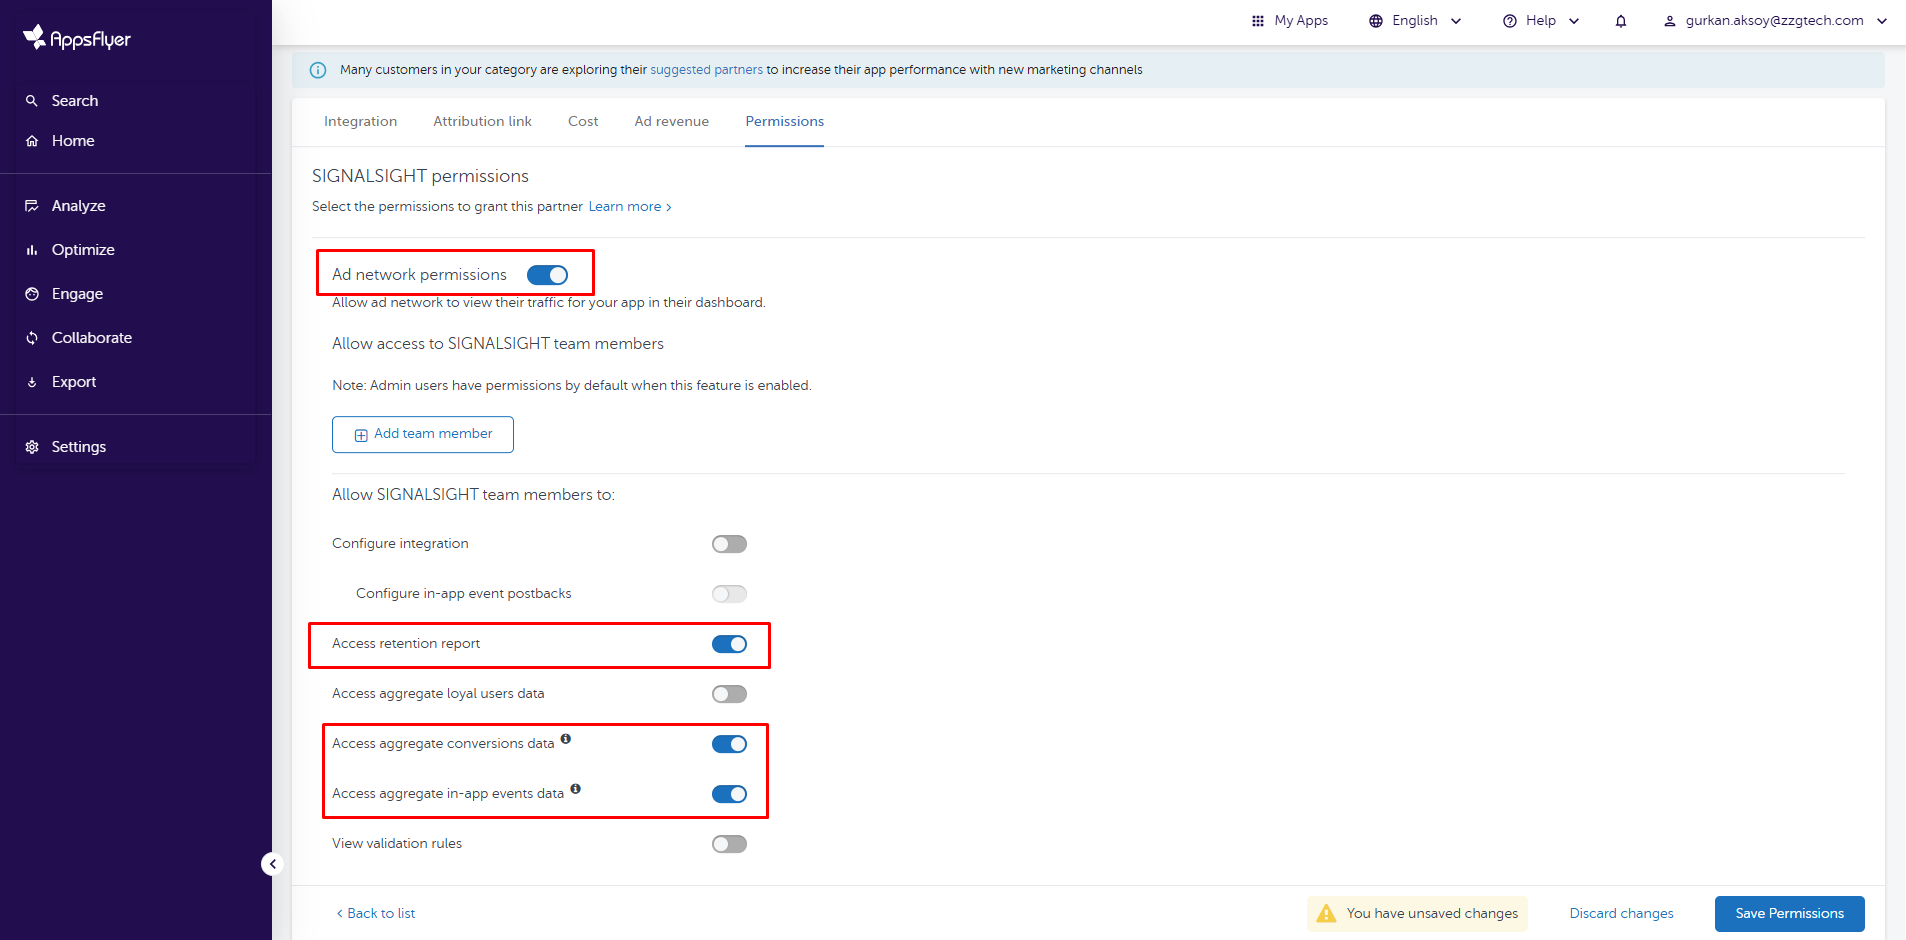
Under the Permissions tab, enable the access permissions listed in the interface. This is required for data to flow correctly between SignalSight and AppsFlyer.
Save the integration settings once complete.
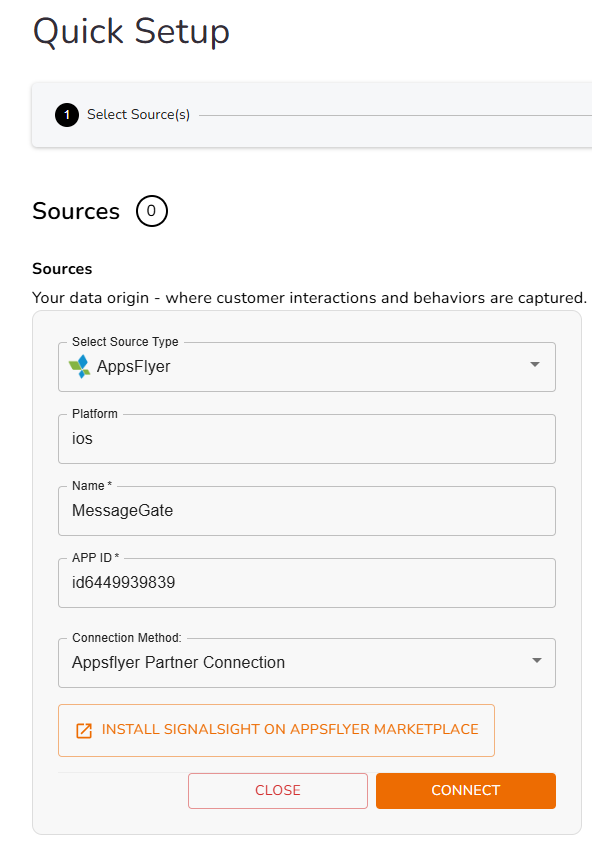
Return to SignalSight and click Connect. On the mapping screen, proceed with the default mapping.
- Destination:
- Select Meta Conversion API.
- Enter the Meta Pixel ID and Access Token.
- Enable browser-level tracking if needed, then save.
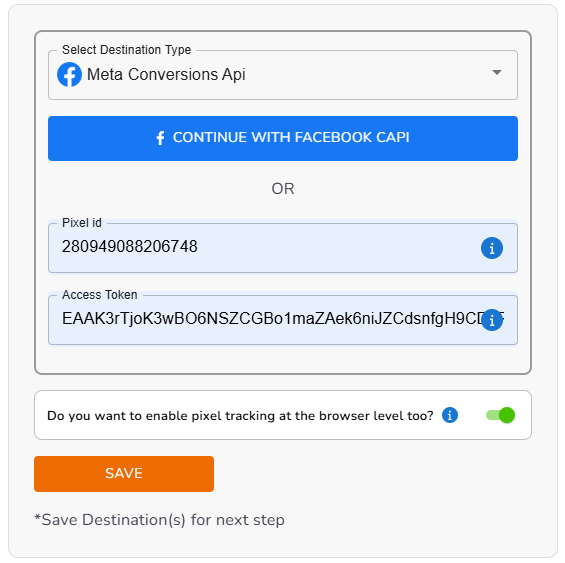
- Name the tracker (e.g., "MessageGate Web2App") and click Complete.
Once created, the tracker forwards install and in-app events to Meta automatically.
Event Tracking Use Cases
- Install Attribution: Tracks and attributes app installs from SignalSight landing pages.
- In-App Events: Forwards subscriptions, purchases, and other events to Meta via the Conversion API.
Landing Page Creation
Open Landing Page from the left menu. If you don't have an active subscription, enable it first, then go to Landing Pages and click Create Landing Page.
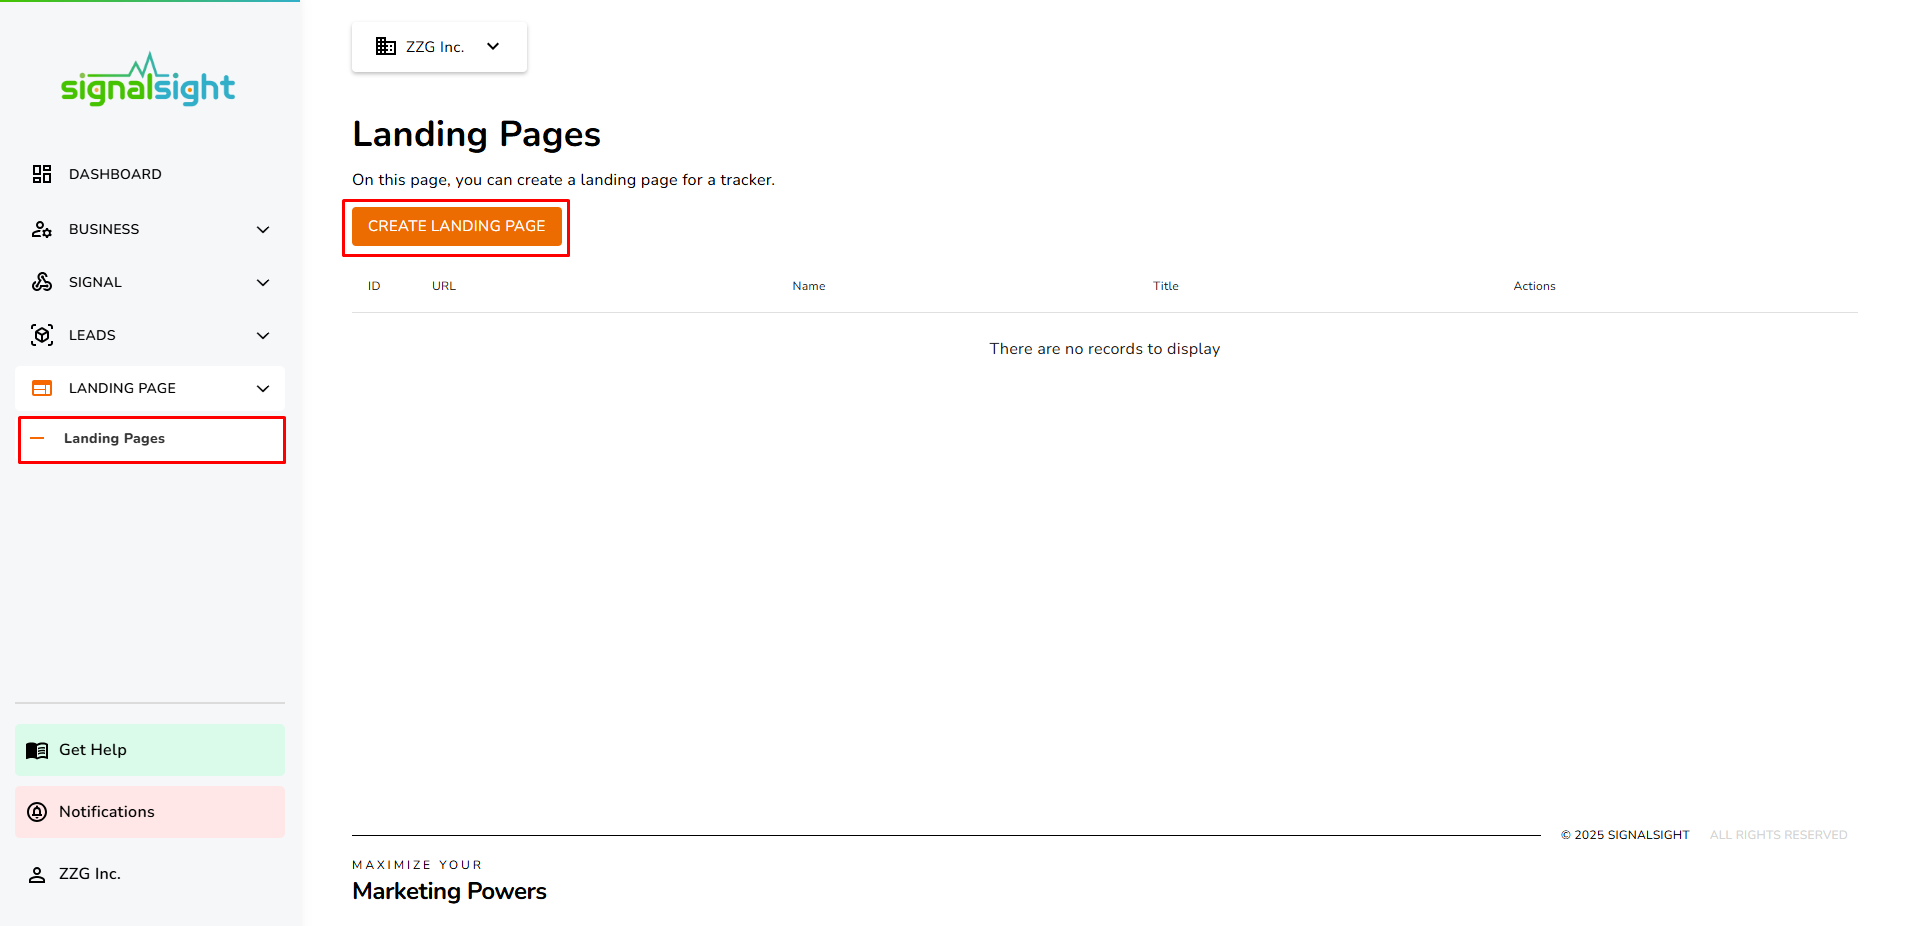
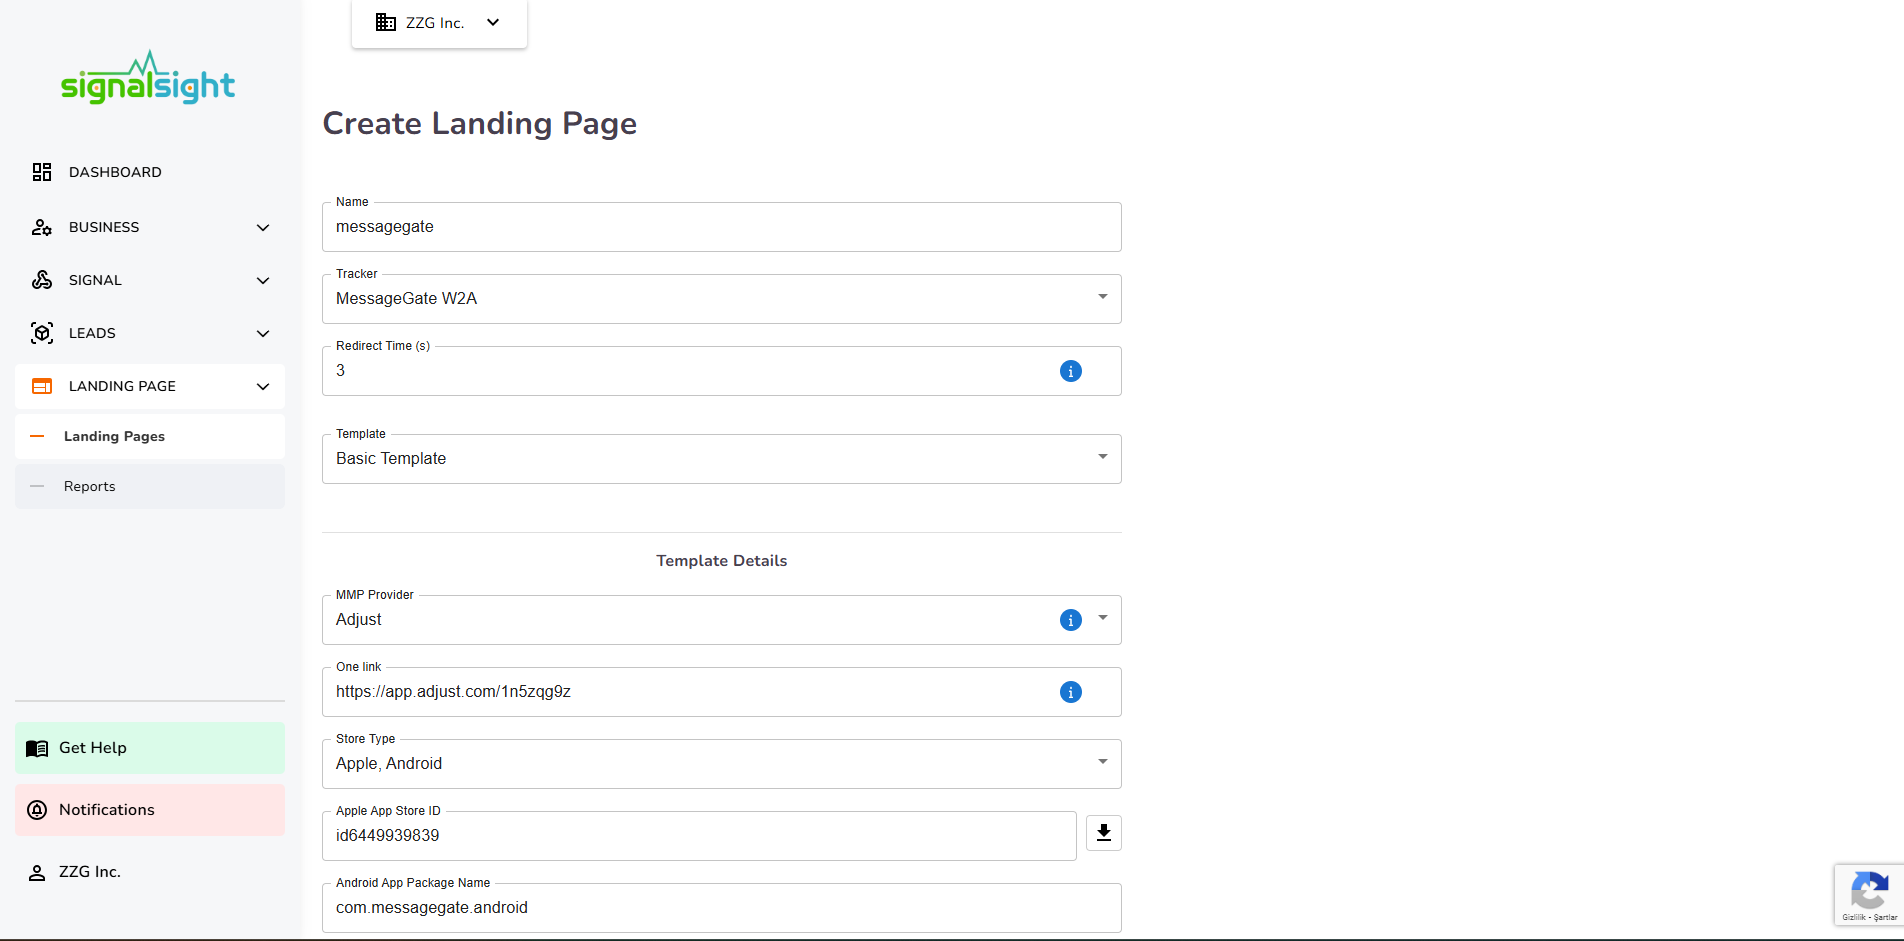
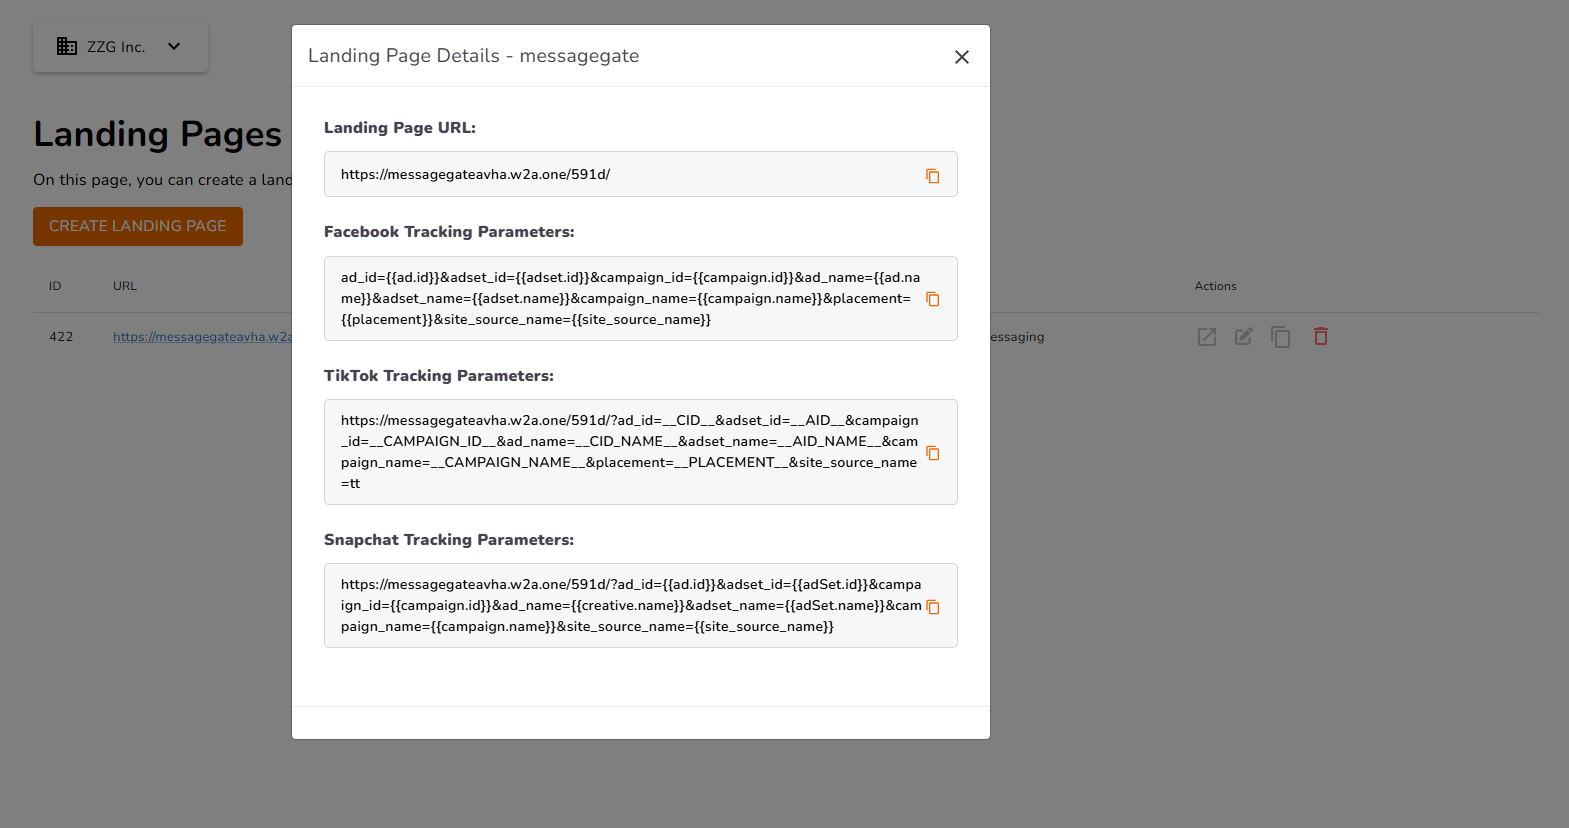
Choose the logo, description, and theme, then click Create. Your page is ready in seconds. The confirmation modal shows the landing page URL and channel-specific tracking URLs for Facebook and TikTok.
Event Mapping
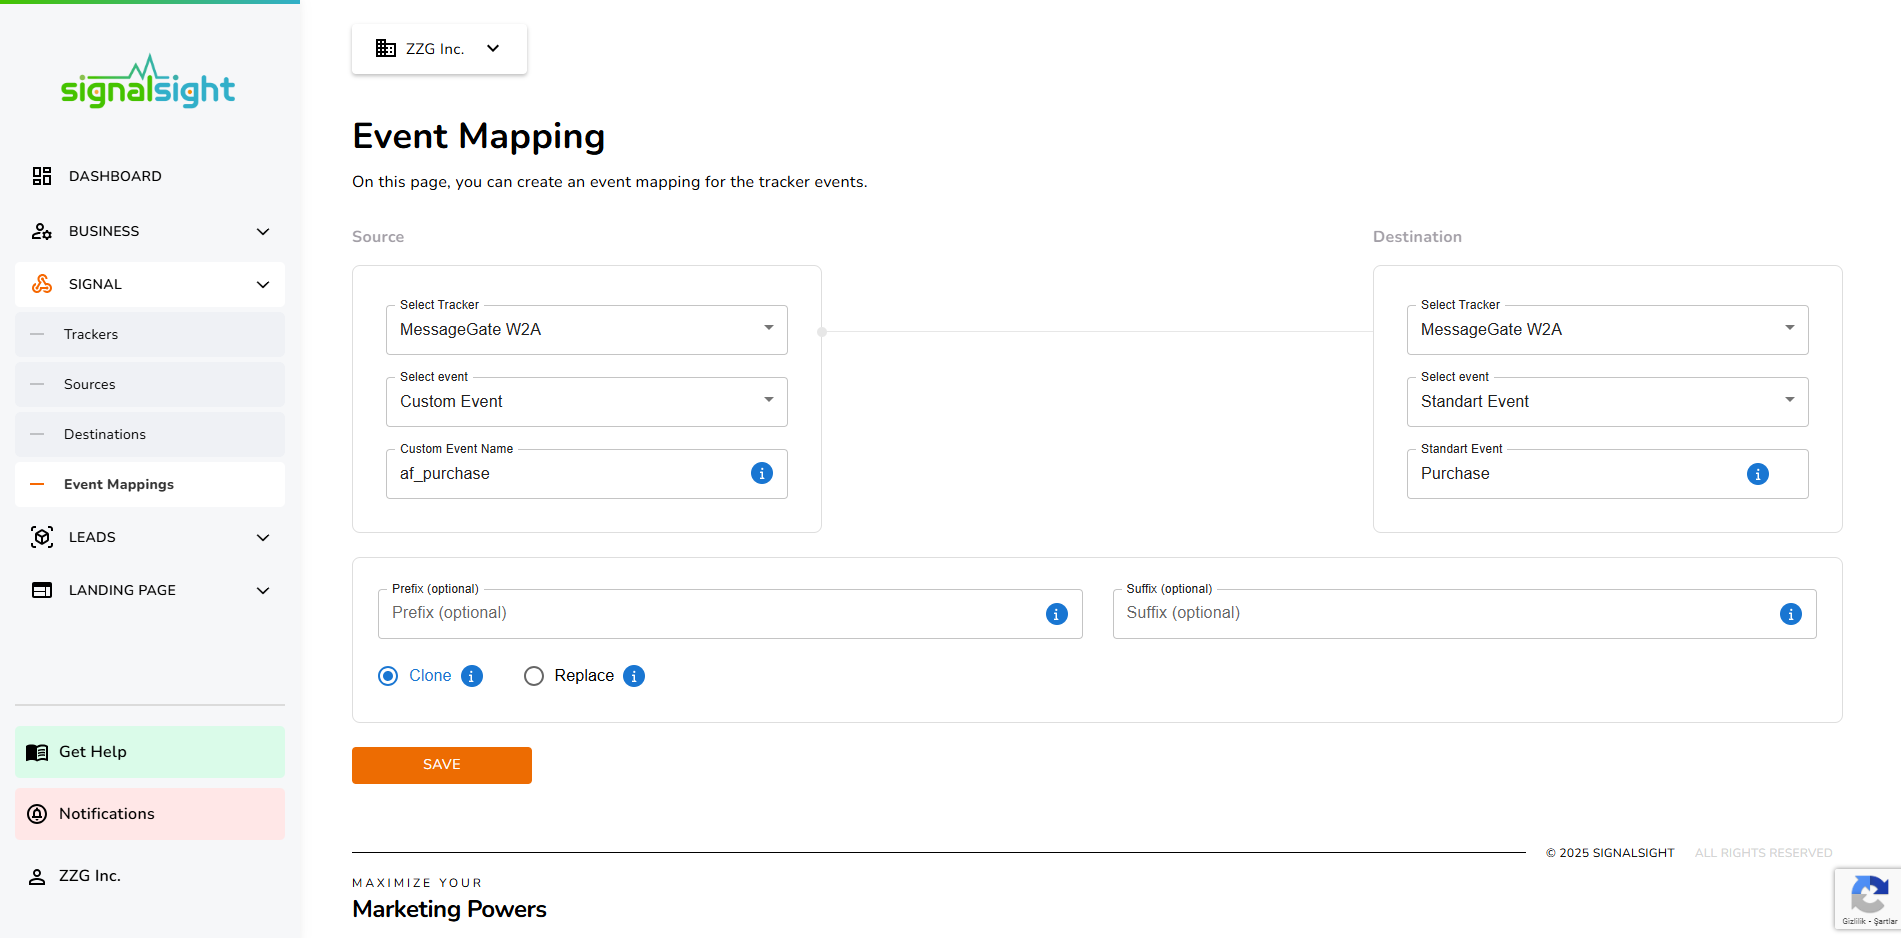
Go to Event Mappings under the Signal menu, then:
- Select the tracker you created from the Source dropdown.
- Choose Custom Event and enter the event name exactly as defined in AppsFlyer (e.g.,
af_purchase). - Select the same tracker from the Destination dropdown and map it to the standard event.
On first setup, create custom events using the exact names from AppsFlyer, then map them to the corresponding standard events. Example below:
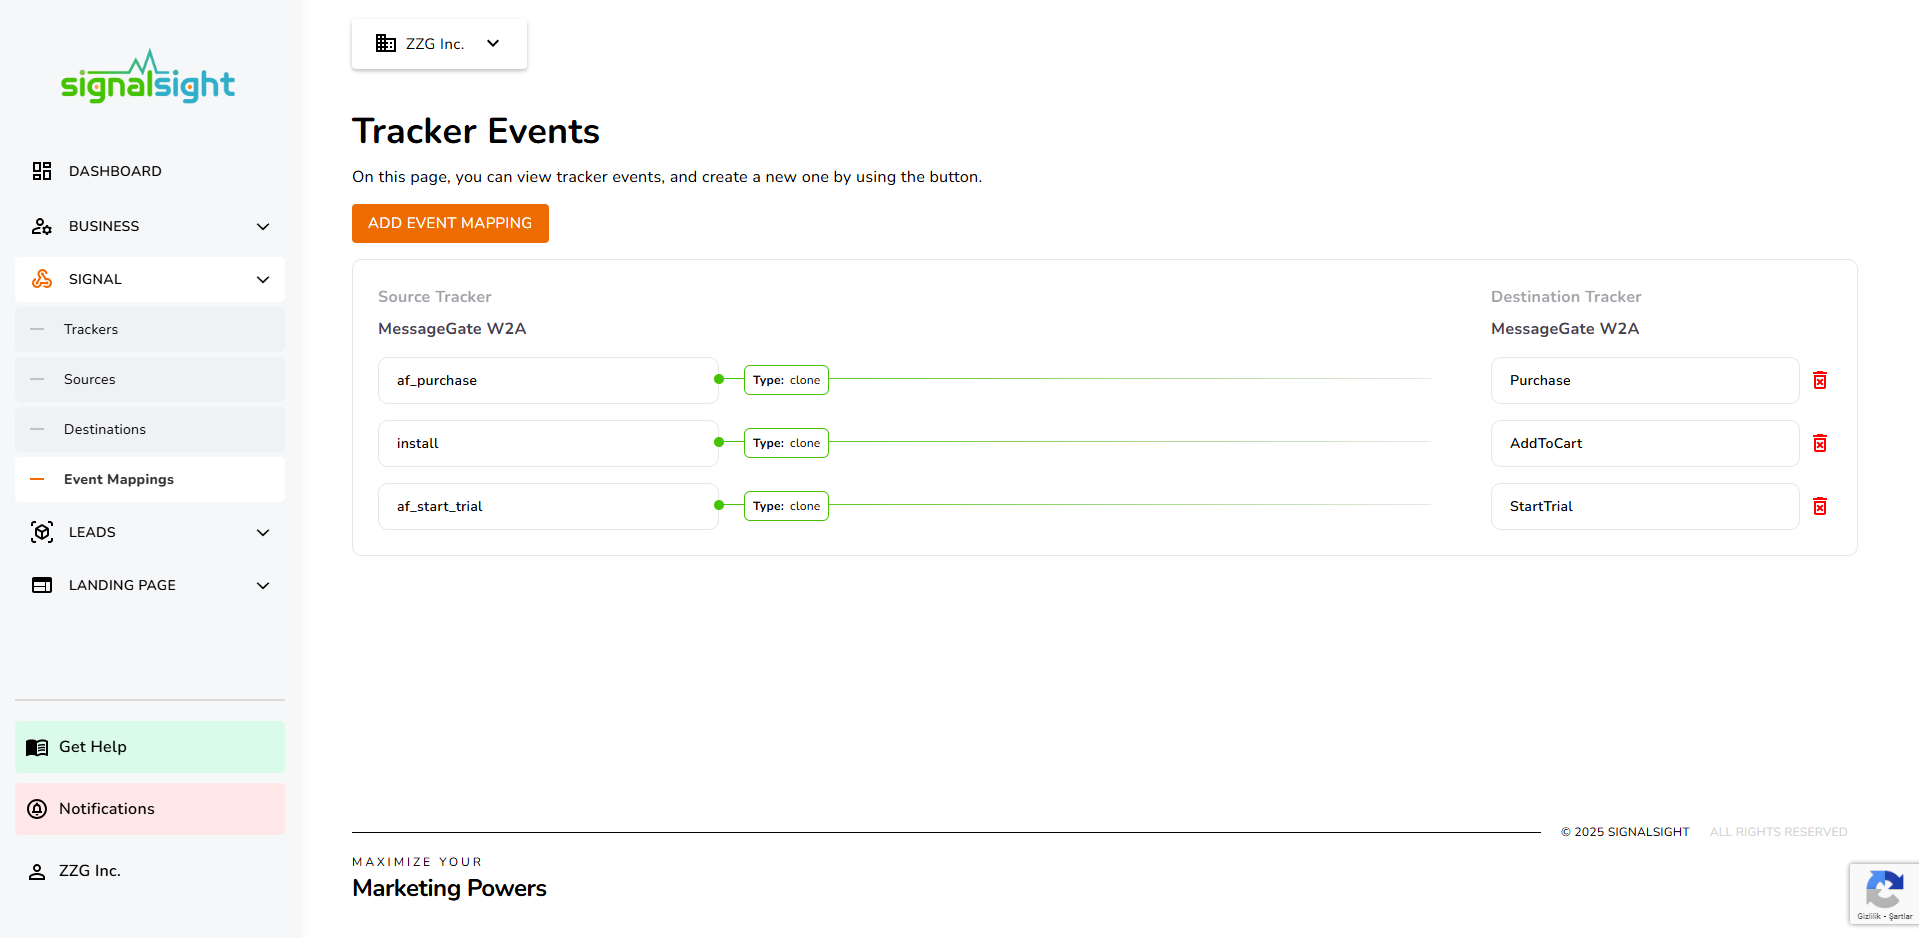
The final mapping structure will look something like this. Customize it to match your strategy.
Beyond af_purchase
Don't limit yourself to af_purchase. Events with similar intent — such as renewal — can also map to the Purchase standard event. Make sure any additional events are included in the SignalSight app configuration within AppsFlyer.
Creating an Advertising Campaign
With setup complete, you're ready to launch. Run A/B tests to find what works — but always double-check that landing page attribution parameters are entered correctly in your campaign settings.
Creating a Web2App Campaign for Meta
Optimize for the standard events you mapped as a Web Campaign in Event Mapping. For example, if you mapped AddToCart and Purchase, use those as your conversion events.
To create a Purchase conversion campaign on Meta:
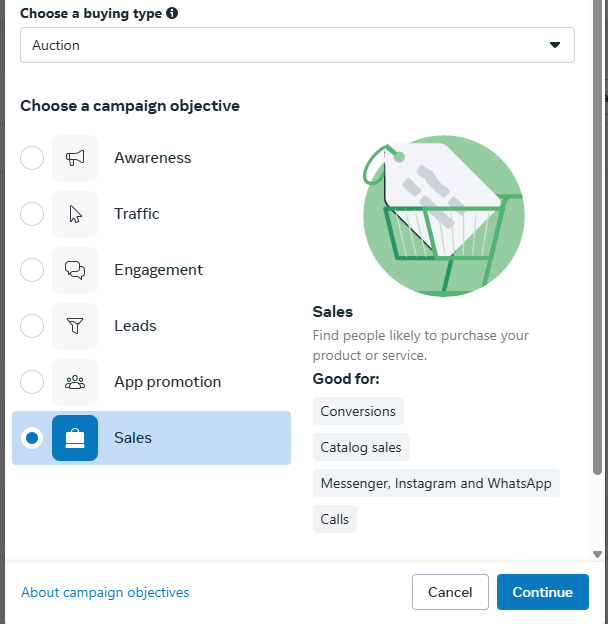
- Select the Sales Objective
- In Meta Ads Manager, click Create and choose the Sales objective.
- This lets Meta optimize for purchases that occur after users land on your Web2App page.
- Set the Conversion Location
- Under Conversion Location, choose Website as the destination.
- Meta will optimize for conversions on your landing page before users reach the app store.
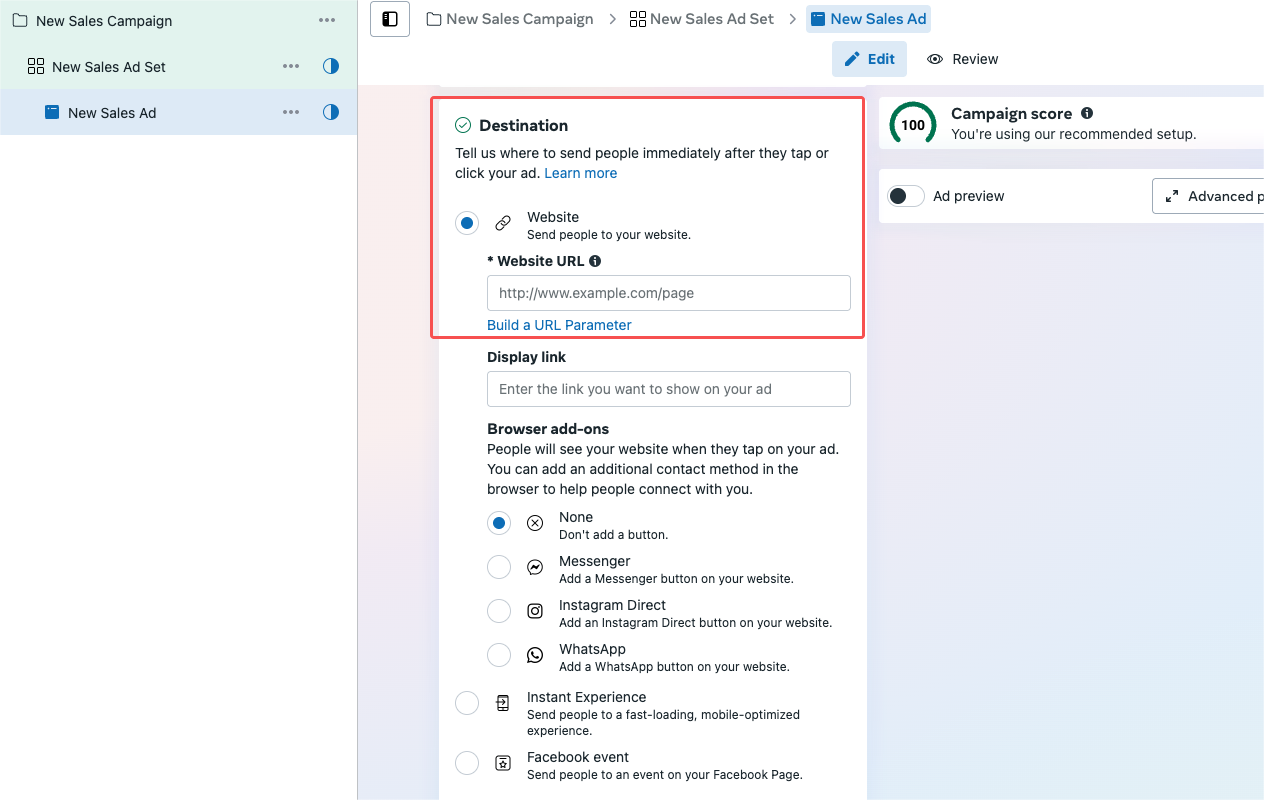
- Enter the Website URL
Paste your Web2App landing page URL in the Website URL field.
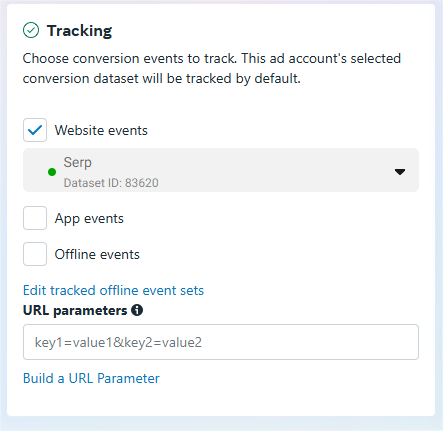
- Tracking Section
In Tracking, confirm the correct Pixel is selected.
- Optimization & Delivery
Choose your conversion event (e.g., AddToCart, Purchase) under Optimization & Delivery.
Creating a Web2App Campaign for TikTok
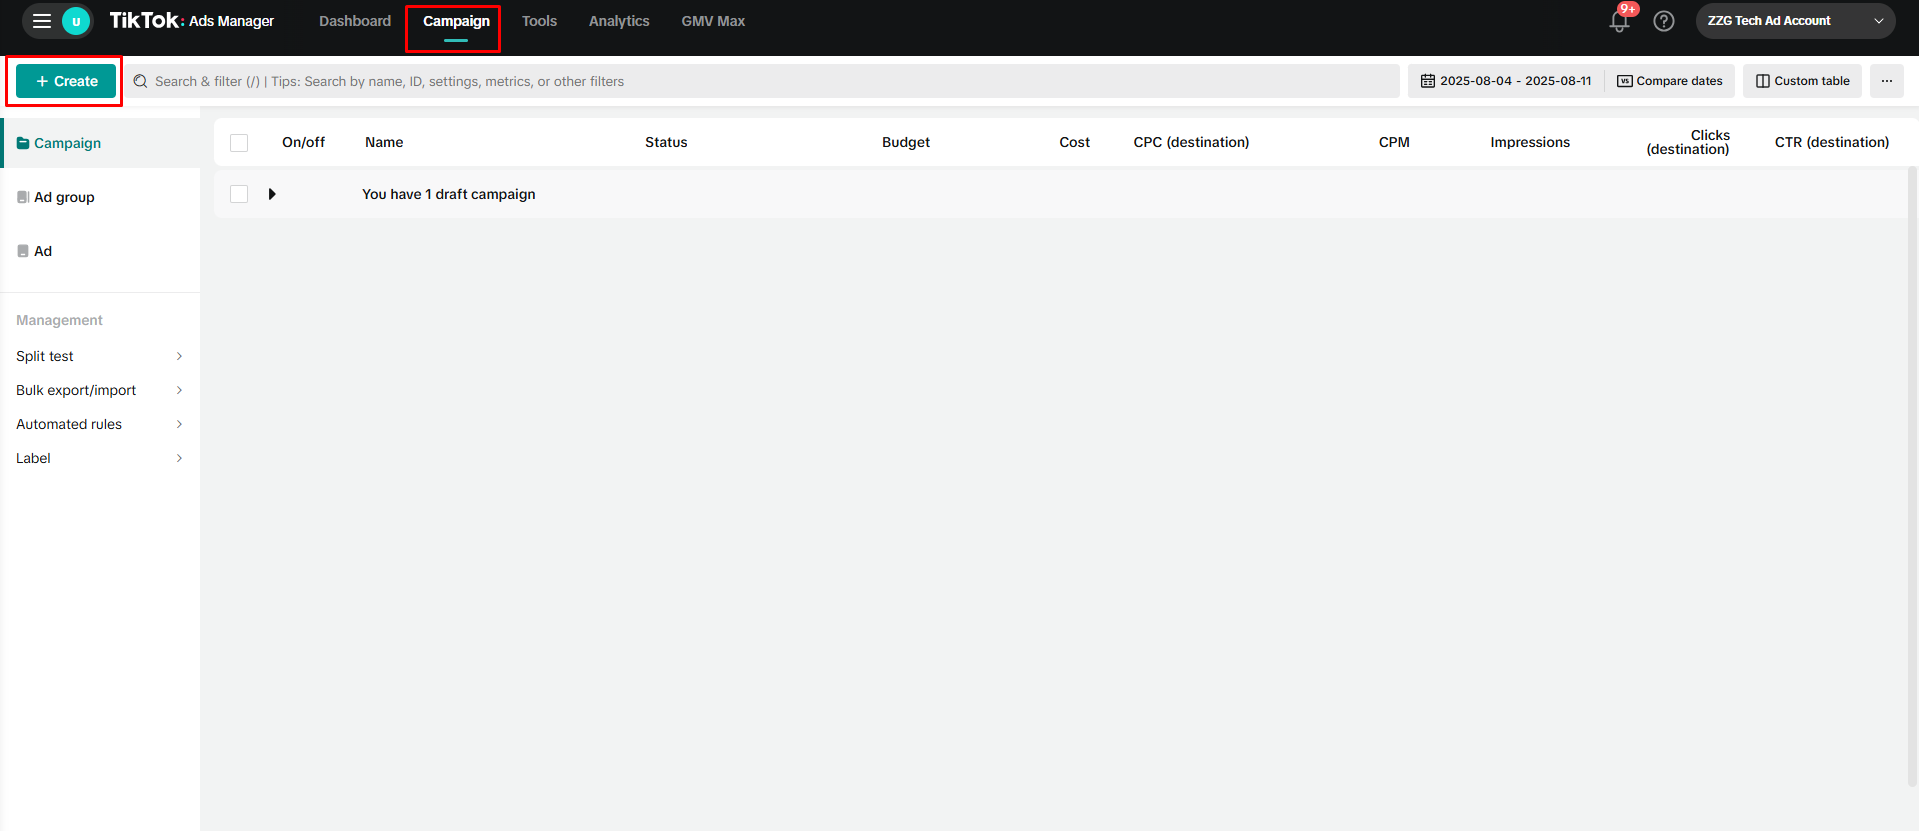
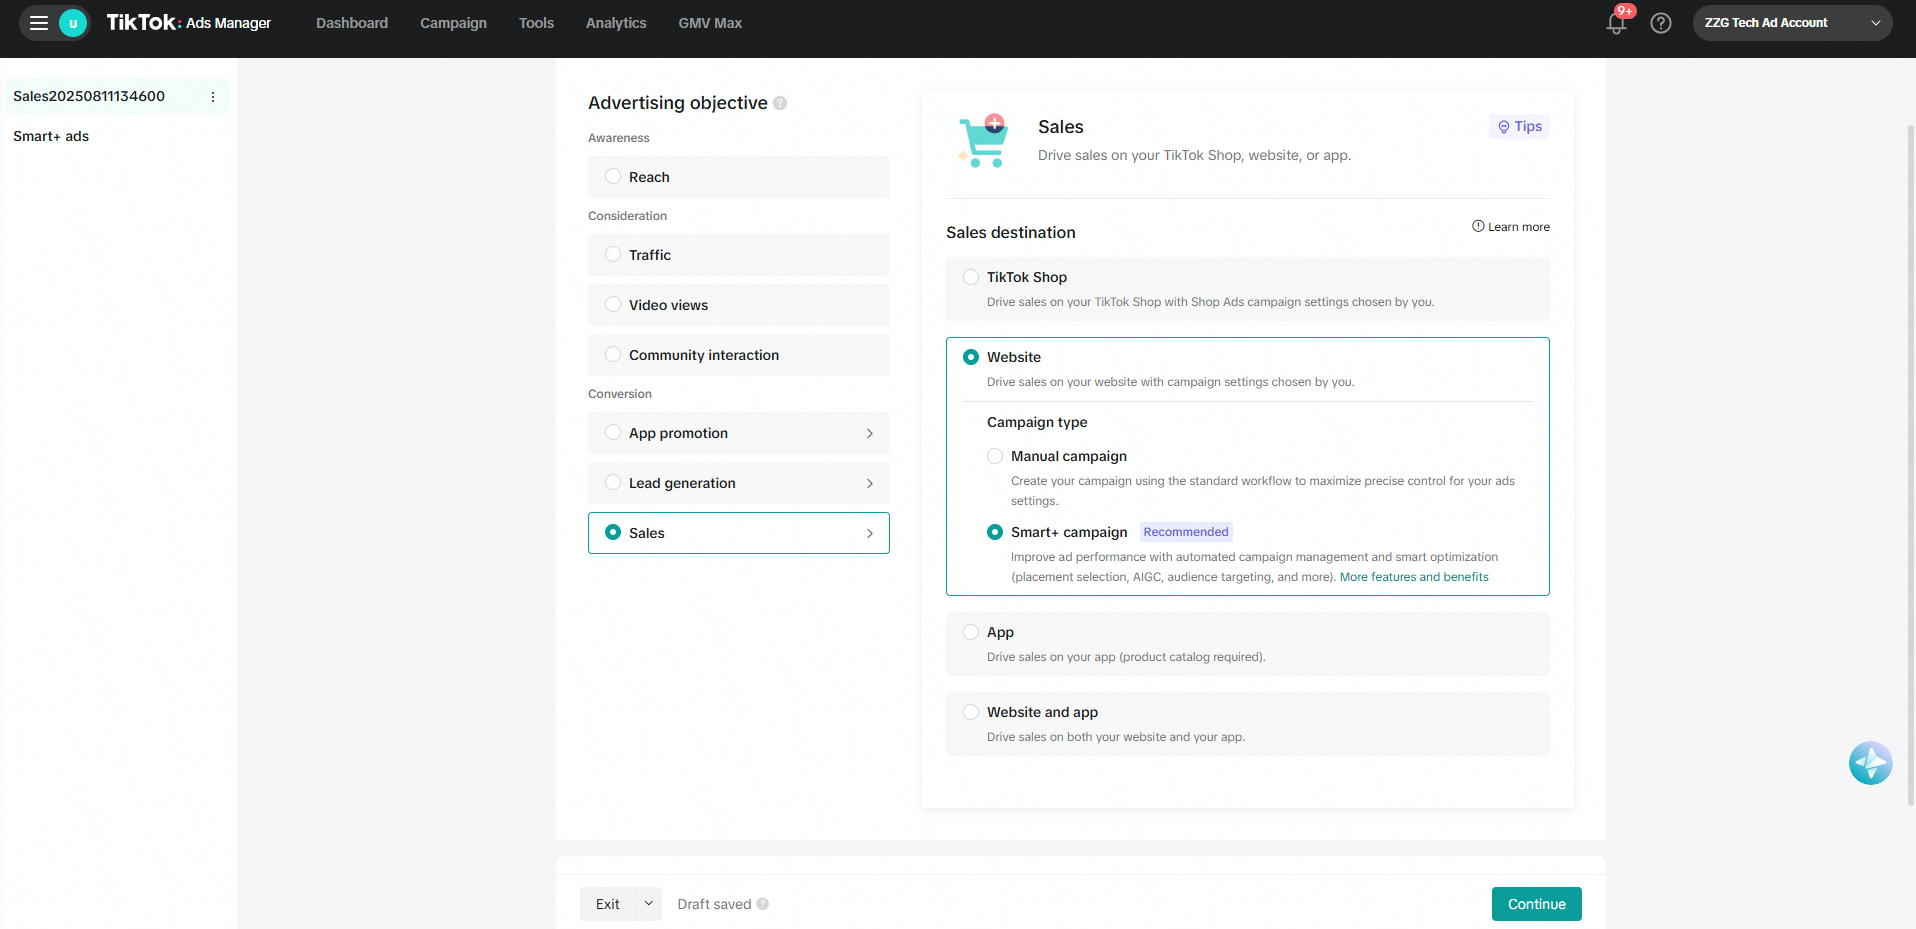
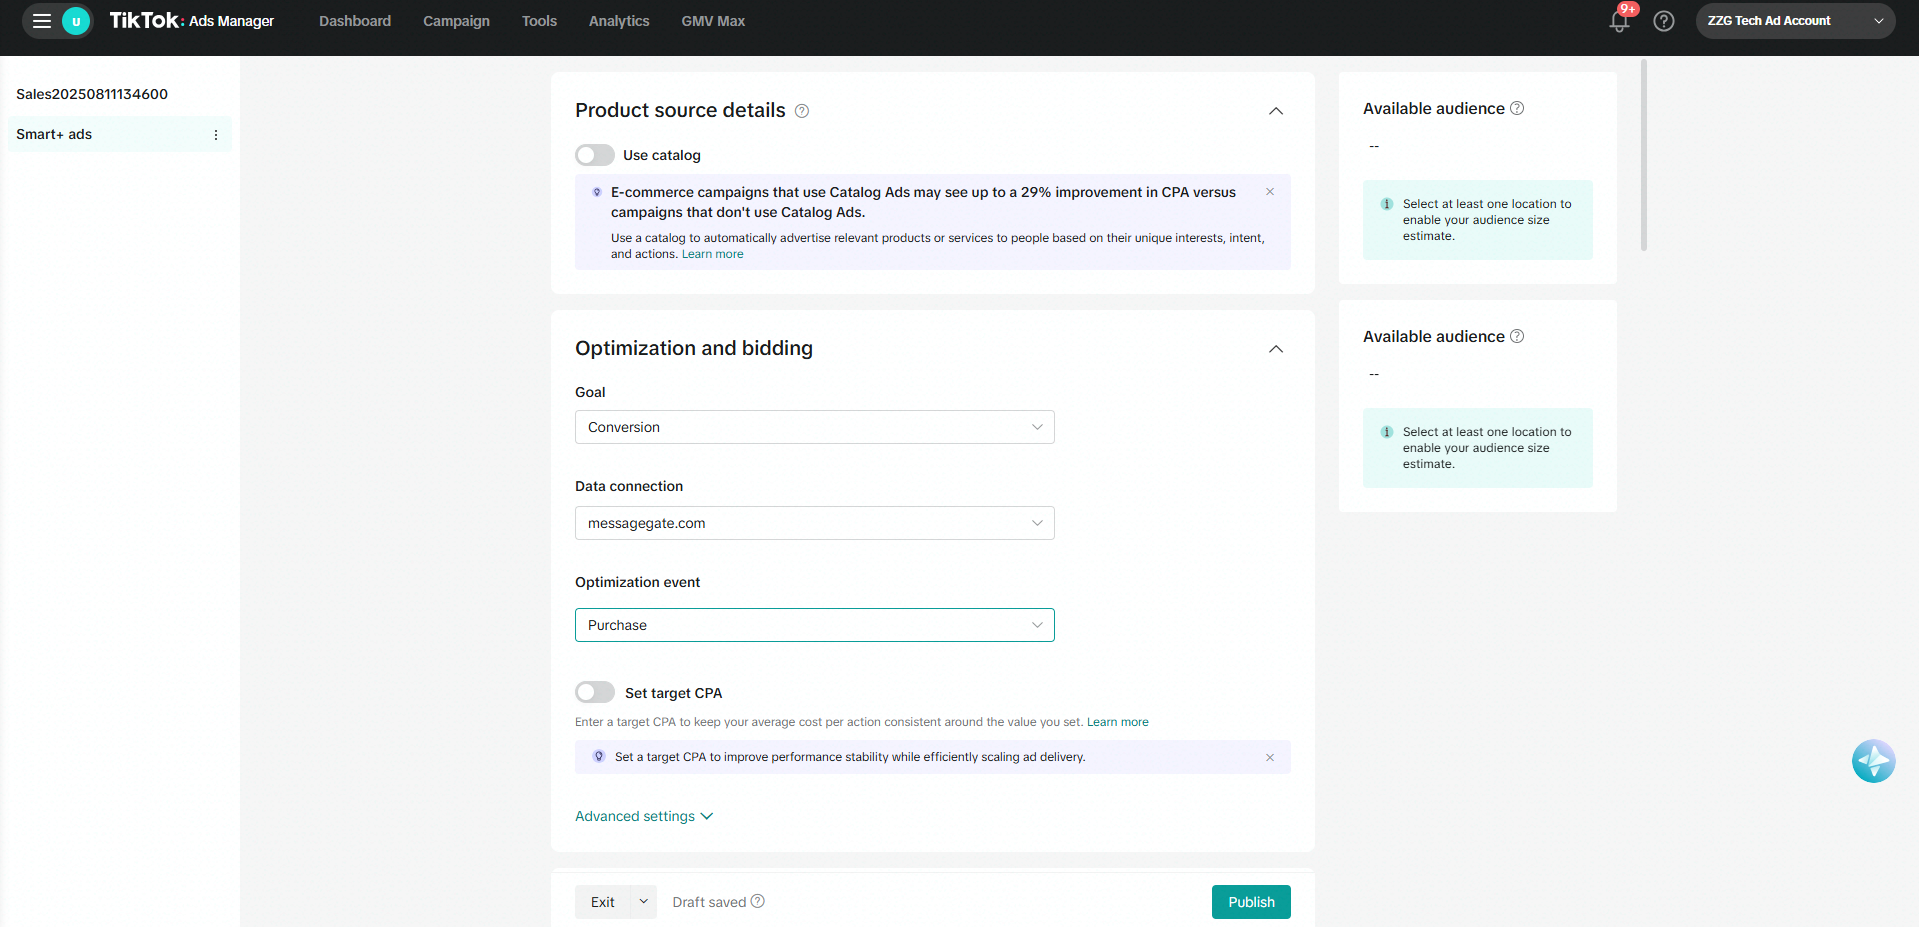
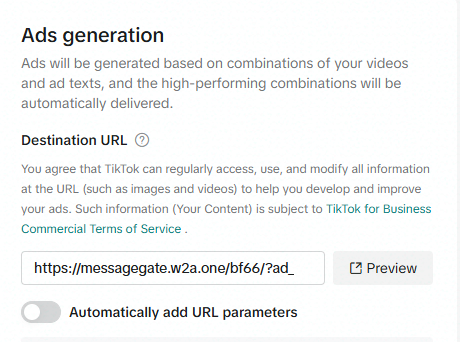
TikTok doesn't use separate tracking parameters. Under Destination, paste the URL from the TikTok Tracking Parameters section shown when your landing page was created (or via the landing page edit button) into the Destination URL field.
Frequently Asked Questions
Do I need custom scripts for the integration?
No. SignalSight handles event conversion and forwarding automatically.
What data does SignalSight forward to Meta?
Install and in-app event data based on your AppsFlyer postback configuration.
How can I verify if Meta is receiving the events?
Open Meta Events Manager under your Pixel and monitor incoming events.
How do I know users from the landing page actually installed the app?
Installs and in-app actions are tracked through SignalSight's AppsFlyer integration. When a user installs after landing on your page, an Install event is triggered and forwarded to the ad platform. Check Events Manager or SignalSight Reports for the full event flow.