SignalSight's Custom Template layout lets you upload your own HTML, CSS, and JavaScript instead of using a pre-built design. Use it when you need full control over branding, layout, or custom interactions — while still routing events through your tracker and MMP for Web2App attribution.
What Is Custom Template?
Custom Template is a landing page layout option that accepts your own markup in the Page Content step. You design the page exactly as you want it, paste the body content into the editor, and SignalSight handles hosting, tracking, and app store redirects.
Benefits
- Complete design control — build any layout without wizard constraints.
- Brand consistency — match your existing site or campaign creative.
- Custom functionality — add interactions, animations, or integrations you need.
- Campaign flexibility — reuse or adapt templates across different offers.
Step 1: Tracker Creation and Landing Page Setup
A tracker is required before you create a landing page. For Web2App campaigns, set up your MMP web datasets and tracker first, then link that tracker during landing page creation.
Create a Tracker
- Create new web datasets in your MMP (Adjust or AppsFlyer) for use in the landing page.
- Open the Tracker Creation Wizard under Trackers.
- Select your MMP Provider as the source (Adjust or AppsFlyer).
- Add the web datasets as destinations — Meta Conversions API for Meta, TikTok Events API for TikTok.
- Name the tracker and complete the wizard.
- Select this tracker when configuring your landing page.
For full Web2App setup details, see Adjust — Web2App or AppsFlyer — Web2App.
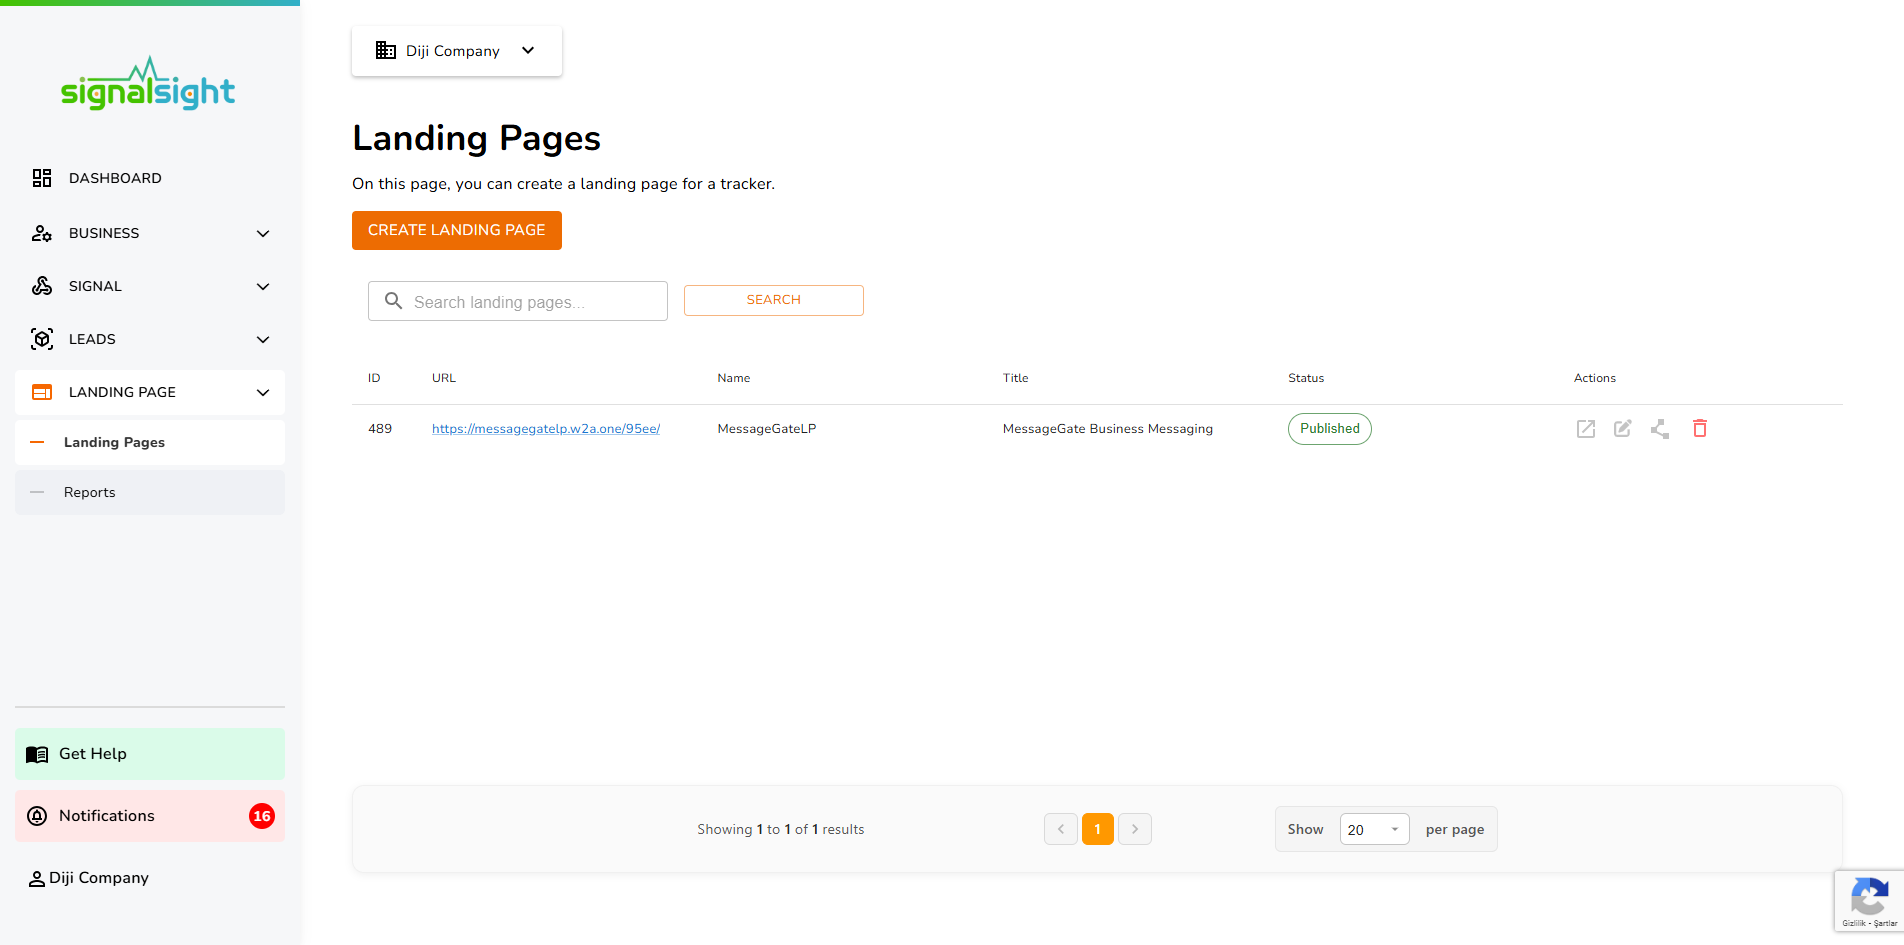
Access Landing Page Creation
- From the tracker dashboard, open the Landing Pages section.
- Click Create Landing Page to start the wizard.
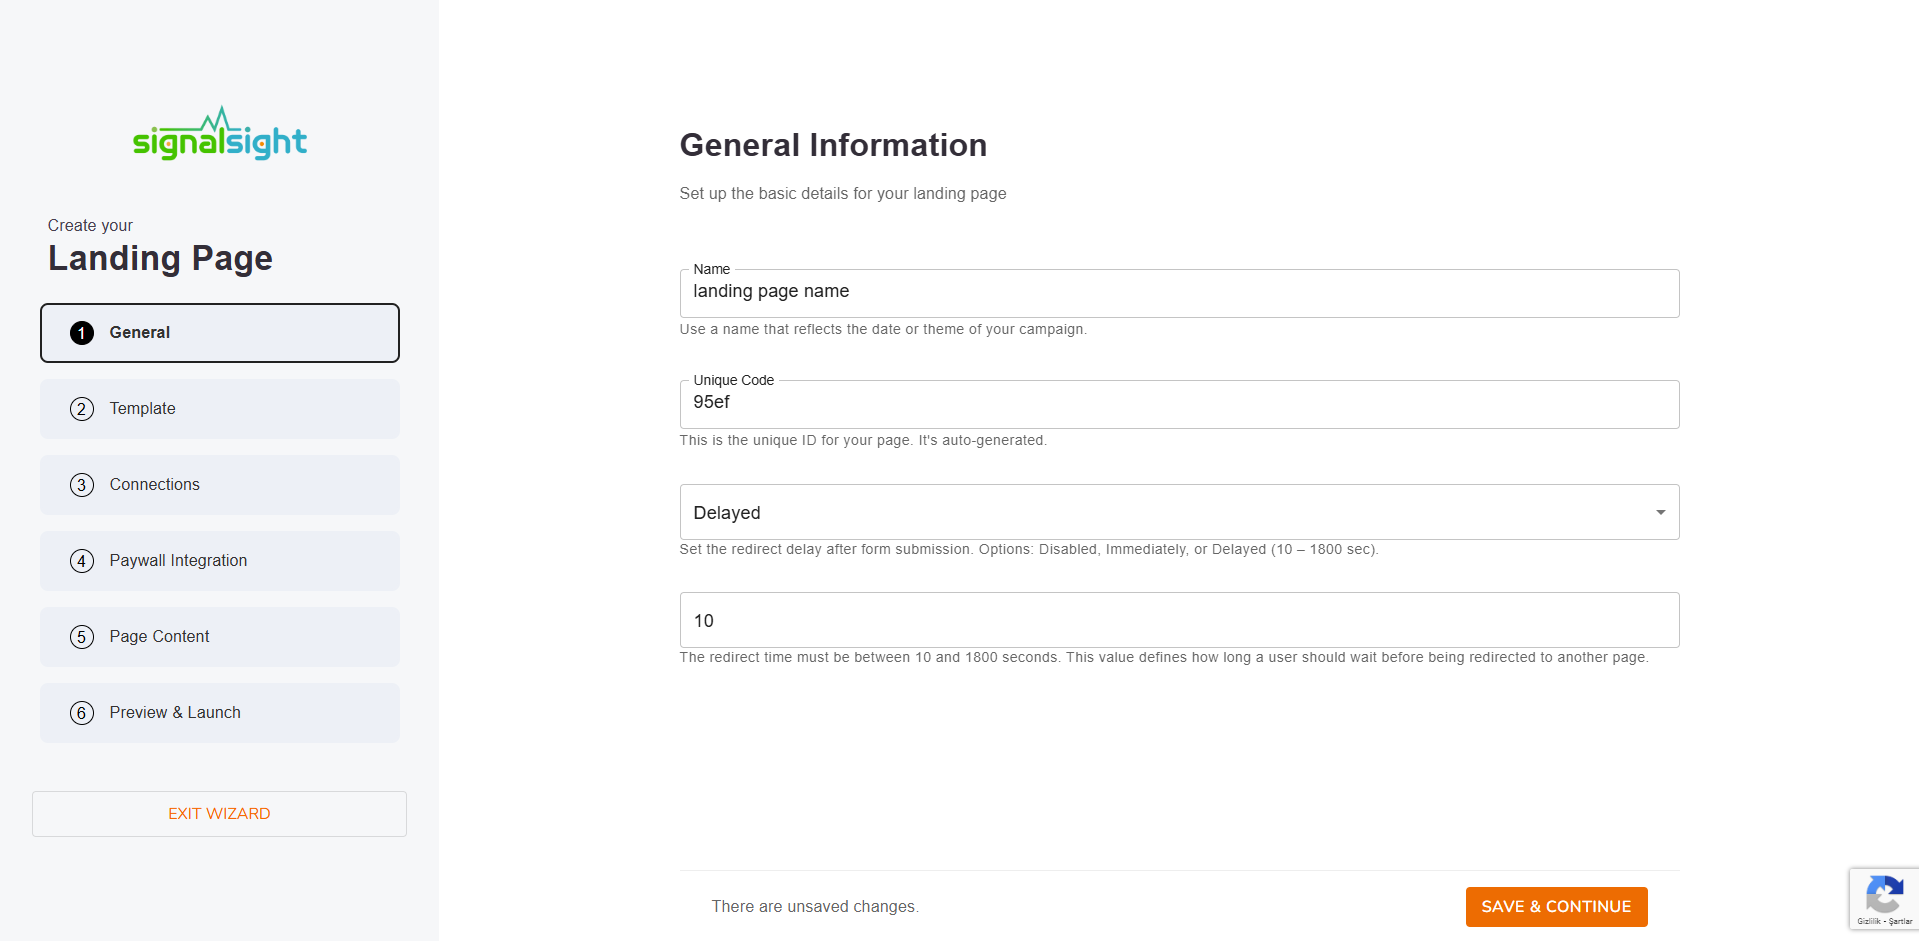
General Information
- Name: A descriptive name for your campaign or theme.
- Unique Code: Auto-generated identifier used in your landing page URL.
- Redirect Delay: Choose Disabled, Immediately, or Delayed (10–1800 seconds) for post-submission redirects.
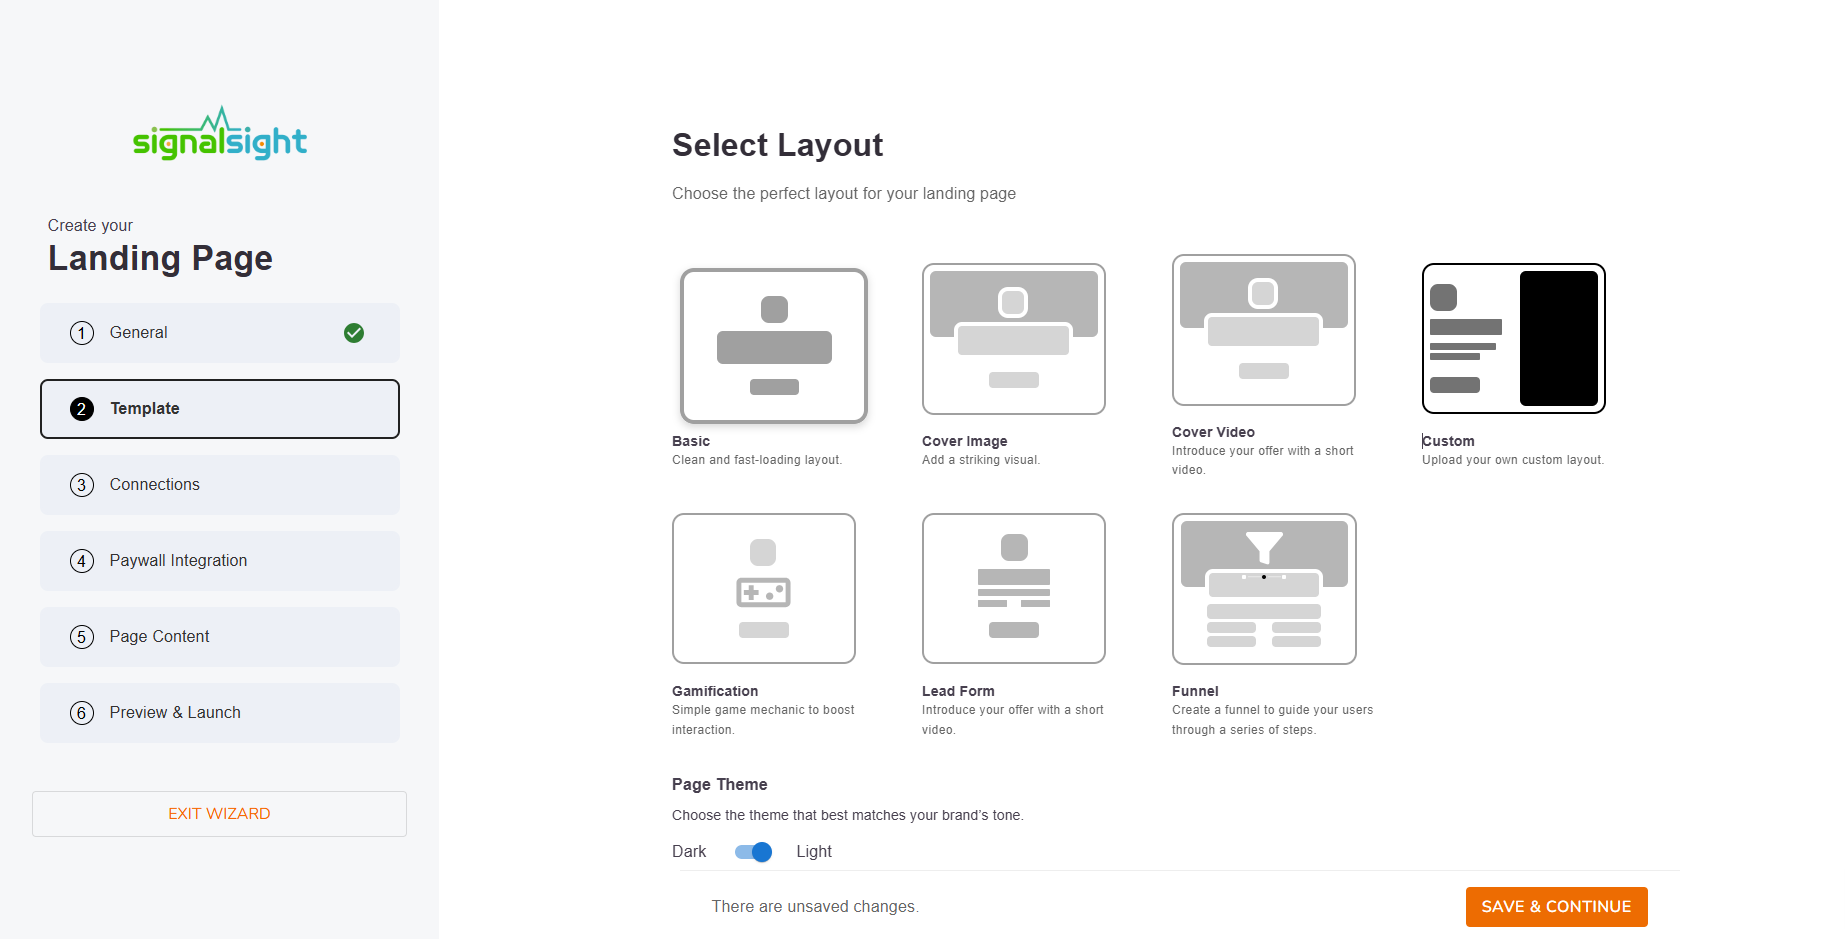
Template Selection
In the layout step, select Custom. This enables the HTML editor in the Page Content step where you paste your template.
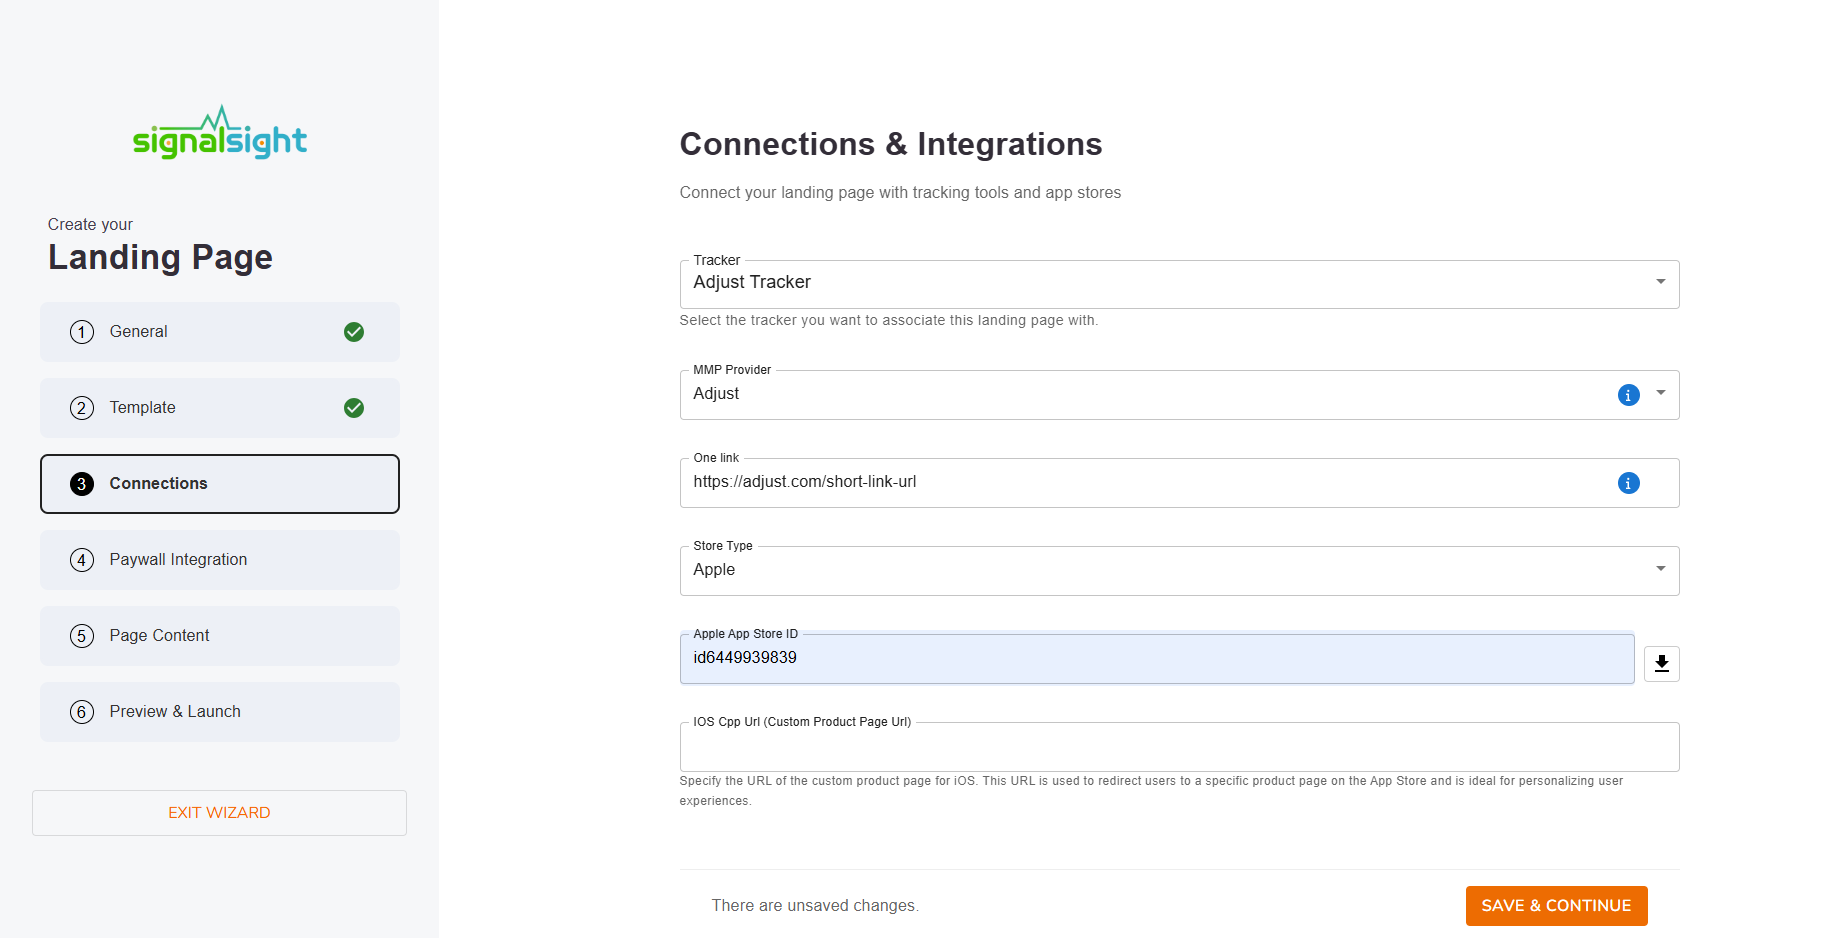
Connections and Integrations
- Tracker: The Adjust or AppsFlyer tracker created above.
- MMP Provider: Adjust or AppsFlyer.
- One Link: Your MMP OneLink URL for store redirections.
- Store Type: Apple App Store, Google Play Store, or both.
- App Store ID: Your app's store identifier.
- Custom Product Page URL: Optional iOS Custom Product Page URL.
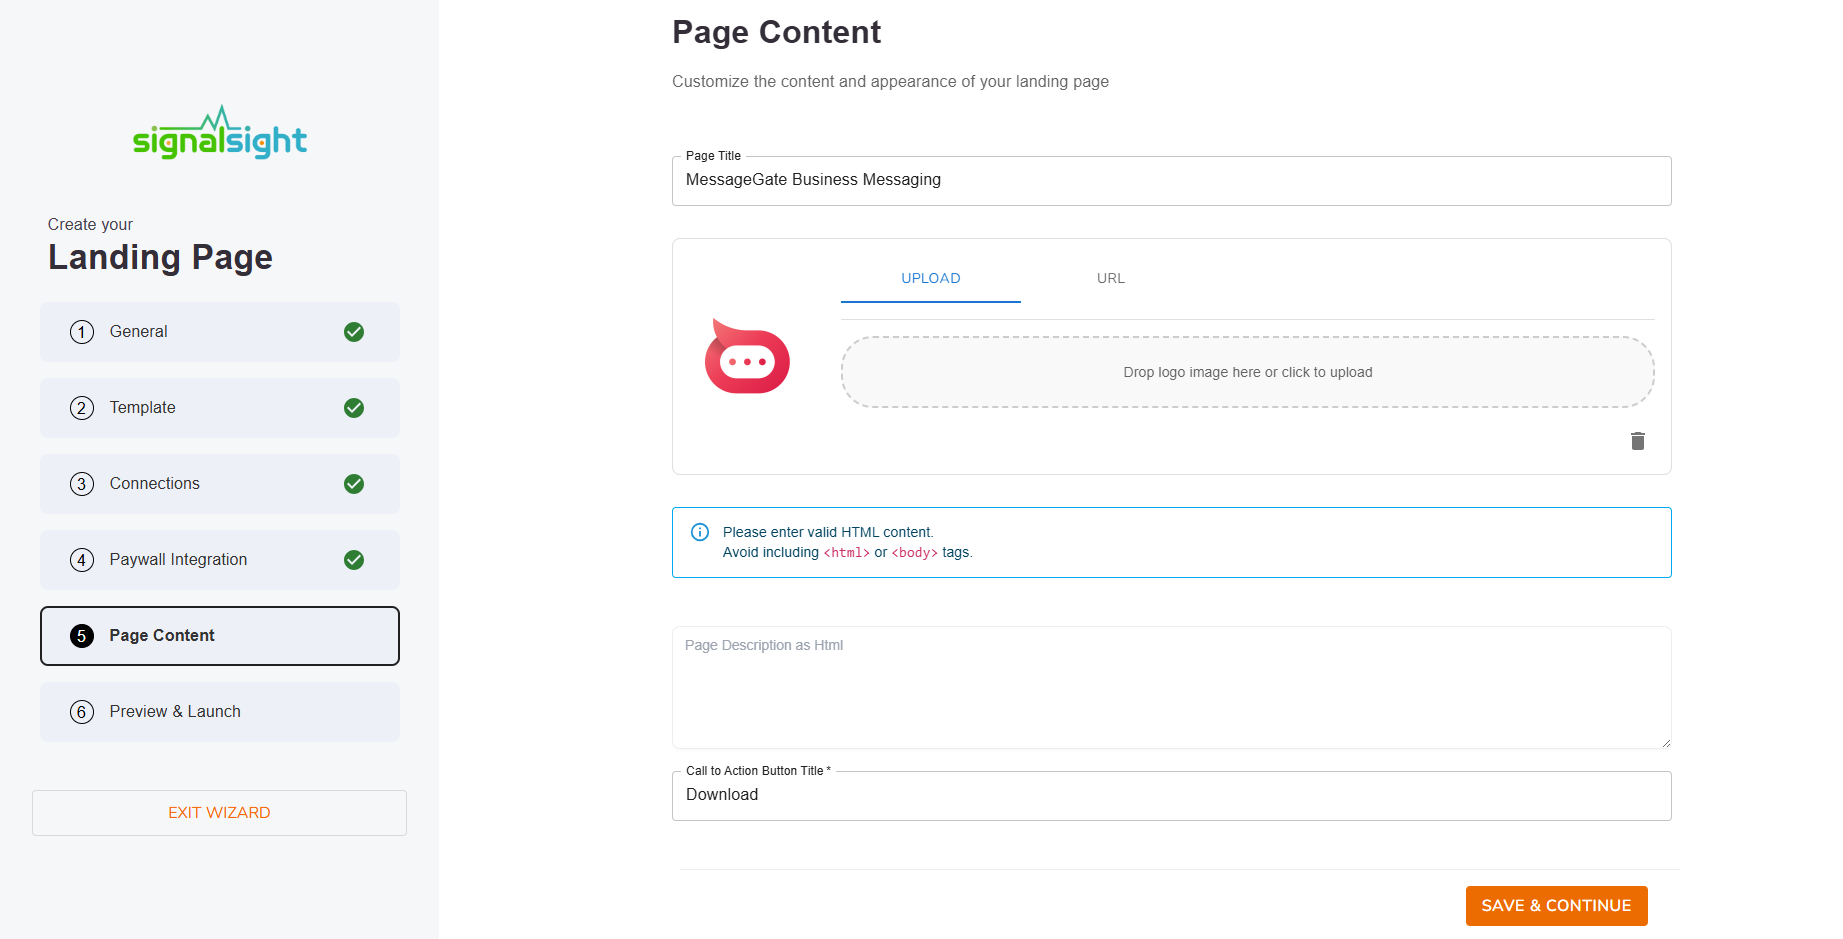
After these steps, continue to Page Content to add your custom HTML. For the standard wizard flow without custom code, see Landing Page Creation.
Step 2: Upload Custom Template
Paste your code into the Page Description as HTML field. Keep these rules in mind:
- Paste only the content that would go inside the
<body>tags — not the full HTML document wrapper. - You can include
<style>blocks and inline JavaScript alongside your HTML. - For app store redirect buttons, use
redirectToAppStore()in the button'sonclickhandler. This built-in method handles store redirection and attribution automatically.
<button onclick="redirectToAppStore()">Download Now</button>Step 3: Customize and Preview
- Review your template in the preview panel.
- Adjust the HTML code if layout or styling needs changes.
- Test interactive elements and buttons before publishing.
- Confirm tracking events fire correctly through your linked tracker.
Step 4: Publish Your Landing Page
- Click Complete (or Publish) to make the page live.
- A unique landing page URL is generated for your campaigns.
- You can edit and update the custom template at any time from the Landing Pages list.
For ad campaign setup after publishing, see Creating an Advertising Campaign in the AppsFlyer Web2App guide.
Best Practices
- Keep it simple — start with clean, well-structured HTML.
- Optimize performance — compress images and minimize asset sizes.
- Mobile-first — test on multiple screen sizes before going live.
- Use redirectToAppStore() — always use the built-in method for store redirect buttons.
- Test thoroughly — verify redirects and tracking in preview before publishing.
Frequently Asked Questions
Do I need a tracker before using Custom Template?
Yes. Link your Adjust or AppsFlyer tracker in the Connections step so landing page events route to your ad platforms and MMP.
Can I paste a full HTML document with <html> and <head> tags?
No. Only paste the content inside <body> — plus optional <style> and <script> blocks. SignalSight wraps your code in the page shell automatically.
How do I redirect users to the app store?
Add onclick="redirectToAppStore()" to your download button. SignalSight handles the OneLink redirect and attribution — no custom redirect logic needed.
Can I switch from a pre-built layout to Custom later?
Yes. Open the landing page editor, change the layout to Custom in the template step, and paste your HTML in Page Content.