SignalSight Conversion Lead streams lead-stage updates from Odoo CRM to Meta in real time. When a lead moves through your pipeline — qualified, junk, won, or lost — those events flow back to Meta so campaigns optimize toward meaningful outcomes instead of raw form submissions.
Before you start
You need an Odoo account, a SignalSight account, and a Meta CRM Pixel set up in Events Manager. For Pixel ID and access token steps, see Meta (Facebook) CAPI Setup. New users can start with Account Creation.
Get Started
Open the Tracker Creation Wizard under Signal → Trackers and click Create Tracker. You can also add an Odoo source to an existing tracker from the tracker detail page.
Create a Tracker
Step 1 — Odoo CRM Source
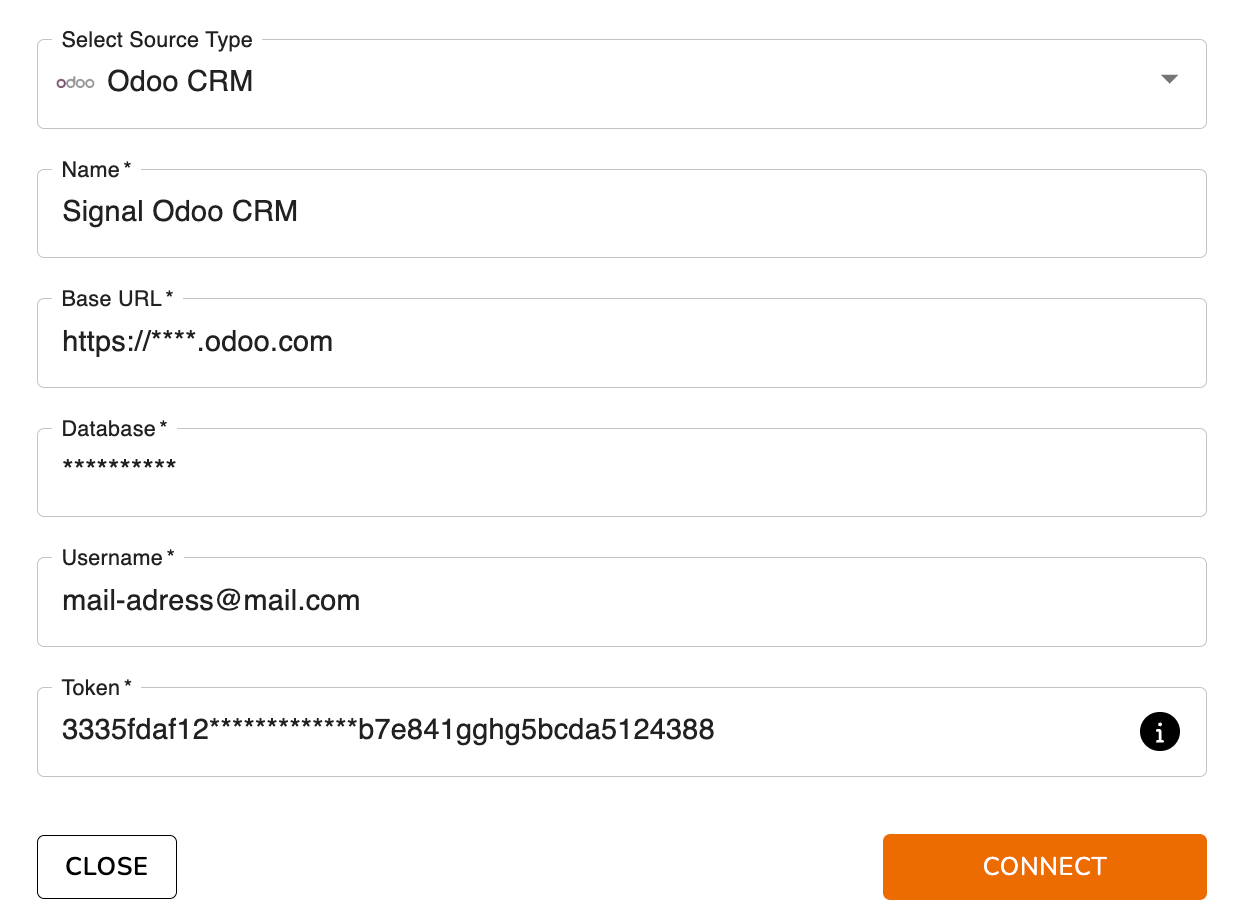
- Select Odoo CRM from the source list.
- Enter your Base URL, Database, Username (email), and API token (see How to Get Base URL, Database, and Token below).
- Click Connect to open the mapping screen.
Configure the Event Name Prefix and field mappings. Leave the prefix empty to send events like Qualified Lead or Junk. With the CRMLeads prefix, events follow the format CRMLeads-Junk. Ensure leadgen ID fields are mapped correctly — this is required for Conversion Leads.
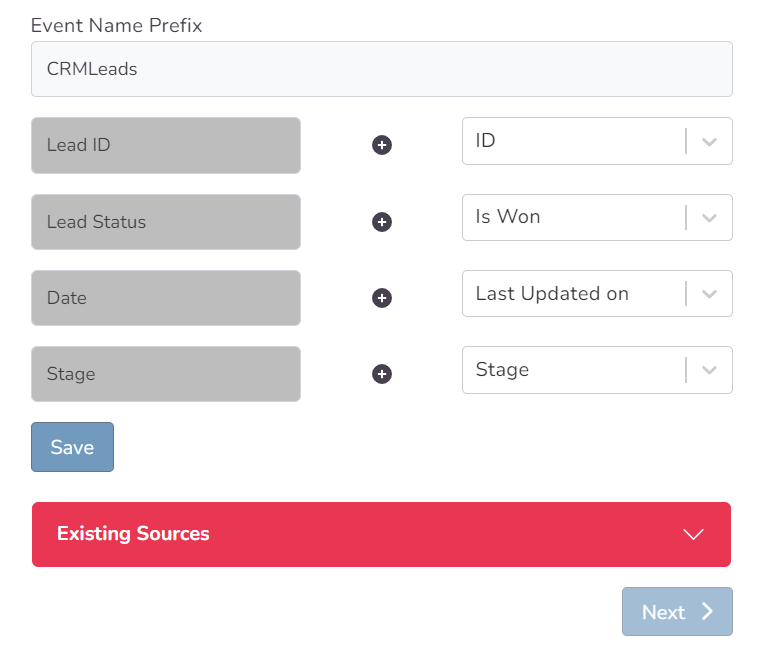
Click Save and Next to continue.
How to Get Base URL, Database, and Token
Base URL — log in to Odoo and copy the root of your instance URL. For example, https://yourcompany.odoo.com.

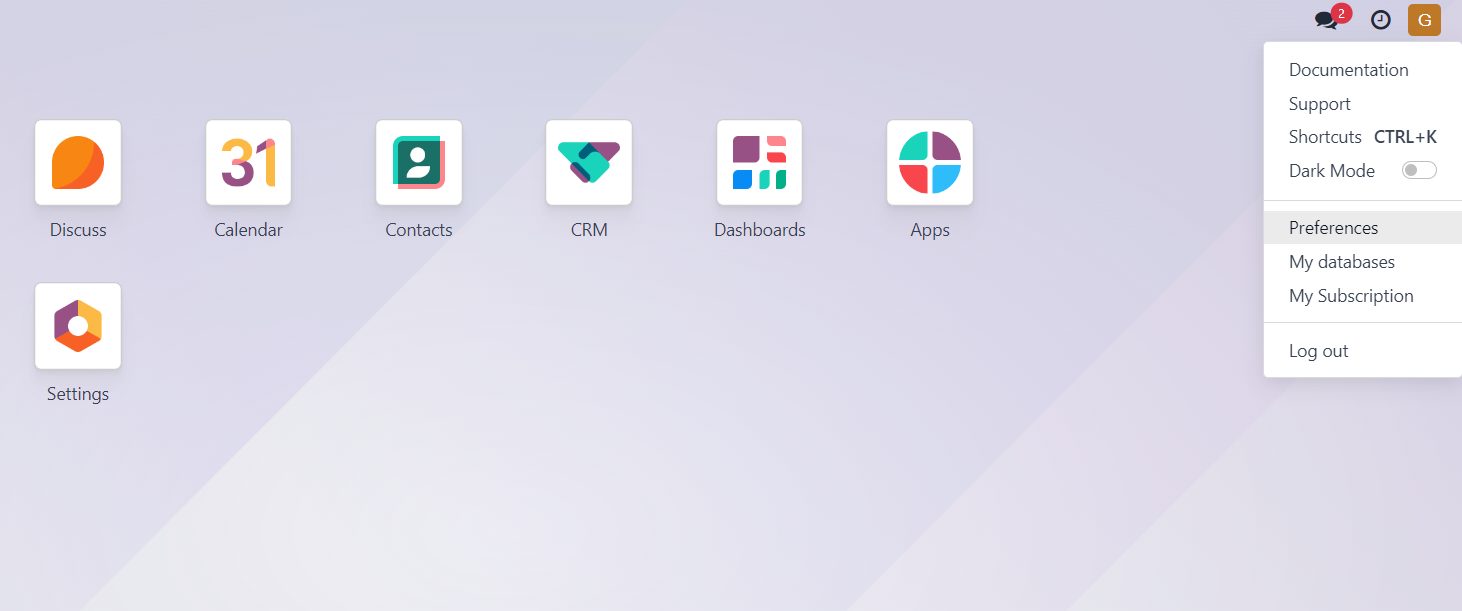
Username — click your profile icon in the top-right corner and open Preferences. The Email field is your username.
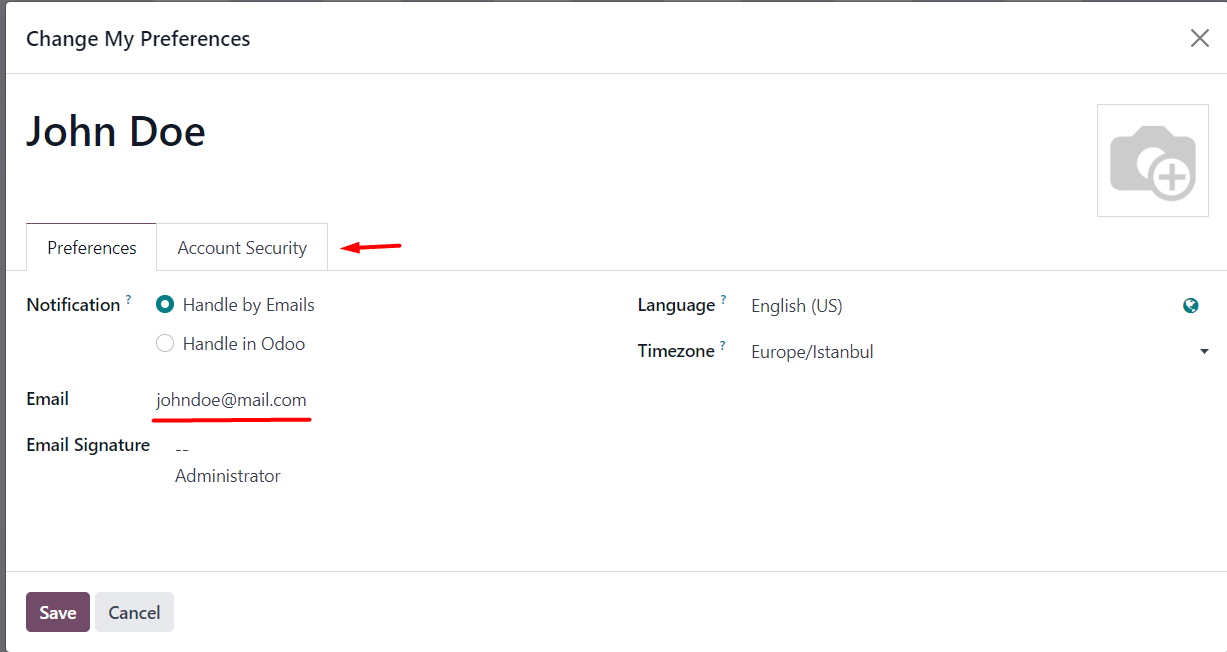
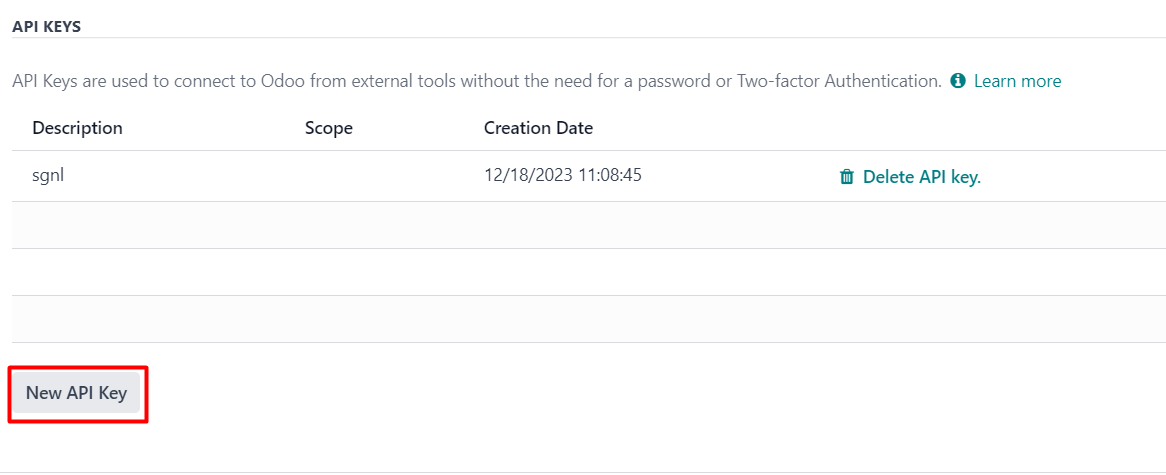
API token — in the same Preferences window, switch to the Account Security tab. Under API Keys, click New API Key, name the key, and copy the token immediately — it cannot be retrieved later.
Database — from the profile menu, open My Databases. Copy the database name shown on the list (e.g. the value under your business name) and paste it into SignalSight.

Step 2 — Meta CAPI Destination
Create a Meta Conversions API destination. Enter your CRM Pixel ID and access token manually, or use Connect Facebook CAPI to sign in and select the Pixel from your account.
Note
The Pixel must be a CRM Pixel — not your website Pixel. In Events Manager, click Connect Data Sources, select CRM, then Connect. Create a new dedicated Pixel (recommended) so CRM events stay separate from your web Pixel.
Step 3 — Name and Complete
Name your tracker, review the source and destination summary, and click Complete to finish the wizard.
Manage Your Source
Open your tracker at any time to update field mapping or review sent event history. Use Edit Mapping on the Odoo source to adjust mappings and the CRMLeads event name prefix. The testing feature shows sample lead data if a lead was generated within the last 7 days.
Note
Changing mapping on campaigns that have already finished learning may restart Meta's learning phase. Update mappings carefully once ads are live.
What Happens Next
Once CRM events start flowing, complete the funnel setup in Meta Events Manager. The three guides below cover everything after tracker creation:
- Validation Phase — Meta's 7-day validation window and how to resolve errors.
- Define Your Sales Funnel — map CRM events to funnel stages and set your optimization target.
- Run Conversion Leads Campaigns — campaign objective, ad set, and Conversion Leads optimization settings.
Frequently Asked Questions
Where do I find my Odoo Base URL?
Log in to Odoo and copy the root of your instance URL — everything up to and including .odoo.com (or your custom domain), without the path after it.
What is the Event Name Prefix?
It prepends a label to every event sent to Meta. With the CRMLeads prefix, a Junk stage becomes CRMLeads-Junk. You can leave the prefix empty or customize it during setup or later via Edit Mapping.
Why can't I retrieve my API token later?
Odoo only shows the API key once at creation. Store it securely when you generate it — if lost, delete the old key and create a new one.
Can I add Odoo to an existing tracker?
Yes. Open the tracker detail page and add an Odoo CRM source alongside your existing sources and destinations.