Bitrix24 Conversion Leads
Bitrix24 CRM is an all-in-one platform designed to streamline business operations by offering tools for sales, marketing, and customer management. It provides a centralized space for communication, task management, and automation, helping businesses improve efficiency and collaboration.
Get Started
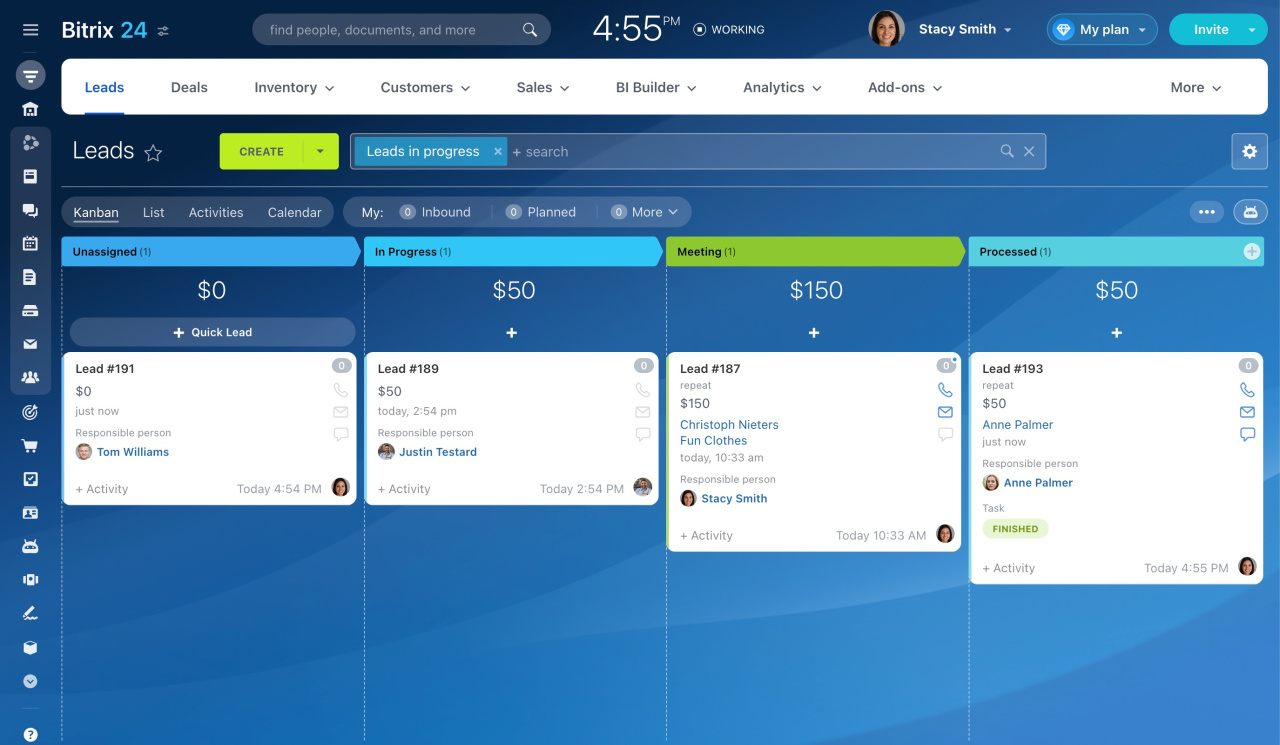
You can use your lead records from Bitrix24 in SignalSight's Conversion Lead solution. With the Conversion Lead solution, you can advertise to potential customers, helping to increase ROI by targeting the right audience more effectively.
Creating a New Tracker
To create a tracker that includes Bitrix24, start by clicking on the "Tracker Creation Wizard" under the "Signal" section in the left menu. With the help of the wizard, you will be guided through a few easy steps to create your tracker and manage your signal flow efficiently.
Bitrix24 Source Creation
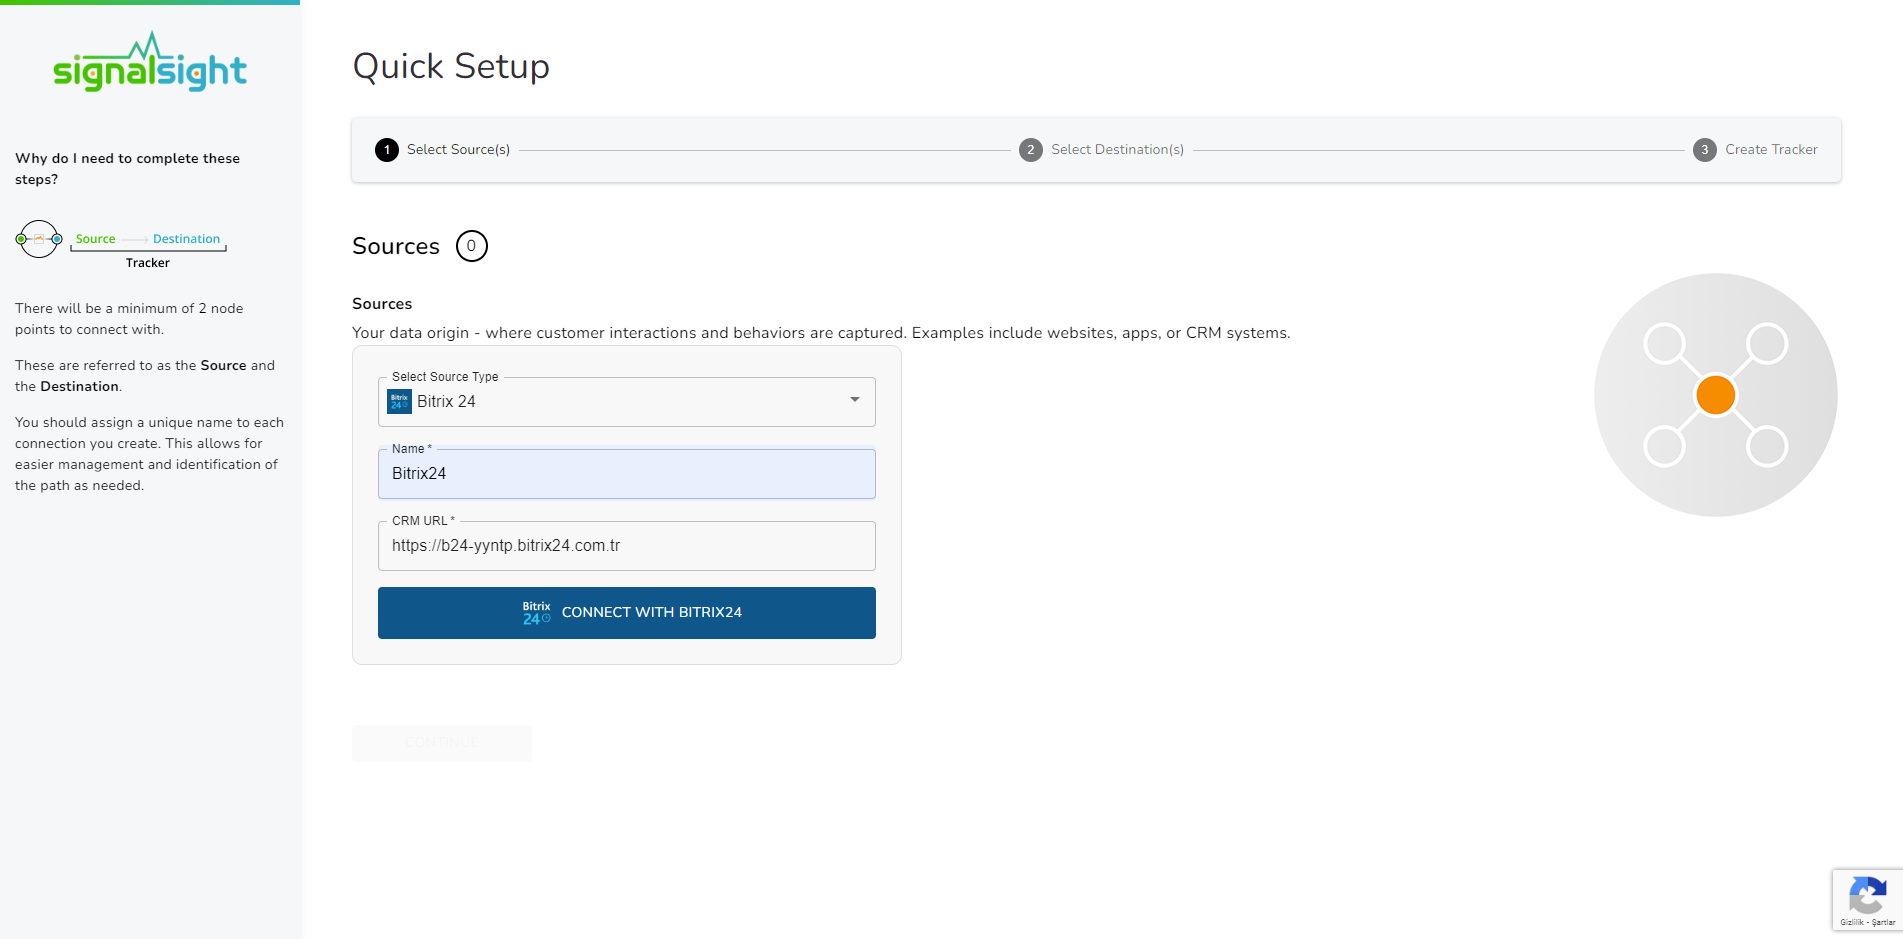
To take advantage of the Bitrix24 solution, the first step is to create an account on SignalSight. After completing the registration process on the Register page, the platform will guide you through a setup wizard. In the first step of the wizard, which is the source creation/selection screen, choose the Bitrix24 source.
- Select "Bitrix24 CRM from the Source list
- Give a name to the created source
- enter the Bitrix24 URL from your panel into the relevant field
- Log in to our Bitrix24 account by clicking the Connect with Bitrix24 button
In the input labeled "Event Name Prefix" you can update the prefix you want to use when sending events to the relevant destination. In other words, if a "Qualified" or a "Junk" event is triggered in your CRM, the event will be sent as "CRMLeads-Qualified" or "CRMLeads-Junk" You can leave this prefix blank or enter a different name if you wish.
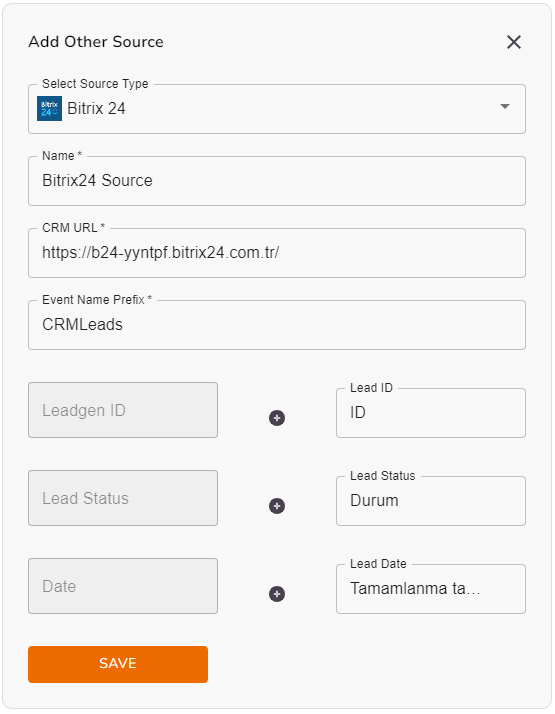
Finally, after you have completed your mapping, you can proceed to the destination creation step with the Save and Next buttons.
Choosing a Destination
In the second step of the wizard, you will create a destination. You should create Meta Conversions Api as destination type for Conversion Leads. Here you are presented with 2 different methods. If you want, you can create Pixel and Meta CAPI destinations with the Save button by entering the pixel id and access token information. In addition, if you have pixel access, create the destination by selecting the account you will access via the Connect Facebook CAPI button and the pixel below it.
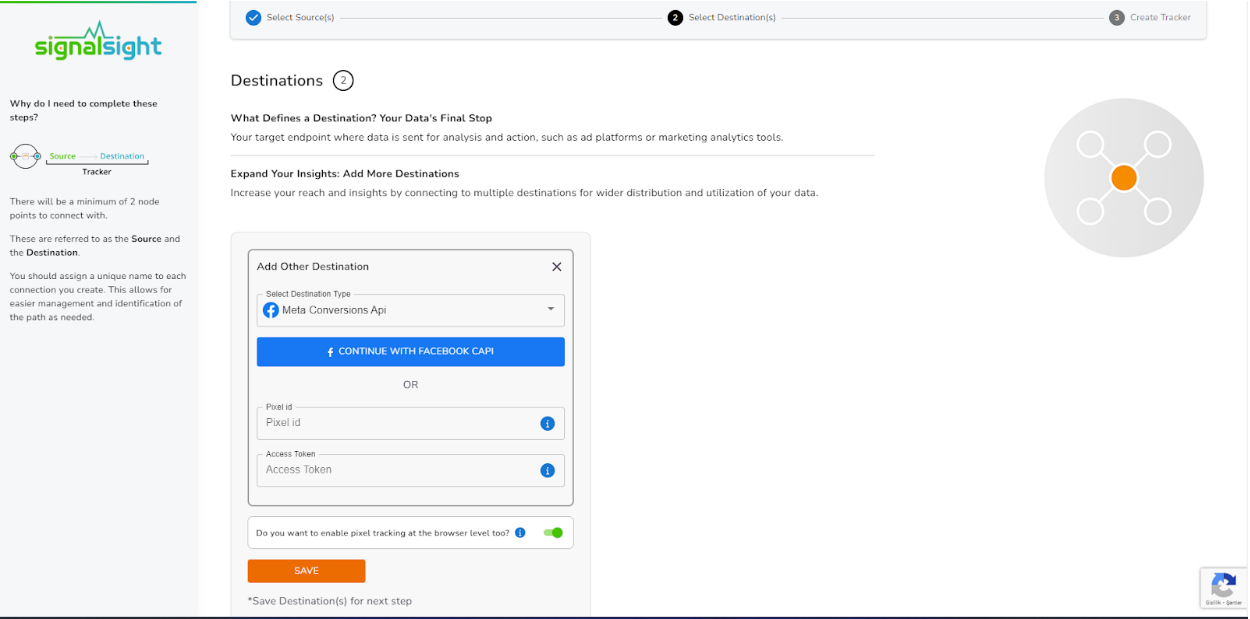
Note: You must make sure that the pixel you will add is a CRM pixel!
In this step of the Wizard, you can give your tracker a name, view the selected source and destination just below, browse the summary, and complete the process.
With the completion of the tracker, you can view your source and destination on the tracker detail screen.
You can enter your Tracker at any time to update the mapping you've done in your CRM source, view data history with the history feature. Additionally, with the "Edit mapping" you can not only update the mapping but also modify the CRMContacts prefix that will precede your event names.
The Validation Phase
Monitoring CRM events
- Once CRM events start flowing you will enter a validation phase, typically lasting 7 days
- During this phase you will work closely with Facebook to identify any errors or issues which may be identified
- All errors must be corrected before you can exit the validation phase and proceed to mapping events to your sales funnel
Validation Phase Exit Requirements
- Your CRM events must provide maximal coverage of all Facebook-generated leads. For example, if 100 leads are generated in a day, then your CRM events for that day should endeavor to cover all of those leads
- We recommend you send at least 3-4 distinct CRM events so that the model can learn a more complete view of your sales funnel. Minimally, you must send in at least 2 events:
- - the initial lead corresponding to a FB-generated lead
- - a target CRM event for which you most want to optimize

Define Your Sales Funnel
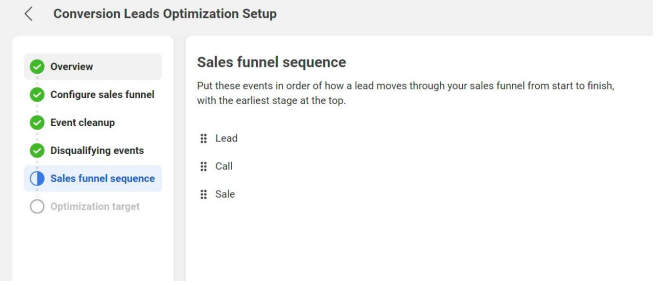
The “Continue Setup” button will be enabled in Events Manager Settings after you’ve exited the validation phase
In each of the sections above, identify CRM events:
- ﹘ that are not events in your sales funnel
- ﹘ that are disqualifying events
- ﹘ and the sequence in which they occur in your sales funnel
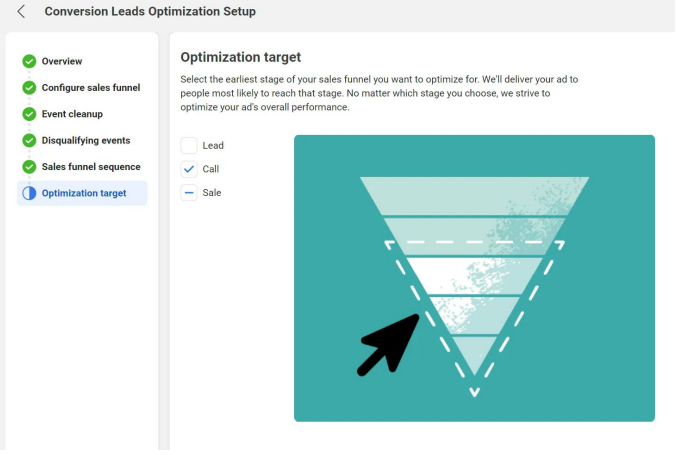
The last step in the integration process is to identify the earliest event in your sales funnel you want to optimize toward
The optimization target need not be the final event in your sales funnel, rather the depth you most want to attract audiences
Run Conversion Leads Campaigns
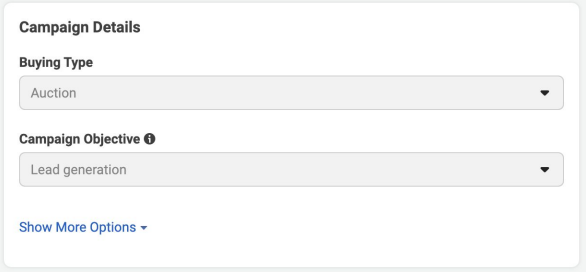
Campaign: Specify the “Lead generation” objective
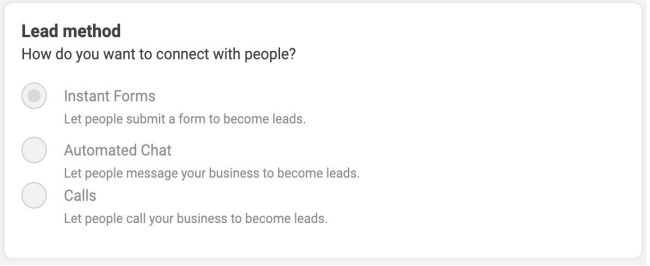
Ad Set: use an Instant Form for higher quality leads
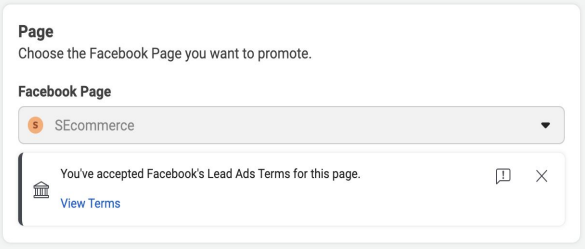
Ad Set / Ad: Choose the Page for associating leads
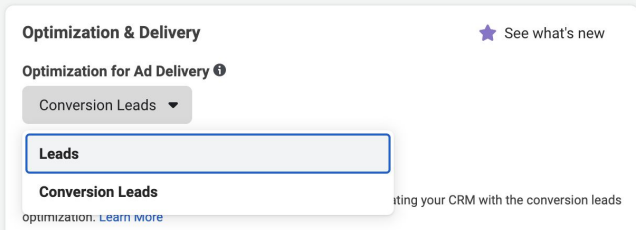
Ad Set: Choose the “Conversion Leads” optimization
