TikTok Events API Setup
Tiktok Events API is used for high conversion rate and more accurate and healthy signals. The Events API is designed to capture and transmit website events that might be missed by the Pixel due to issues like network connectivity problems or errors in page loading.
If you do not have the necessary access to the relevant TikTok ad account and you have an access token along with the pixel, you can proceed with the TikTok Events API manual setup document in addition to automatic installation.
You can take advantage of automatic TikTok installation in either an existing tracker or in the tracker creation wizard. If you're creating a tracker for the first time and don't have one yet, you can initiate the setup process using the tracker creation wizard.
You can enter your website address by selecting Website Javascript in the source creation, which is the first step of the Wizard. After you enter your site address, you can save the source and proceed to the next step.

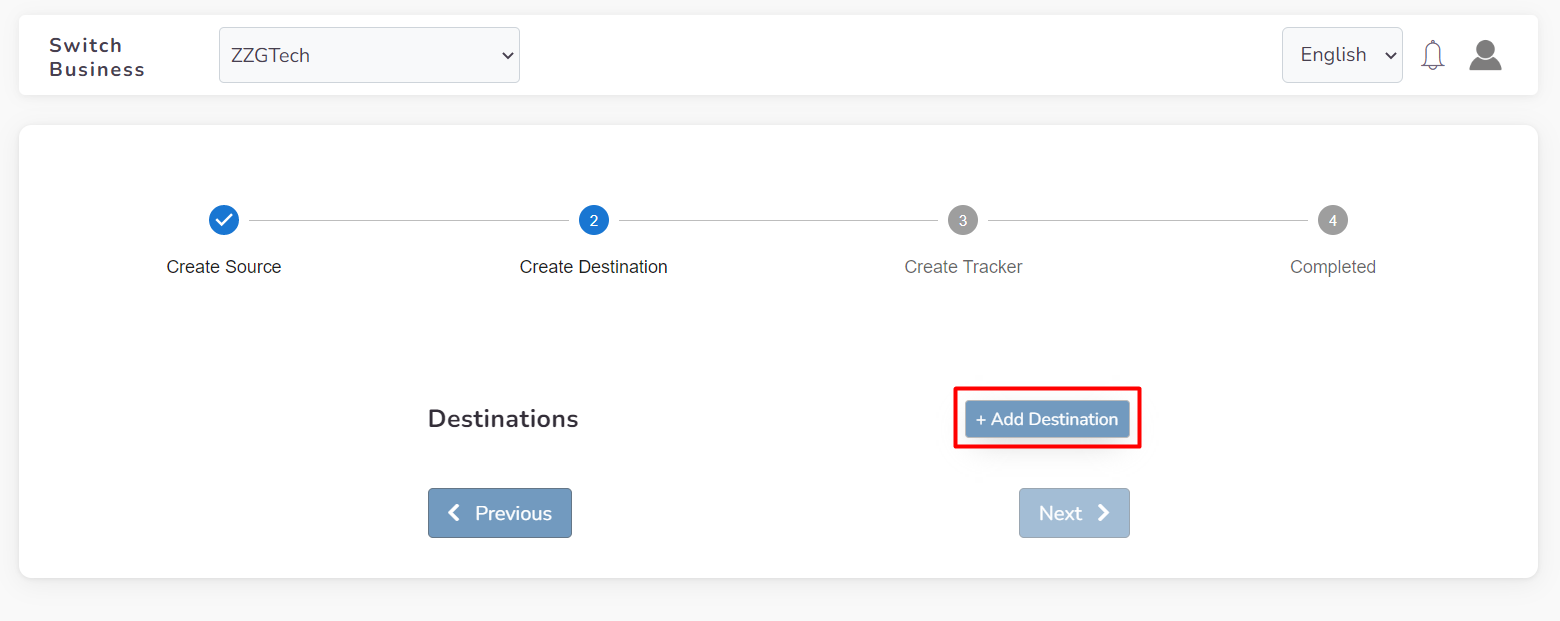
When you reach the Destination step, press the + Add Destination button and select TikTok Events API from the list. You can start the automatic installation by clicking the Create with TikTok button.
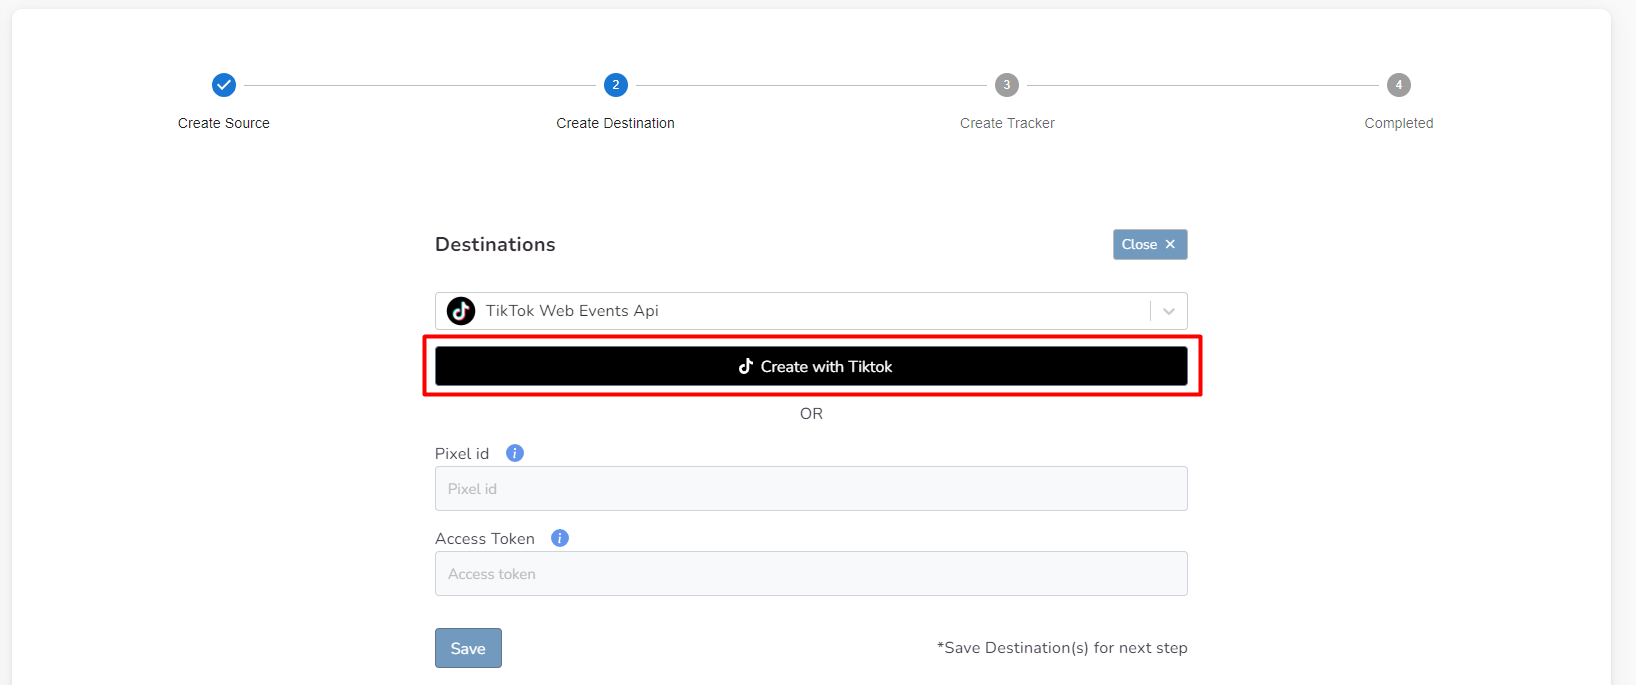
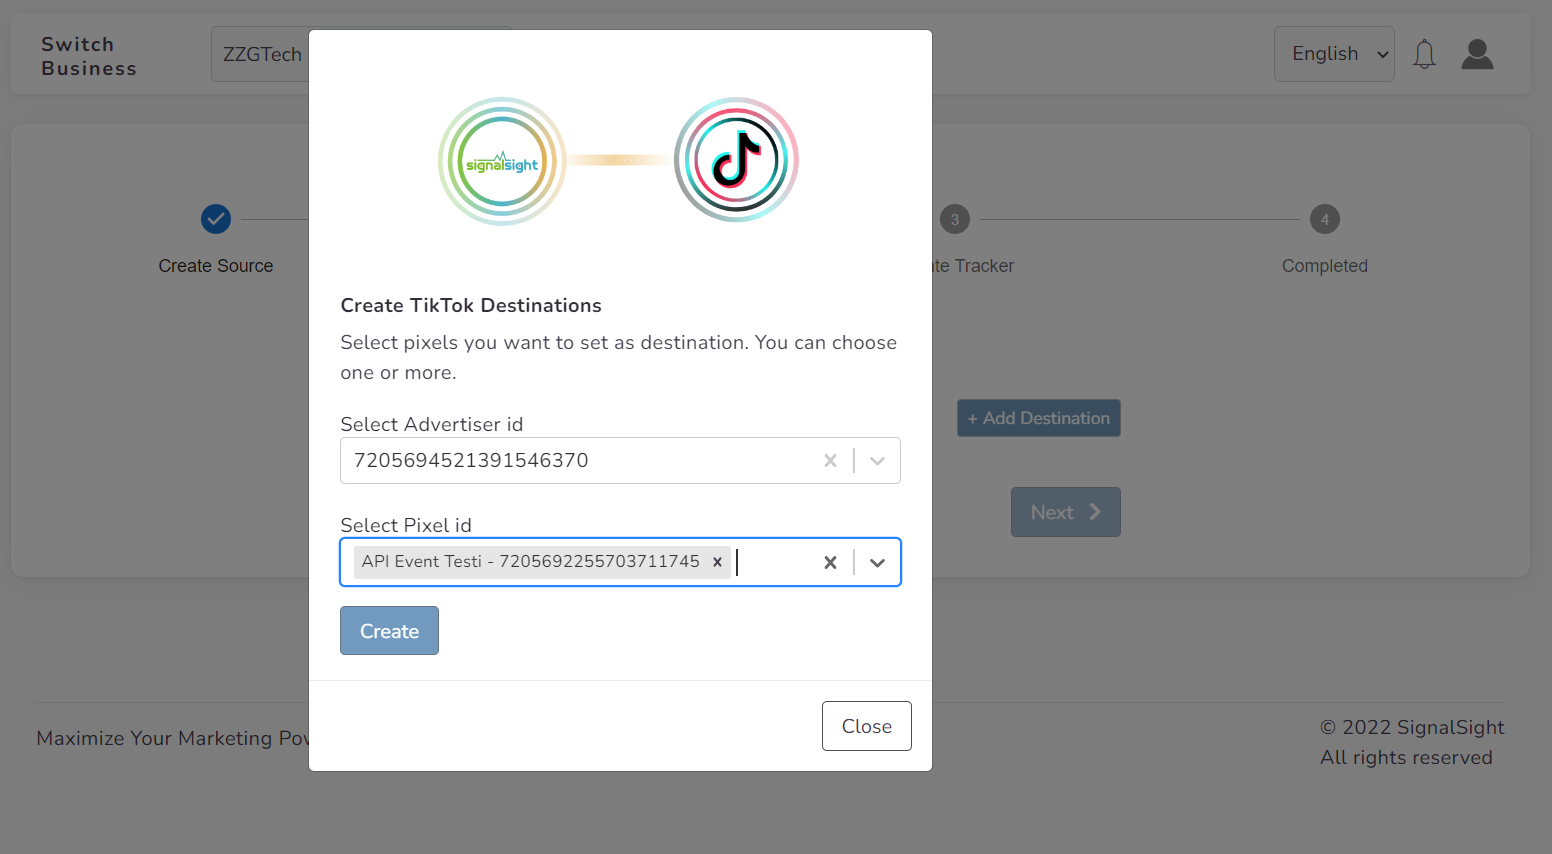
To prepare your TikTok Events API, first select your advertiser account and then choose the Pixels associated with it from the current window. Once you add Tiktok Events API, 2 destinations will be created: Tiktok Pixel and Tiktok Events API. In the last step, you can complete the wizard by giving the tracker a name.
If you already have a tracker, click Trackers on the left sidebar. Next, navigate to the tracker where you want to add the integration, and on the right side of the tracker detail page, add two new destinations. Click "Add New Destination," then select "Create a new" in the pop-up. From the list, select "TikTok Pixel" and click "Create with TikTok." After selecting the advertiser and pixel information, click "Create" to add your destination to the tracker.
To select the TikTok Events API from the list, click "Add New Destination" and create a new one. Then, use "Create with TikTok" to establish the server-side connection in the tracker, including the advertiser and pixel information. With this, your tracker will be ready and you can move on to the GTM/Frontend Code Activation Transactions stage.
GTM/Frontend Code Activation Transactions
Caution! Familiarity with Tag Manager is necessary for this step. If you are not the designated tag manager, please seek assistance from the appropriate parties.
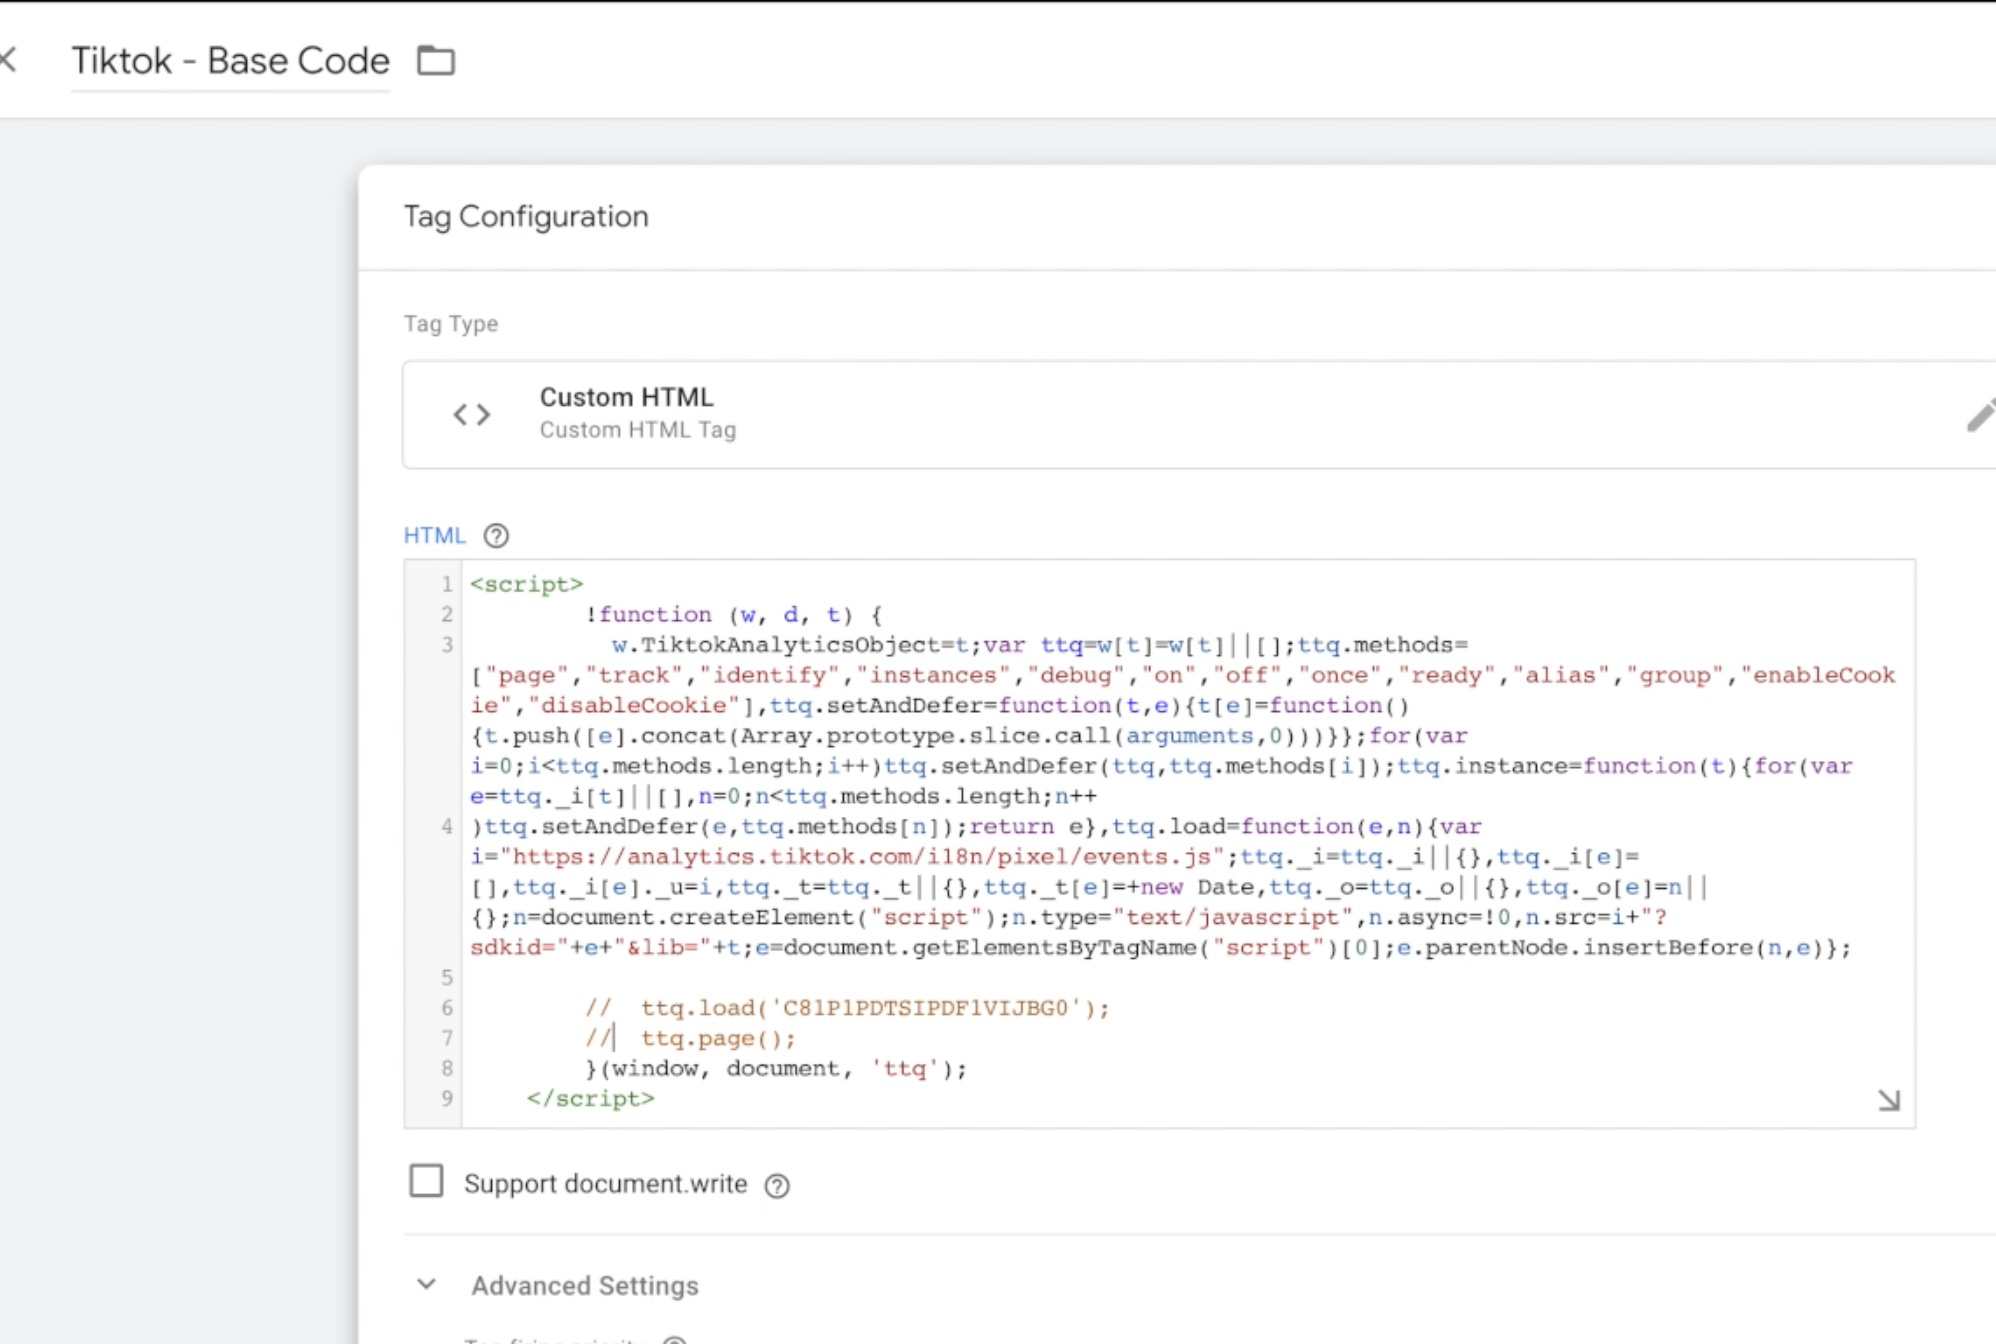
To view your TikTok tags, navigate to your Tag Manager application and search for "TikTok tags" (ttq).
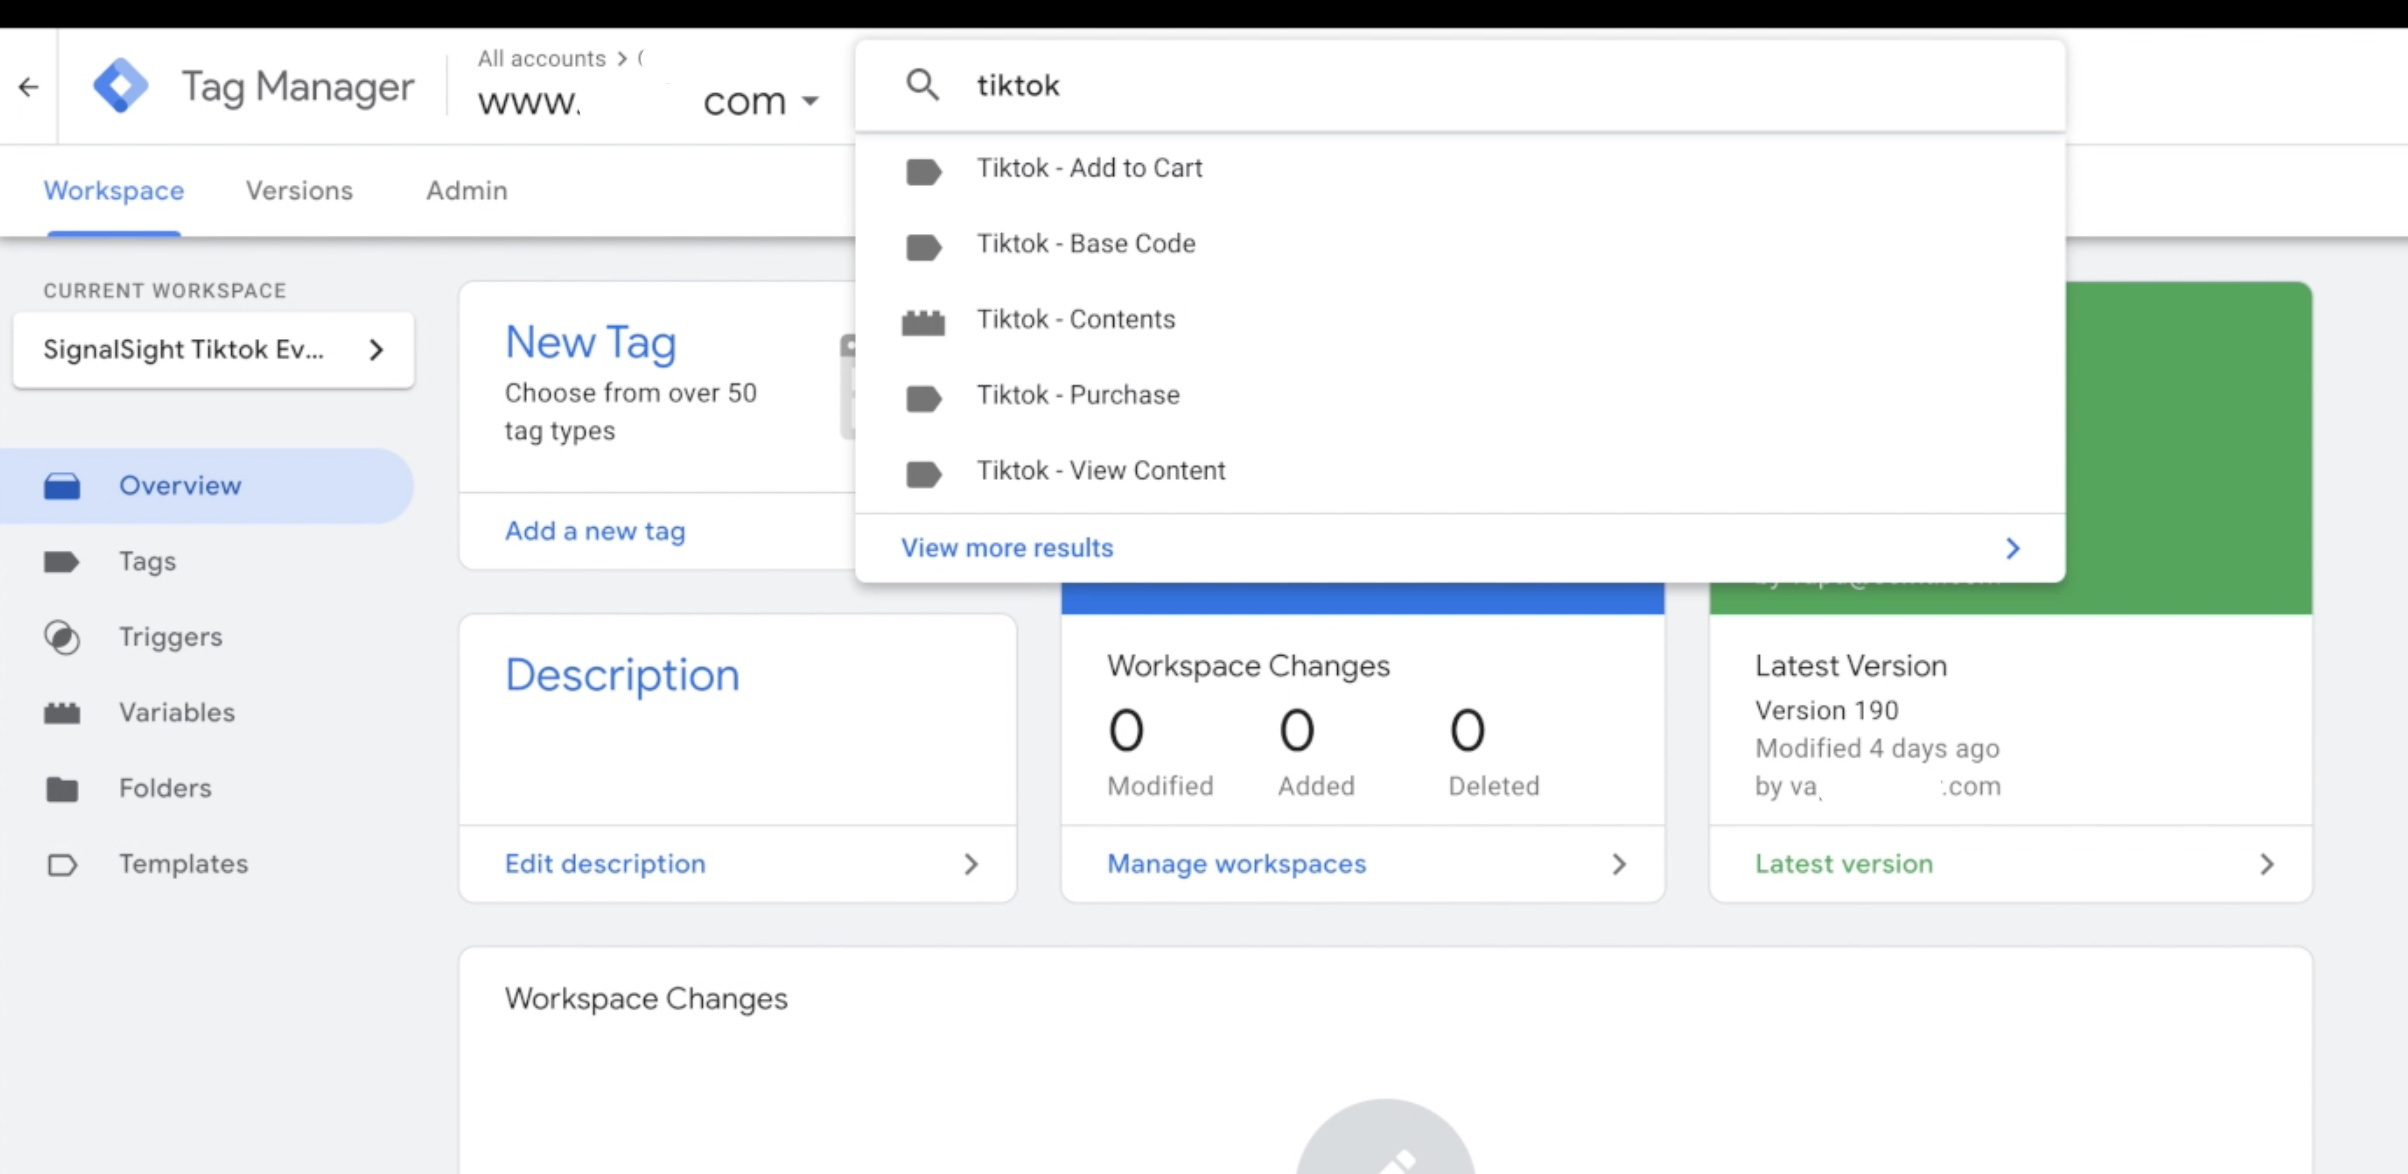
Select the “Tiktok Base Code” tag and disable the lines starting ttq.load and ttq.page with the // sign (comment-out), then press the “Save” button.
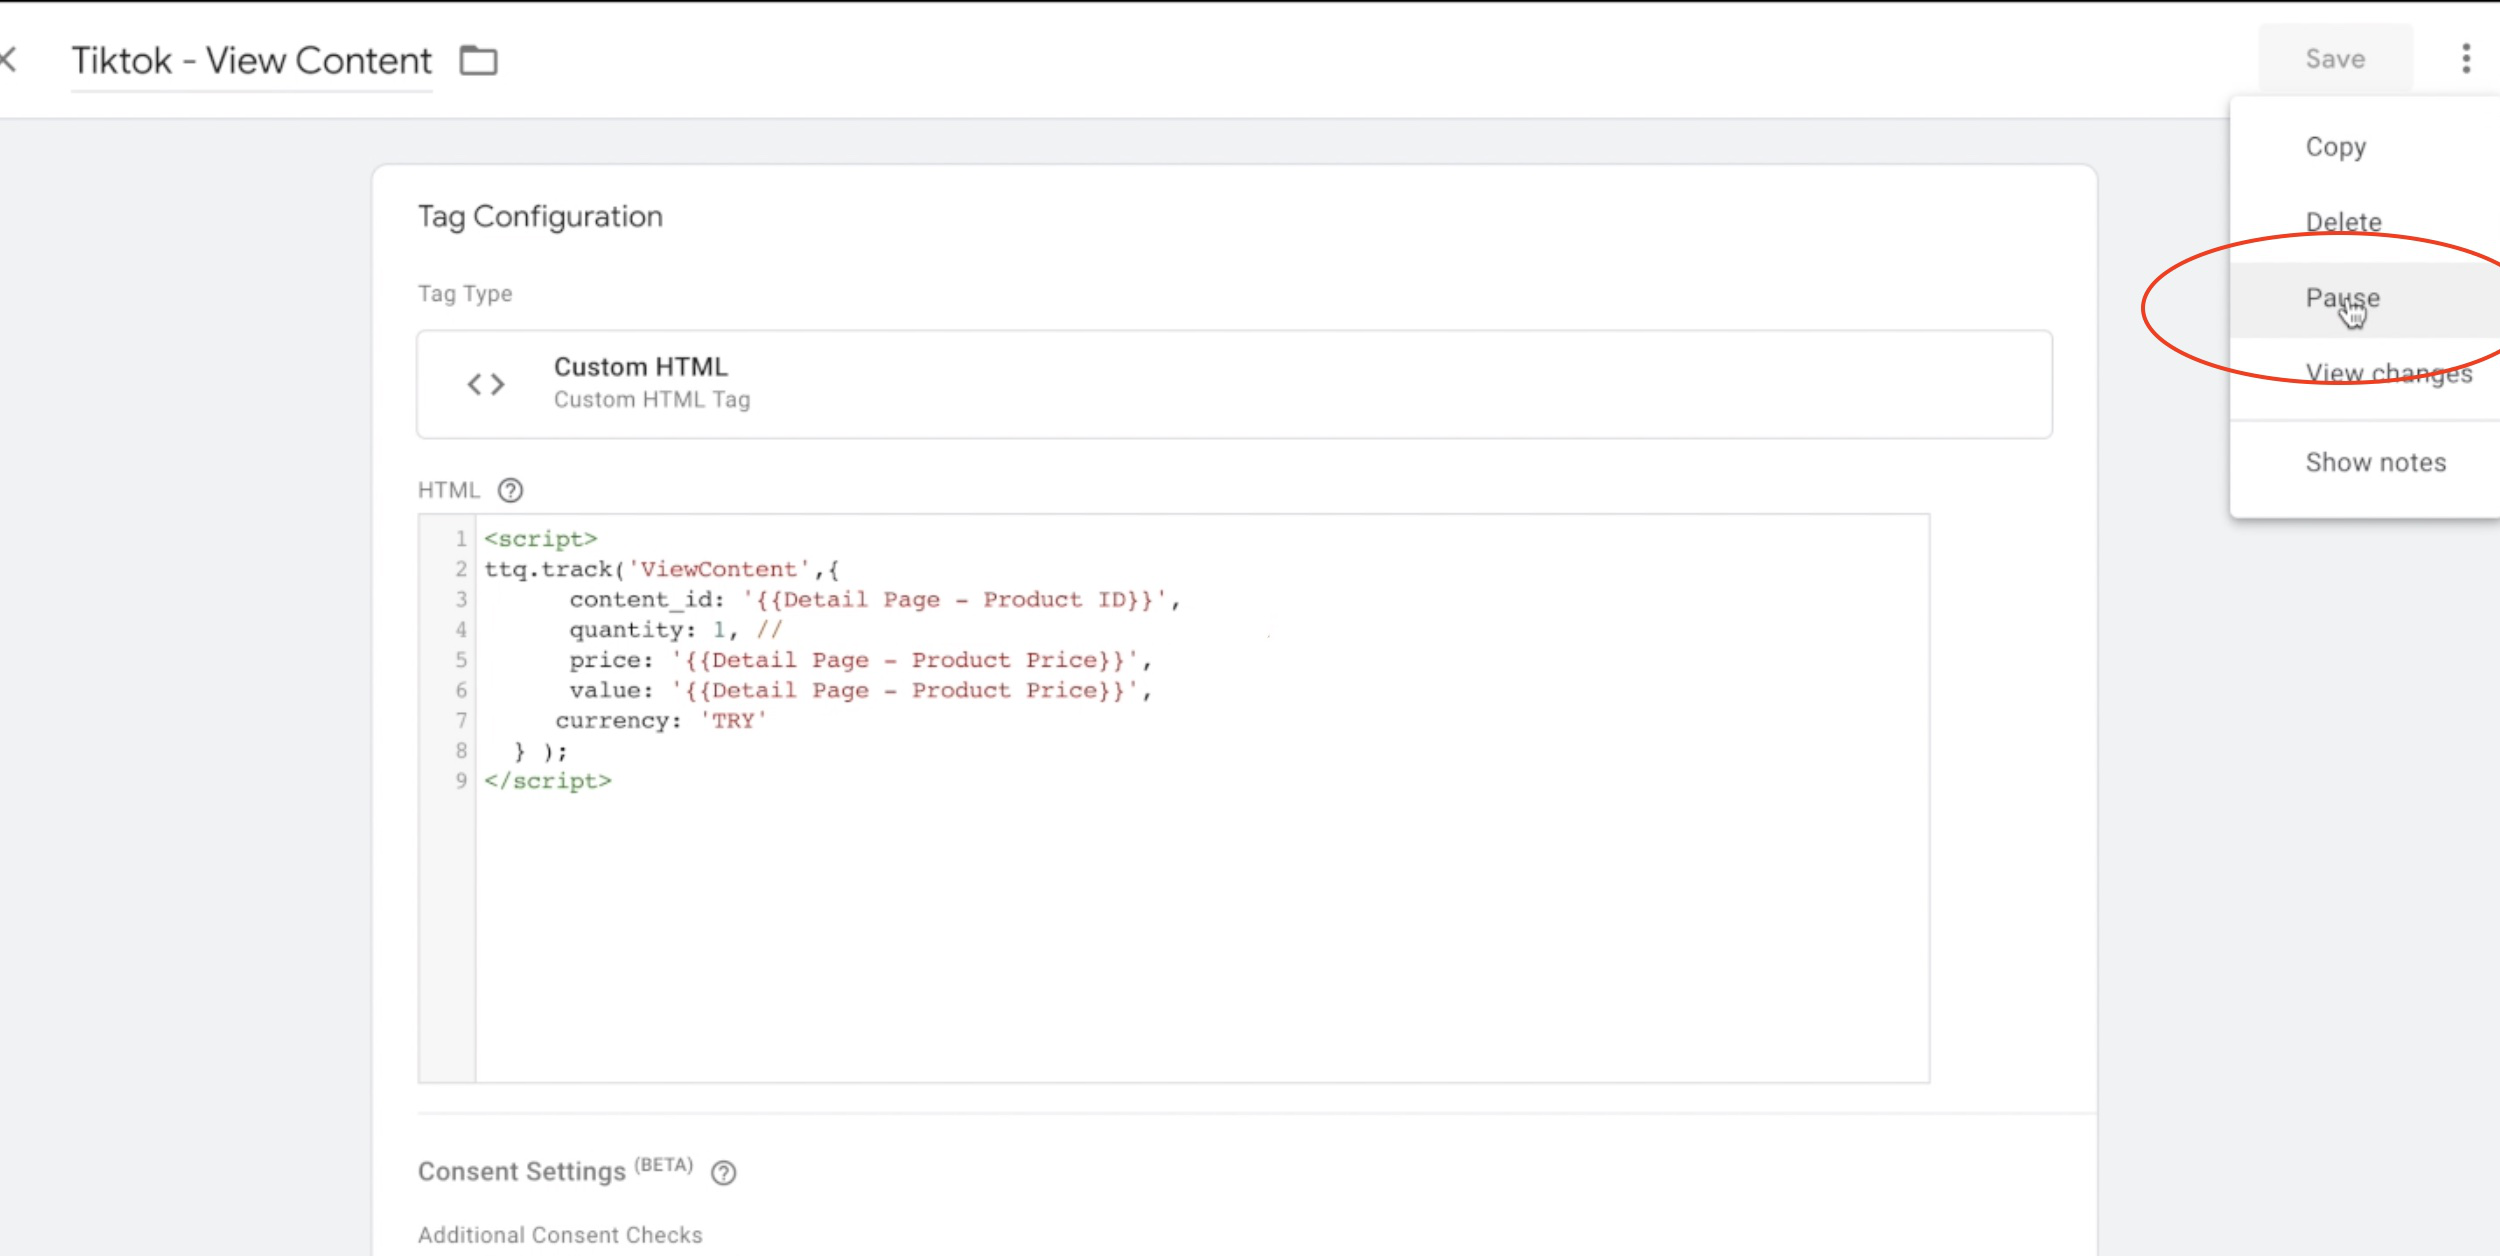
Stop all your other Tiktok tags by going into detail and clicking the "Pause" button.
Signalsight - Testing Events API
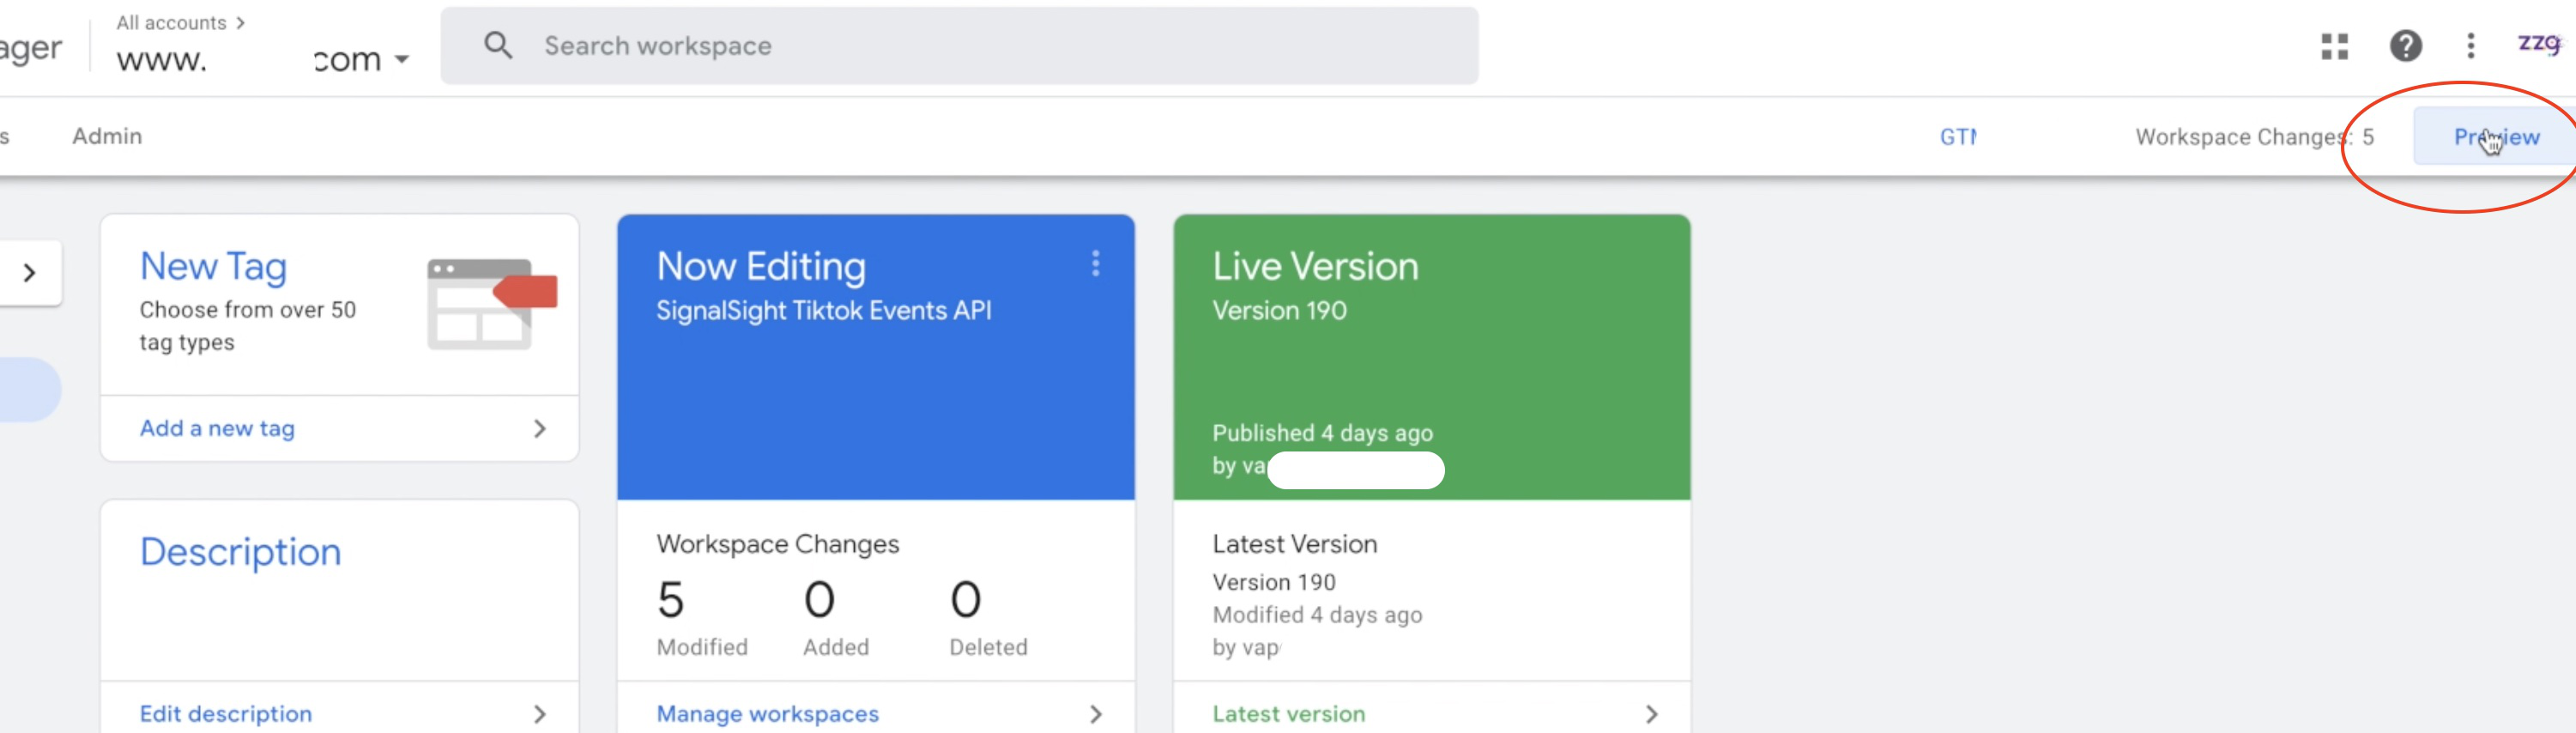
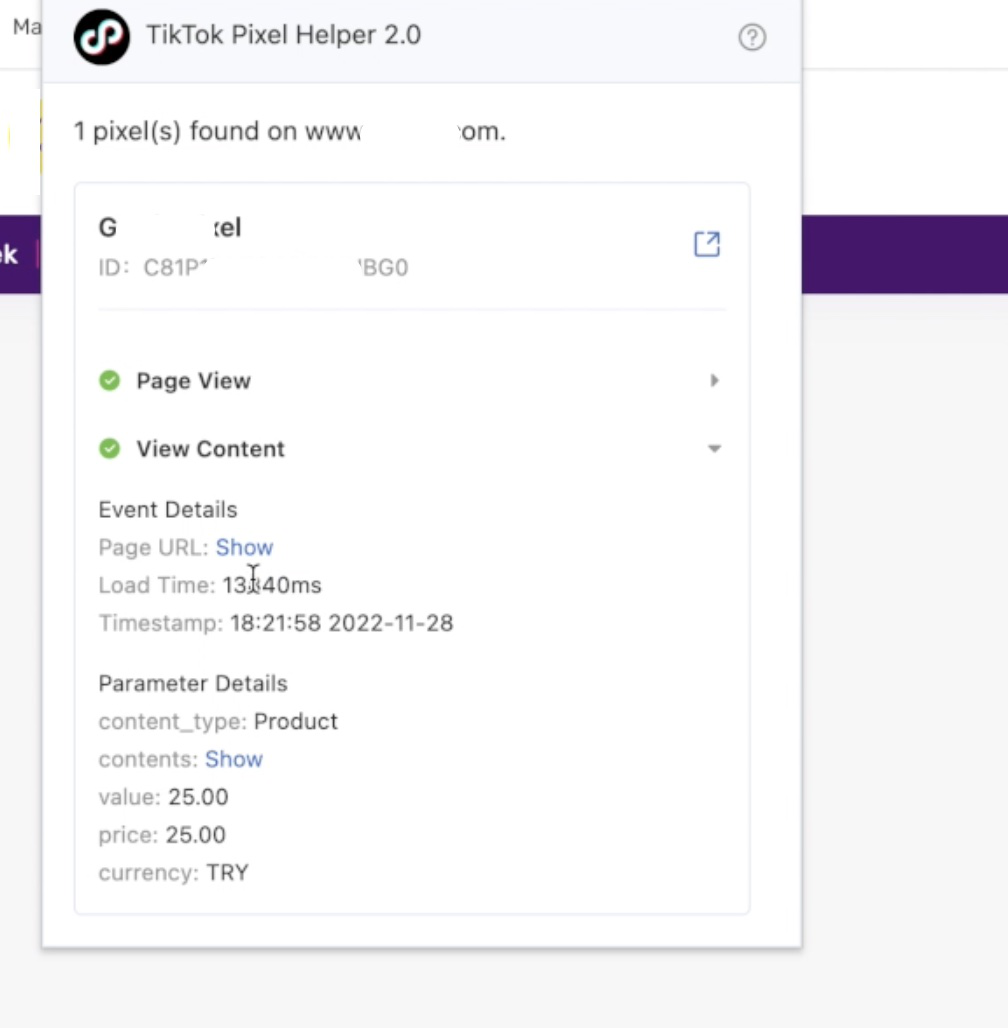
Verify that your TikTok server-side events are activated by clicking the "Preview" button, to confirm that the modifications you have made on the tag manager screen are accurate. You can use the Tiktok Pixel Helper tool for testing.
Consent management and data privacy
To stay compliant in regard to data protection, you should only activate script if users given consent within your Consent Management framework.