File Upload Conversion Leads Guide
SignalSight is an innovative application platform that enables data and signal flow for customers through a variety of source and destination integrations. With a focus on conversion-driven services, SignalSight offers a range of functionalities, including Signalsight CRM and a wide array of source and destination types.
What sets SignalSight apart is its highly customizable and flexible nature, allowing users to tailor the platform to their specific needs and requirements. Whether you need to optimize ad campaigns, track user interactions, or analyze performance metrics, SignalSight has the tools to deliver valuable insights and facilitate seamless data flow.
Get Started
Creating conversion strategies aligned with the company's marketing objectives. These strategies are designed to attract the attention of potential customers, generate interest, and ultimately lead them to become actual customers.
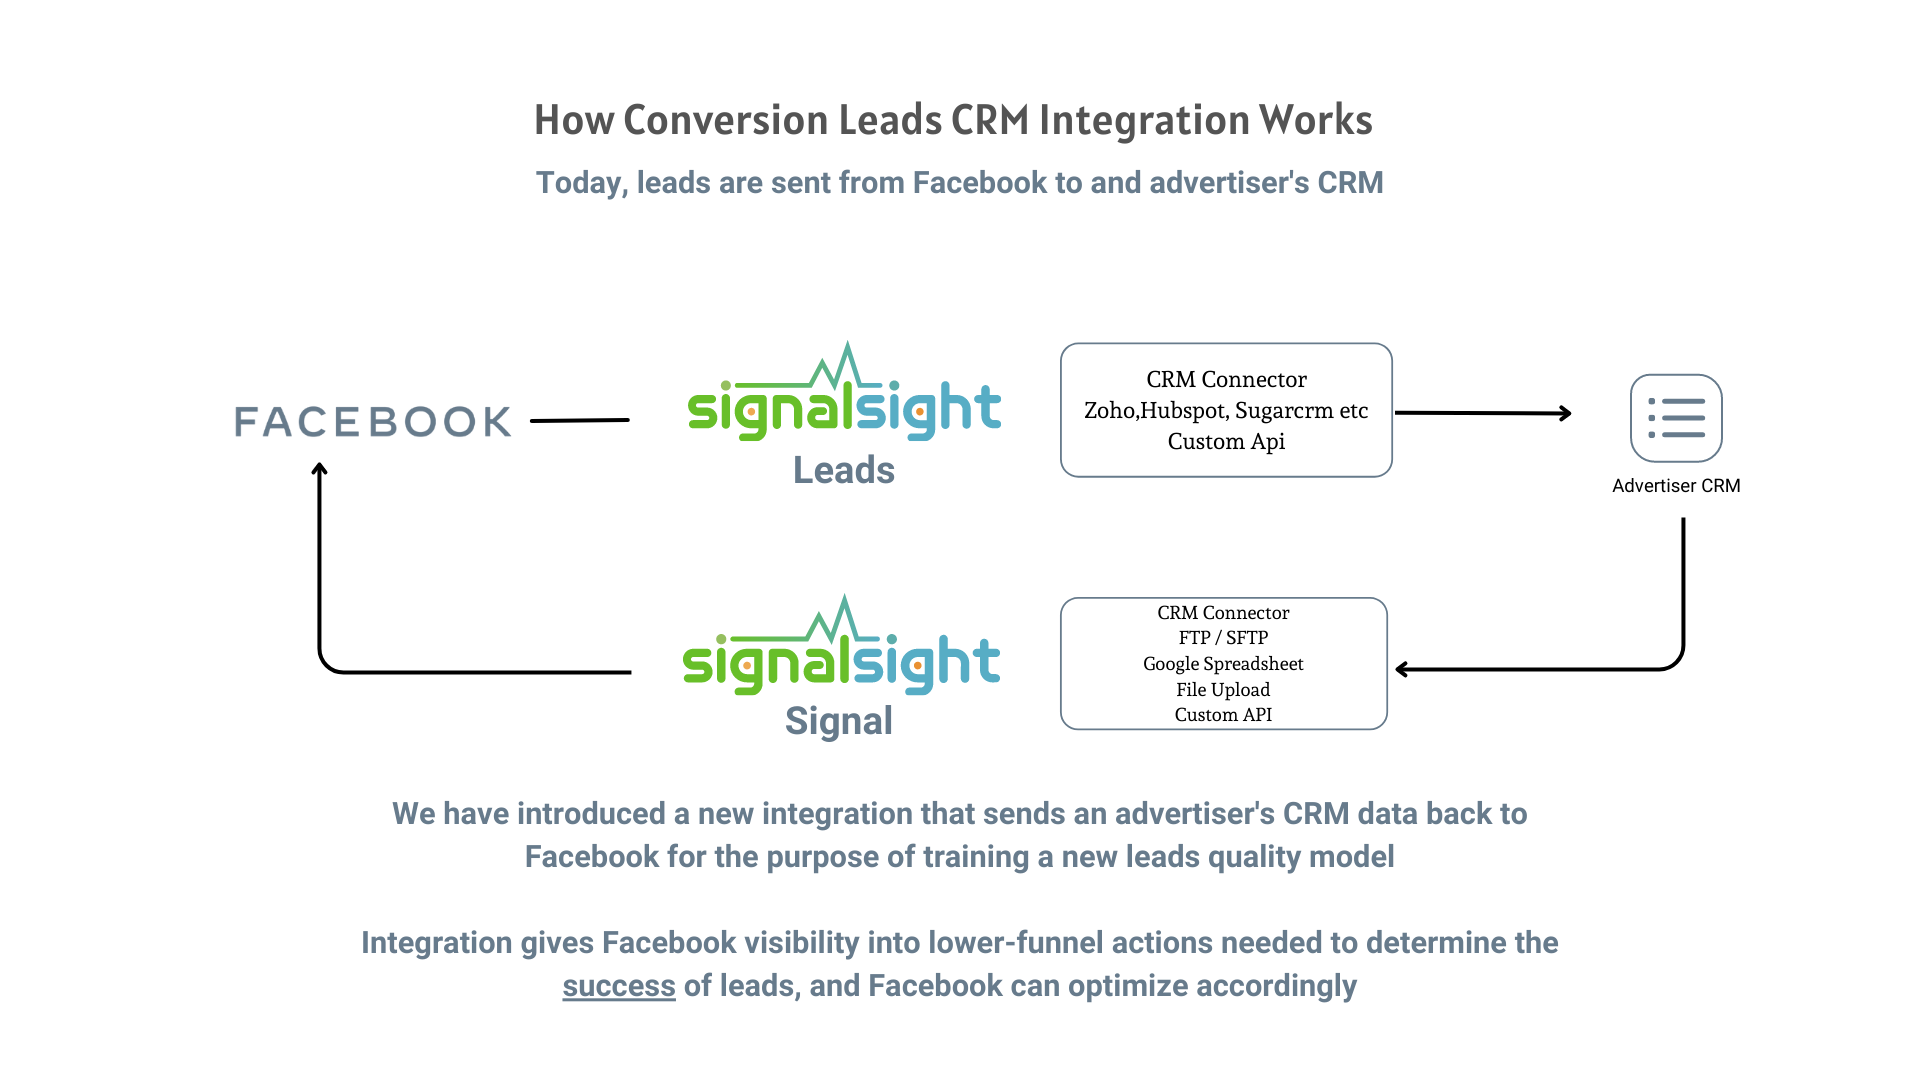
To set up Conversion Leads with SignalSight and make a difference in your conversions, you must first have a SignalSight account. If you do not have an account, you can create your membership via the link https://console.signalsight.io/dash/login?service=free.
When you log in to your account, a dashboard screen like the one below will welcome you. You can start the wizard by clicking Tracker Creation Wizard under SIGNAL from the left menu.

How to Find Pixel ID on Facebook?
To find your Pixel ID, you need to enter Events Manager. After logging into Events manager, select the Pixel you want to view from the data sources in the left-hand menu. Your Pixel ID will be displayed in the upper right corner of the screen that appears.
Facebook Generate Access Token
You can create acces tokens under the settings tab of the
pixel you want implement CAPI in your Business Manager account.
Step 1 - Go to your business pixel.
Step 2 - Assign a Pixel to your system user (you also have an option to create a new system user at this stage).
Step 3 - Go down to the Conversion API header and click on the "Generate access token" link.

Create a Meta CRM Pixel
This section will walk you through creating a Meta Pixel for your CRM.
Note: You will need to have admin access to create or convert a Pixel.
- In Events Manager, click Connect Data Sources to connect a new data source.
- Select CRM, then click Connect.
- You may either create a completely new Pixel or convert an existing Pixel. Your decision will depend on how you want to organize your events and manage ad account access to the Pixels. We recommend creating a new Pixel so the CRM events do not overlap with existing Pixel events in Events Manager, which will make troubleshooting easier.
If you convert an existing Pixel, we recommend giving the CRM events a different name rather than reusing existing event names, which could cause confusion between the different types of events. Converting an existing web Pixel will not affect other events uploaded to it. A CRM Pixel simply lets the Meta know that CRM events will be uploaded to it and adds the Conversion Leads Optimization integration workflow to the Pixel. - To create a new Pixel: Click on the Create New Pixel link, and name the Pixel accordingly.
- To convert a Pixel: Select the existing Pixel you would like to upload CRM events into. Converting an existing web Pixel will not affect other events being uploaded to it.
- Double check that the icon for your CRM Pixel has updated. If it did not, repeat this step.
Note: The integration is Pixel-based. Do not switch completed integrations to a different Pixel.
Creating a New Tracker
To create a tracker that includes File Upload, start by clicking on the "Tracker Creation Wizard" under the "Signal" section in the left menu. With the help of the wizard, you will be guided through a few easy steps to create your tracker and manage your signal flow efficiently.
File Upload Source Creation
In the first step of the Wizard, we will perform the process of adding and creating a source. Since we will be using the conversion leads through the File Upload method, in this step, if we don't already have a File Upload source created, we will create a new one.
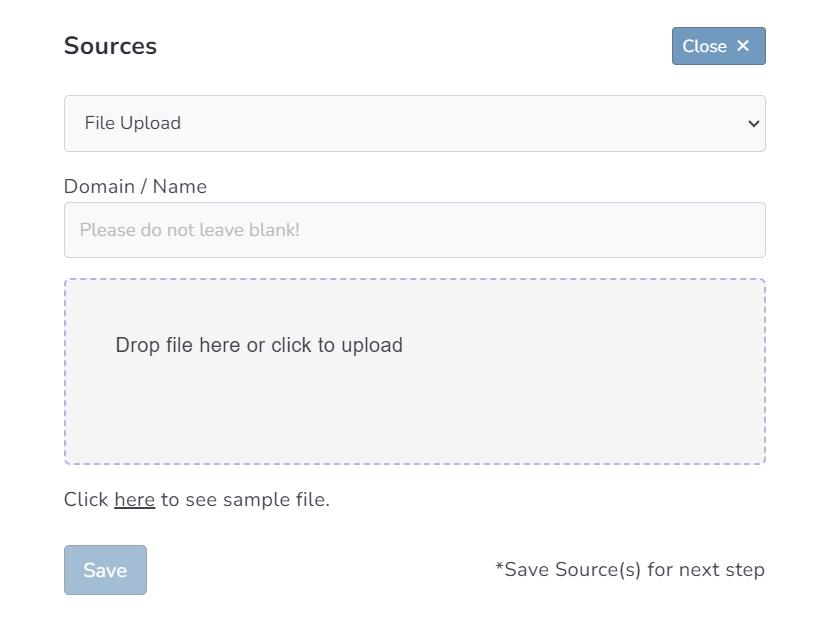
In the first box, select File Upload from the available source types. Then, you must enter a name for this source. You can either drag and drop the file to the area indicated with stripes or use the methods to select the file location after clicking on the box. The file you choose must adhere to specific formats. For an example file, you can download it from the "here" link just above the Save button and examine it.
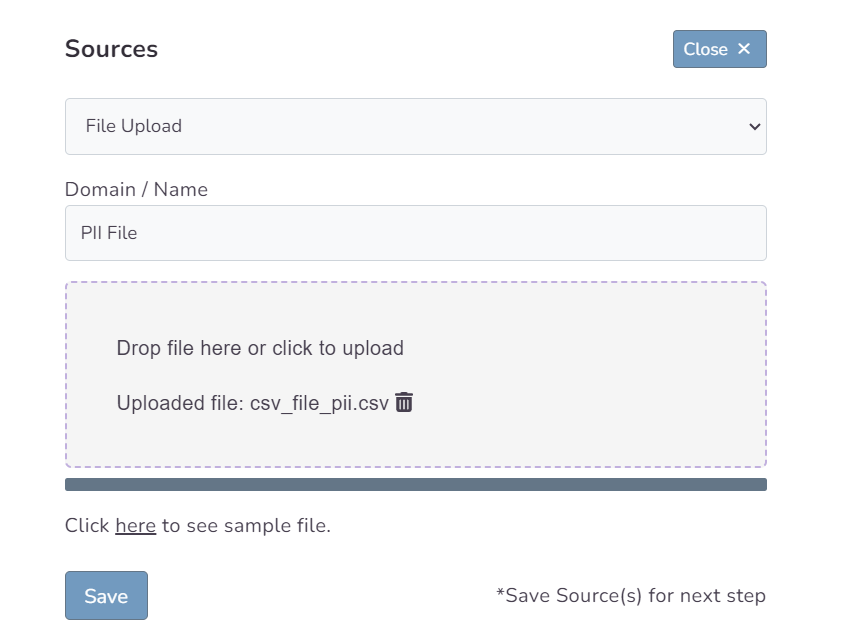
Once you have uploaded your file, you are ready to create your source. You can complete the process by clicking the Save button.
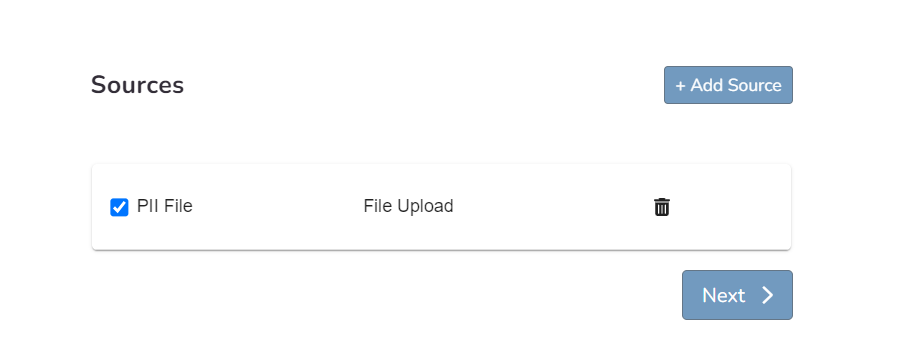
Your source has been created! You are now ready to proceed to the next step. Let's move on to the destination step by clicking Next.
Choosing Destination
In the second step of the wizard, you will create a destination. You should create Meta Conversions Api as destination type for Conversion Leads. Here you are presented with 2 different methods. If you want, you can create Pixel and Meta CAPI destinations with the Save button by entering the pixel id and access token information. In addition, if you have pixel access, create the destination by selecting the account you will access via the Connect Facebook CAPI button and the pixel below it.
In this step of the Wizard, you can give your tracker a name, view the selected source and destination just below, browse the summary, and complete the process.
With the completion of the tracker, you can view your source and destination on the tracker detail screen.
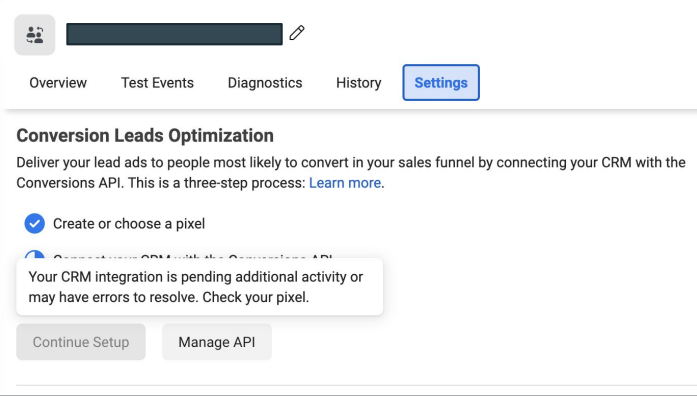
The Validation Phase
Monitoring CRM events
- Once CRM events start flowing you will enter a validation phase, typically lasting 7 days
- During this phase you will work closely with Facebook to identify any errors or issues which may be identified
- All errors must be corrected before you can exit the validation phase and proceed to mapping events to your sales funnel
Validation Phase Exit Requirements
- Your CRM events must provide maximal coverage of all Facebook-generated leads. For example, if 100 leads are generated in a day, then your CRM events for that day should endeavor to cover all of those leads
- We recommend you send at least 3-4 distinct CRM events so that the model can learn a more complete view of your sales funnel. Minimally, you must send in at least 2 events:
- - the initial lead corresponding to a FB-generated lead
- - a target CRM event for which you most want to optimize
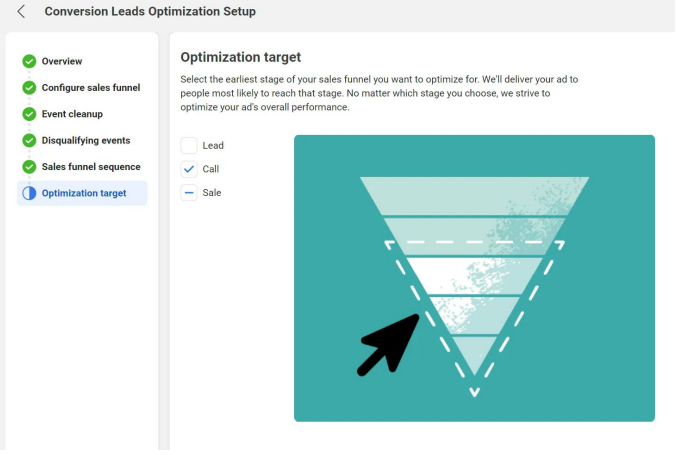
Define Your Sales Funnel

The “Continue Setup” button will be enabled in Events Manager Settings after you’ve exited the validation phase
In each of the sections above, identify CRM events:
- ﹘ that are not events in your sales funnel
- ﹘ that are disqualifying events
- ﹘ and the sequence in which they occur in your sales funnel
The last step in the integration process is to identify the earliest event in your sales funnel you want to optimize toward
The optimization target need not be the final event in your sales funnel, rather the depth you most want to attract audiences
Run Conversion Leads Campaigns
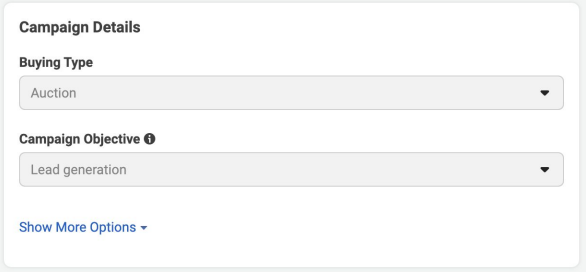
Campaign: Specify the “Lead generation” objective
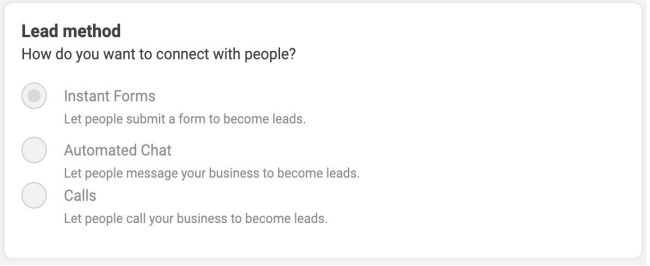
Ad Set: use an Instant Form for higher quality leads

Ad Set / Ad: Choose the Page for associating leads
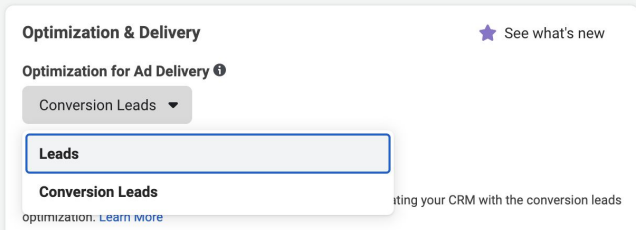
Ad Set: Choose the “Conversion Leads” optimization