Secure FTP Guide
Secure FTP, abbreviated as SFTP, is a network protocol used to securely access, transfer, and manage large and sensitive files. SignalSight allows secure access to your files through its SFTP Source type and enables easy signal transmission to various destination types such as Facebook, TikTok, Snapchat, etc.
Get Started
To create a tracker in SignalSight, you need to be a member. If you don't have a membership, you can create one by following this link: https://console.signalsight.io/dash/login?service=free. Once you have a membership, you can start creating a tracker and, you can add an SFTP source to your existing trackers or include this source when creating a new tracker. To do this, first, click on "Trackers" in the left menu, as shown in the image.
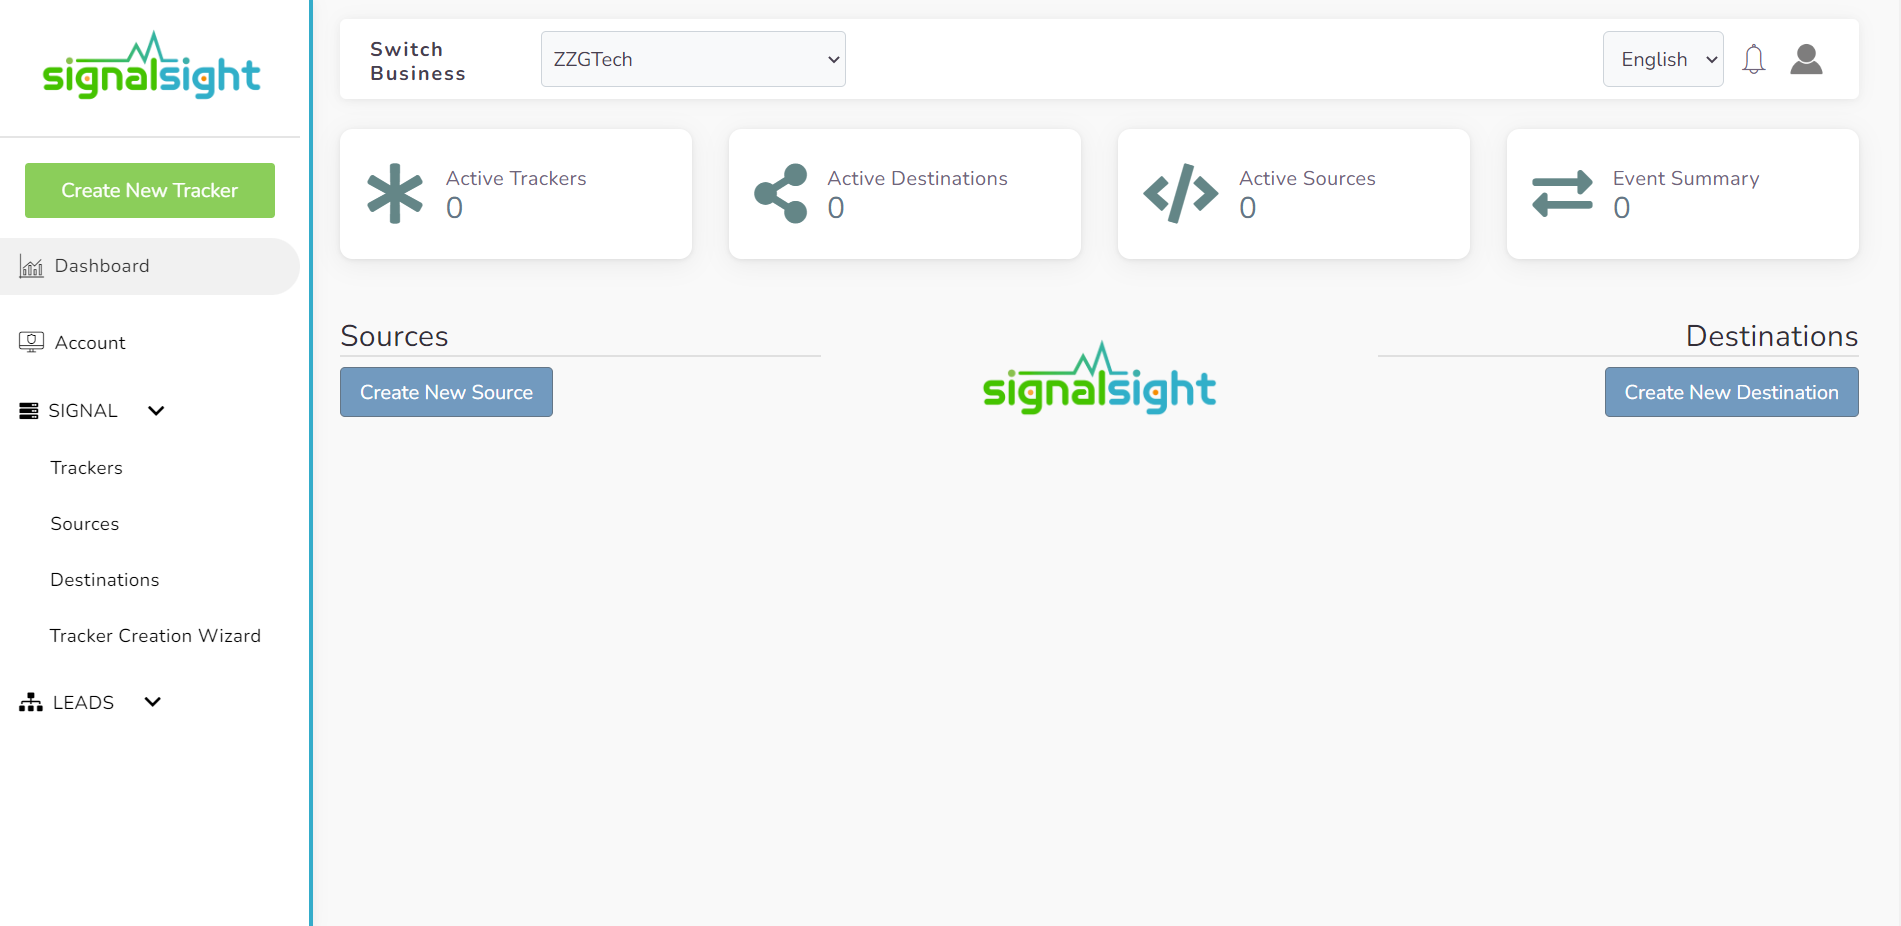
On this page, you can view the trackers you have created before, or you can create a new one by clicking the Create Tracker button at the top right.
Establishing SFTP Connection on New Tracker
Click Tracker Creation Wizard from the left menu. Then select SFTP (Secure FTP) as the source type in the first step of the wizard steps.

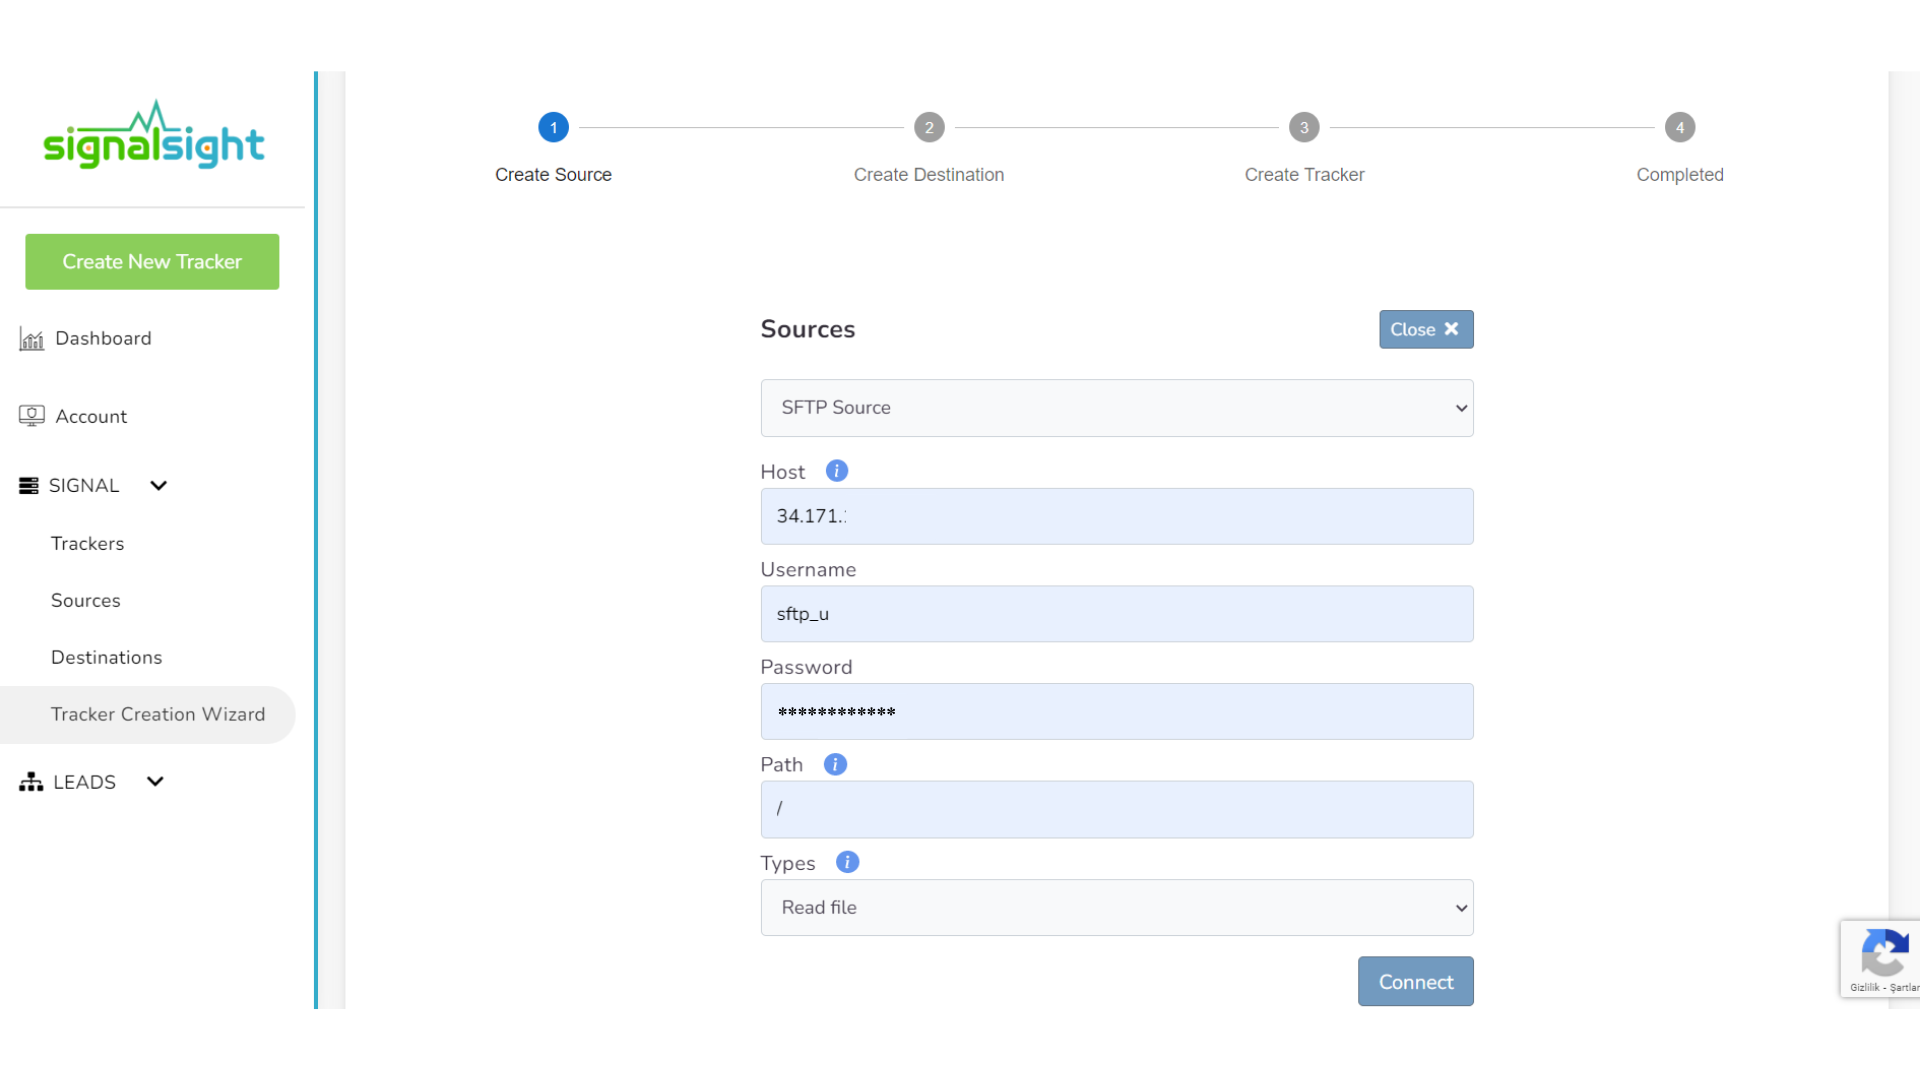
Deciding that the desired host, username, password, file path and file or directory will be read in SFTP Source and connect with the Connect button.
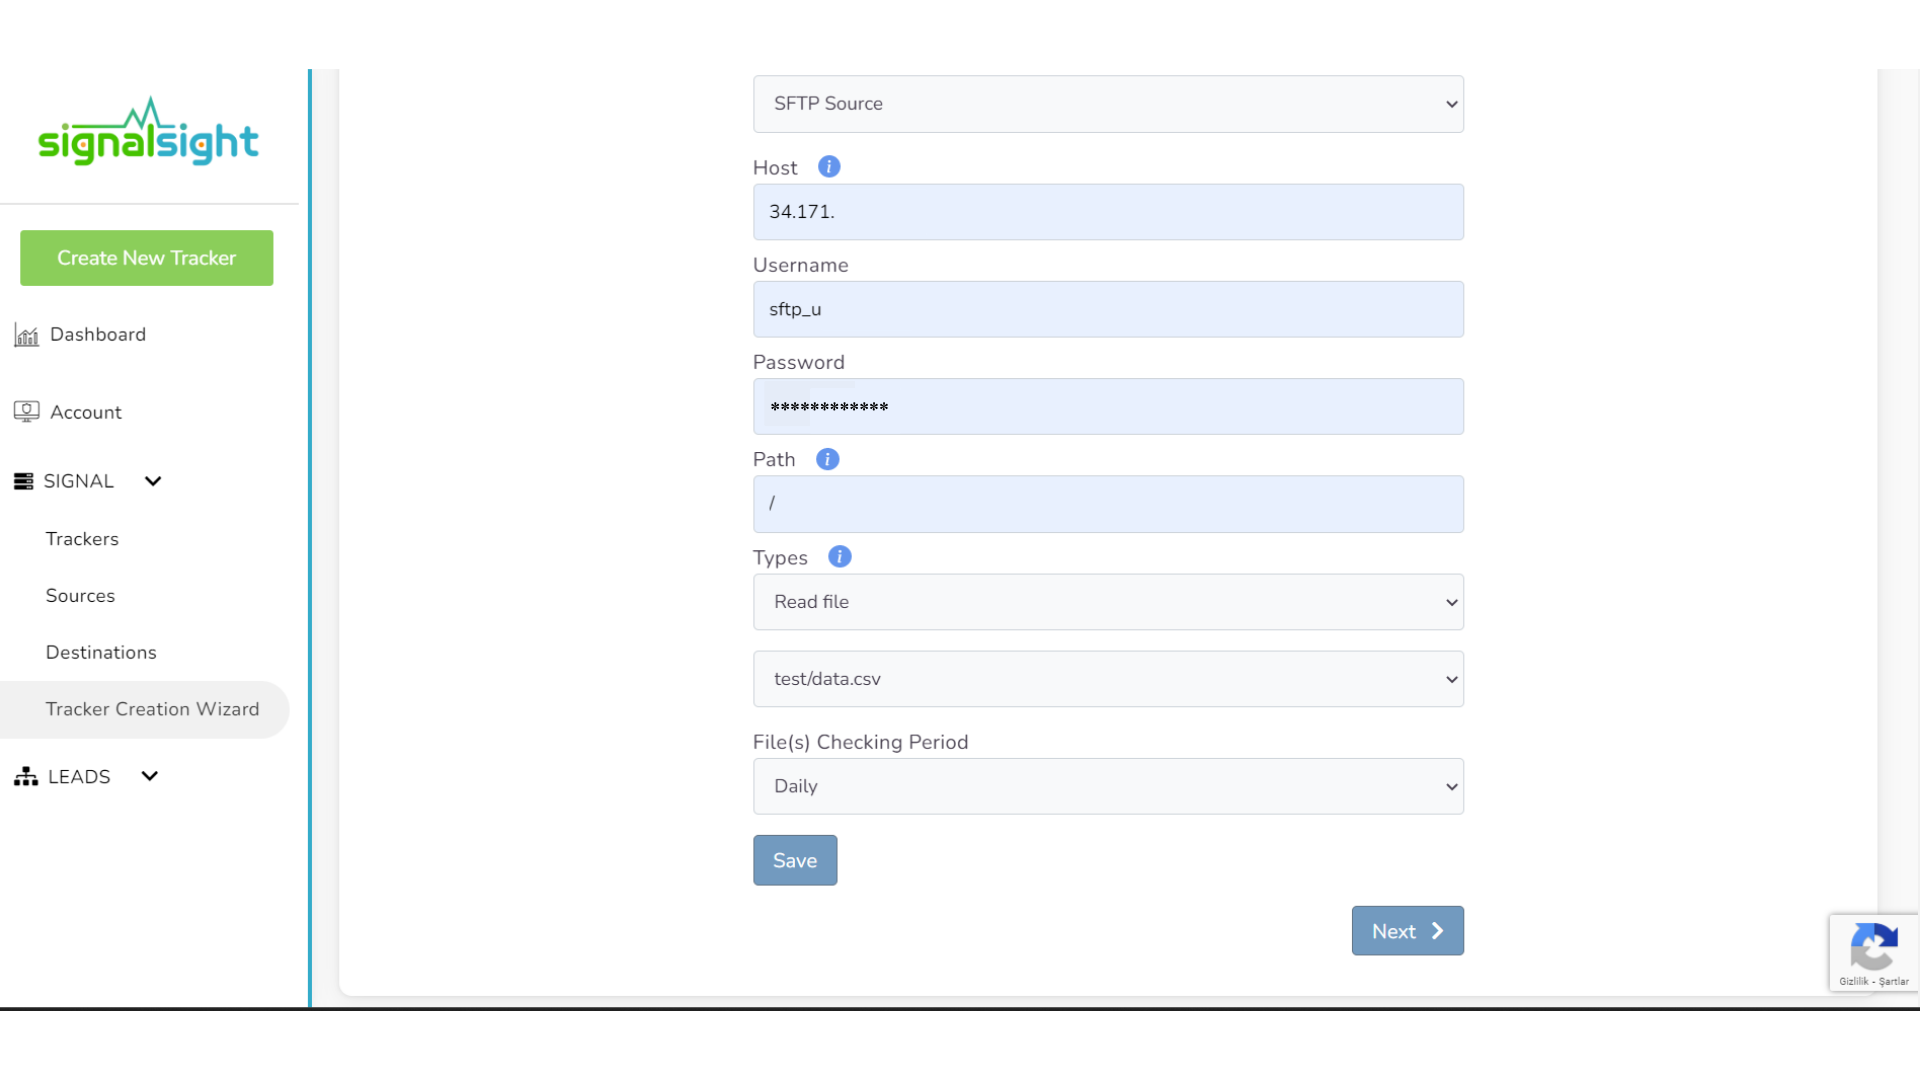
Once the connection is made, select the file name and File(s) checking period, and after saving the source, proceed to the adding destination step with the Next button.
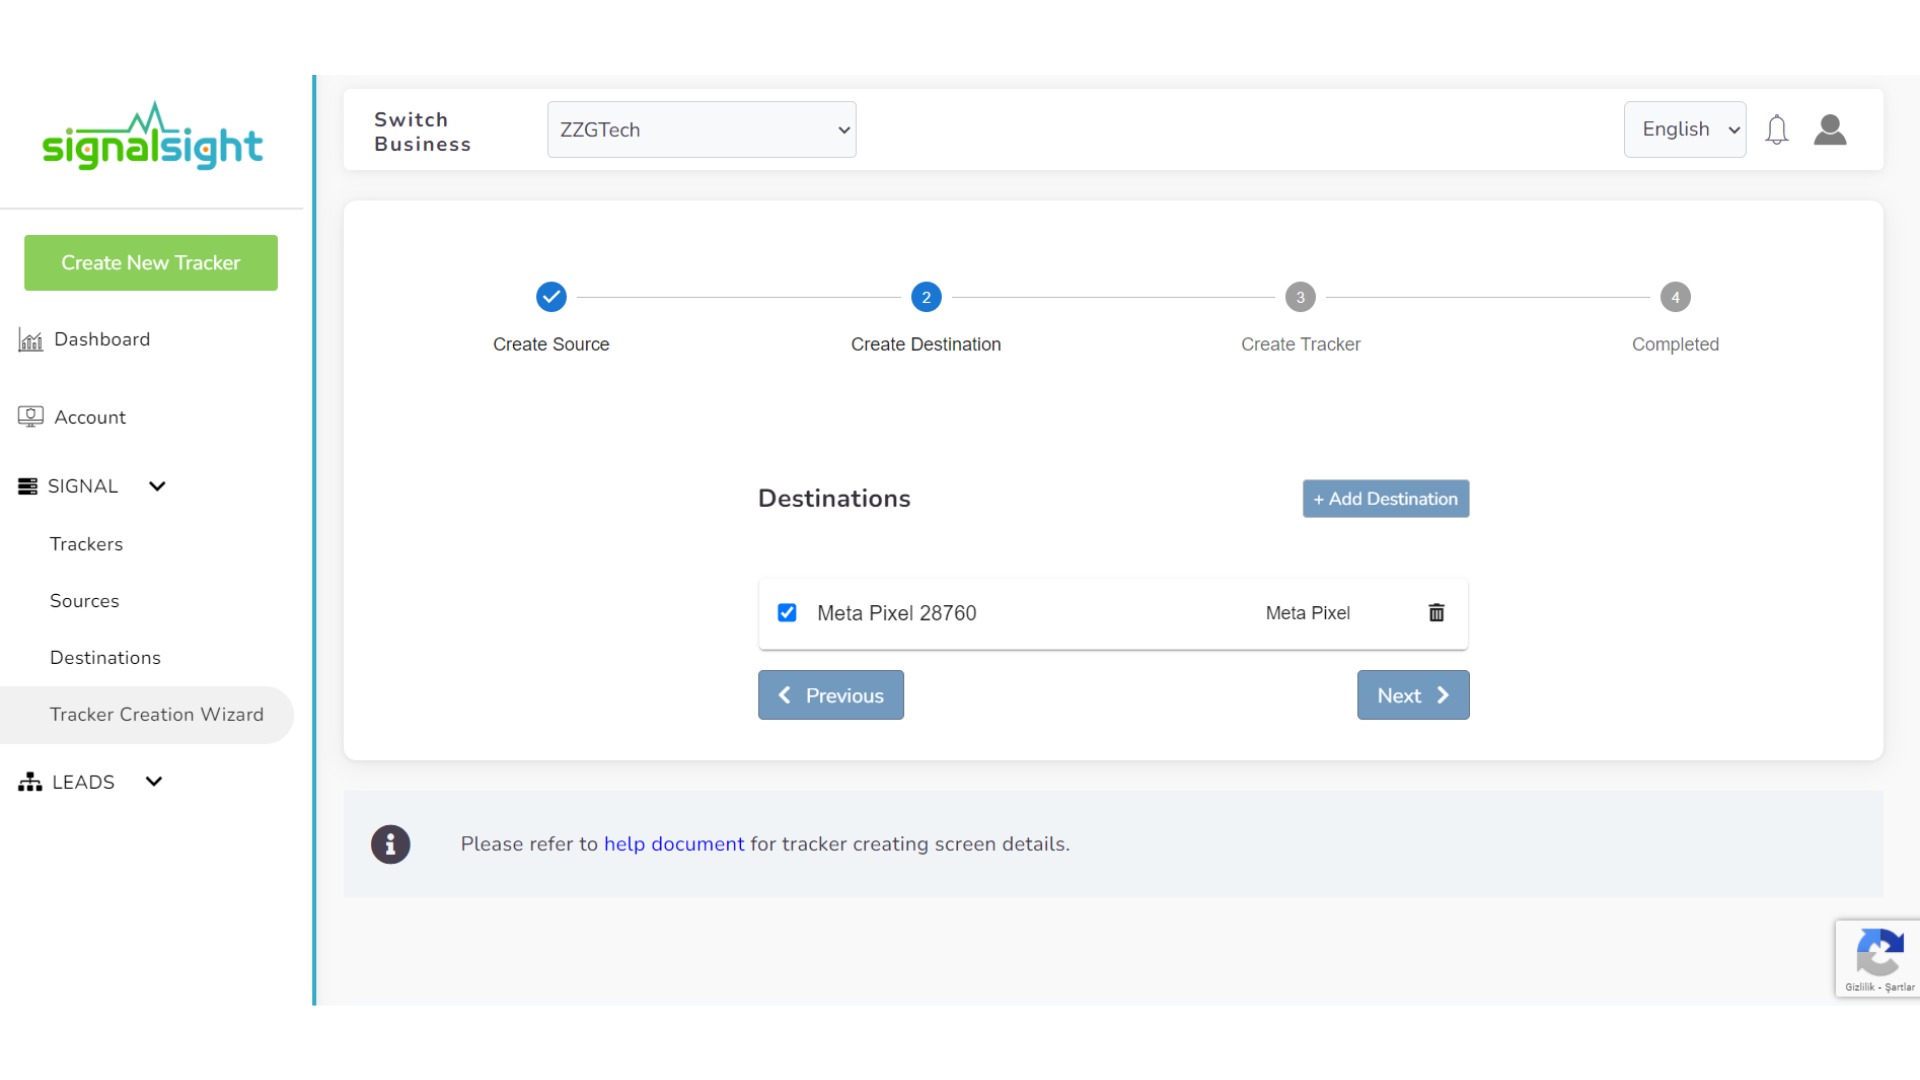
You can proceed to the next step after selecting the destination type that SingalSight has and the signal will be transmitted.
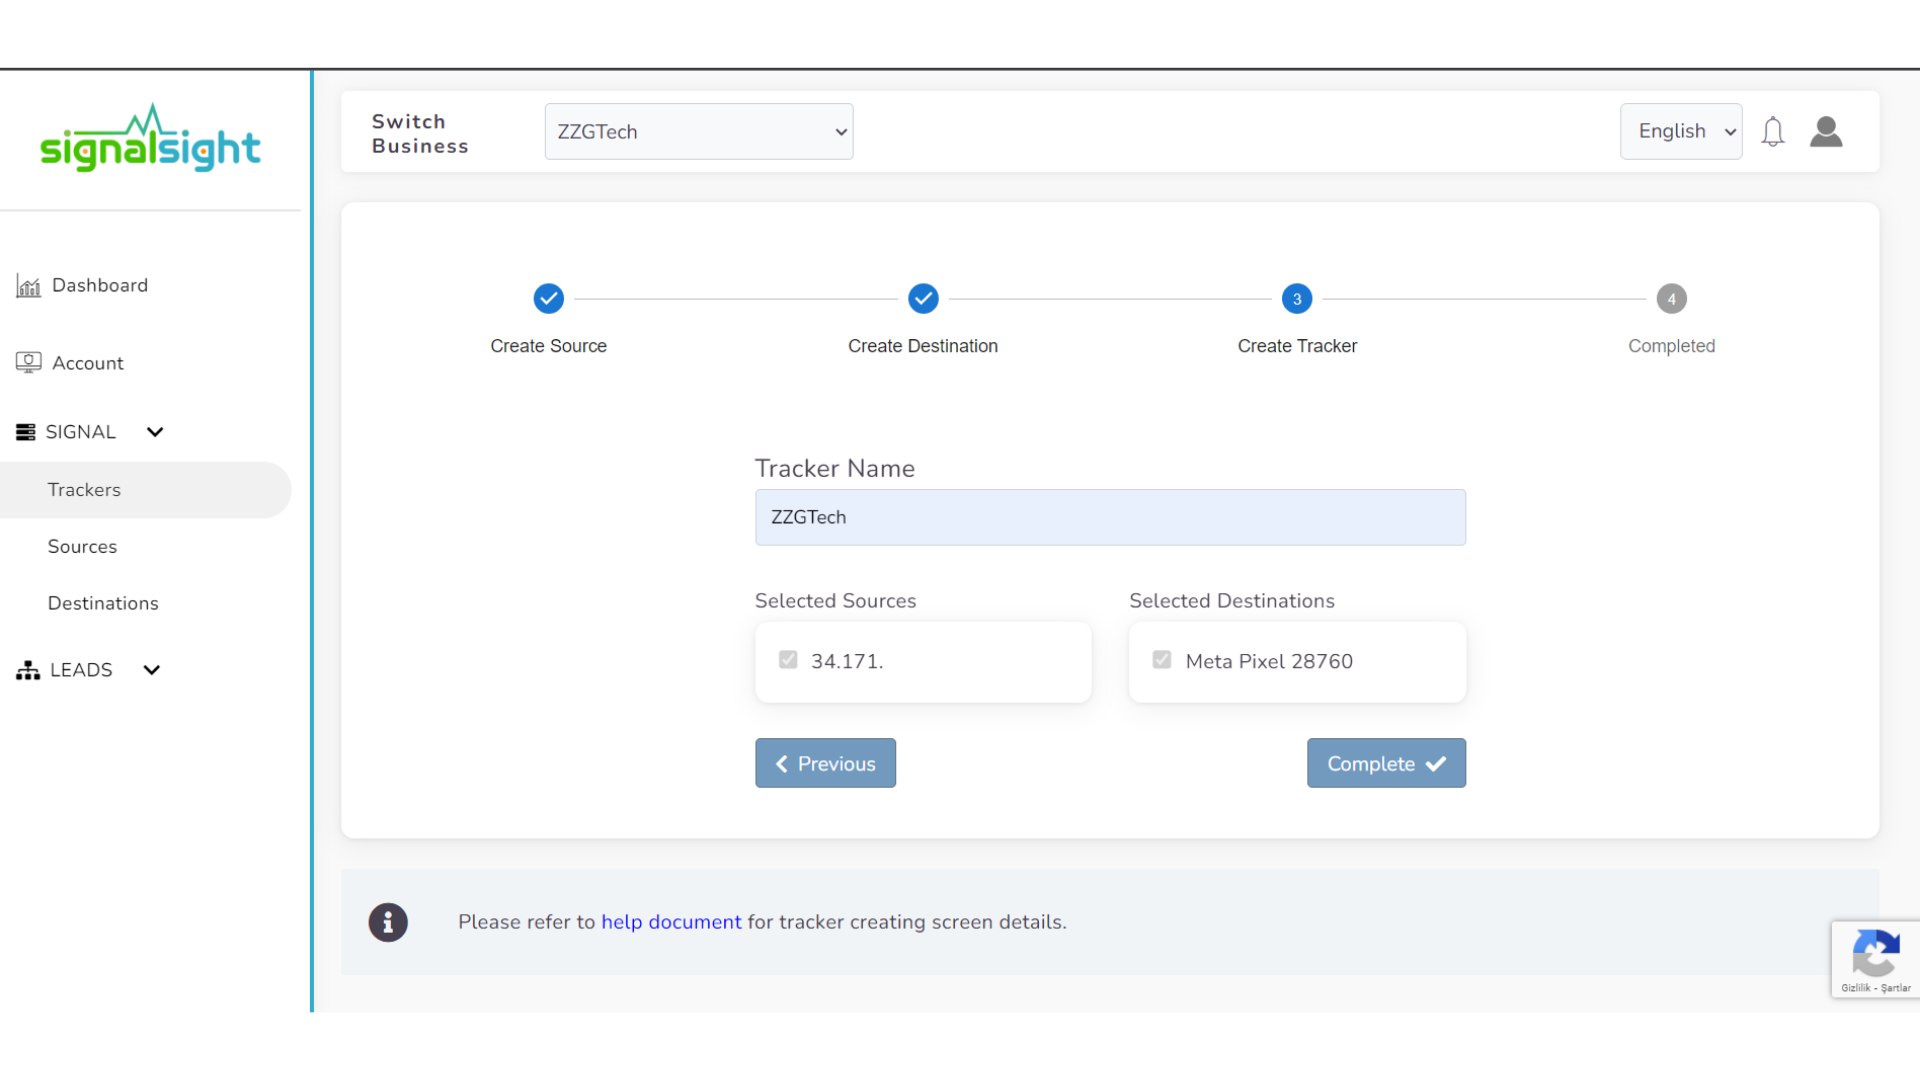
Finally, you can complete the tracker creation wizard with a name you will give to your Tracker. Now the tracker with your SFTP source is ready!

Adding SFTP to Existing Trackers
If you have a tracker on the Trackers page and you want to continue your transaction on it, click on the tracker in the list and go to its details.
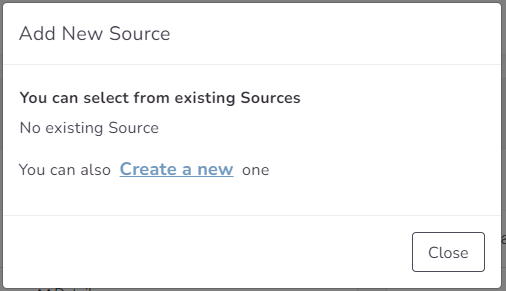
As you can see in the upper left area of this page, there is a source field. You should know that you can create multiple different types of sources. Here, you should click on the + Add New Source button and say Create a new from the pop-up screen that opens.
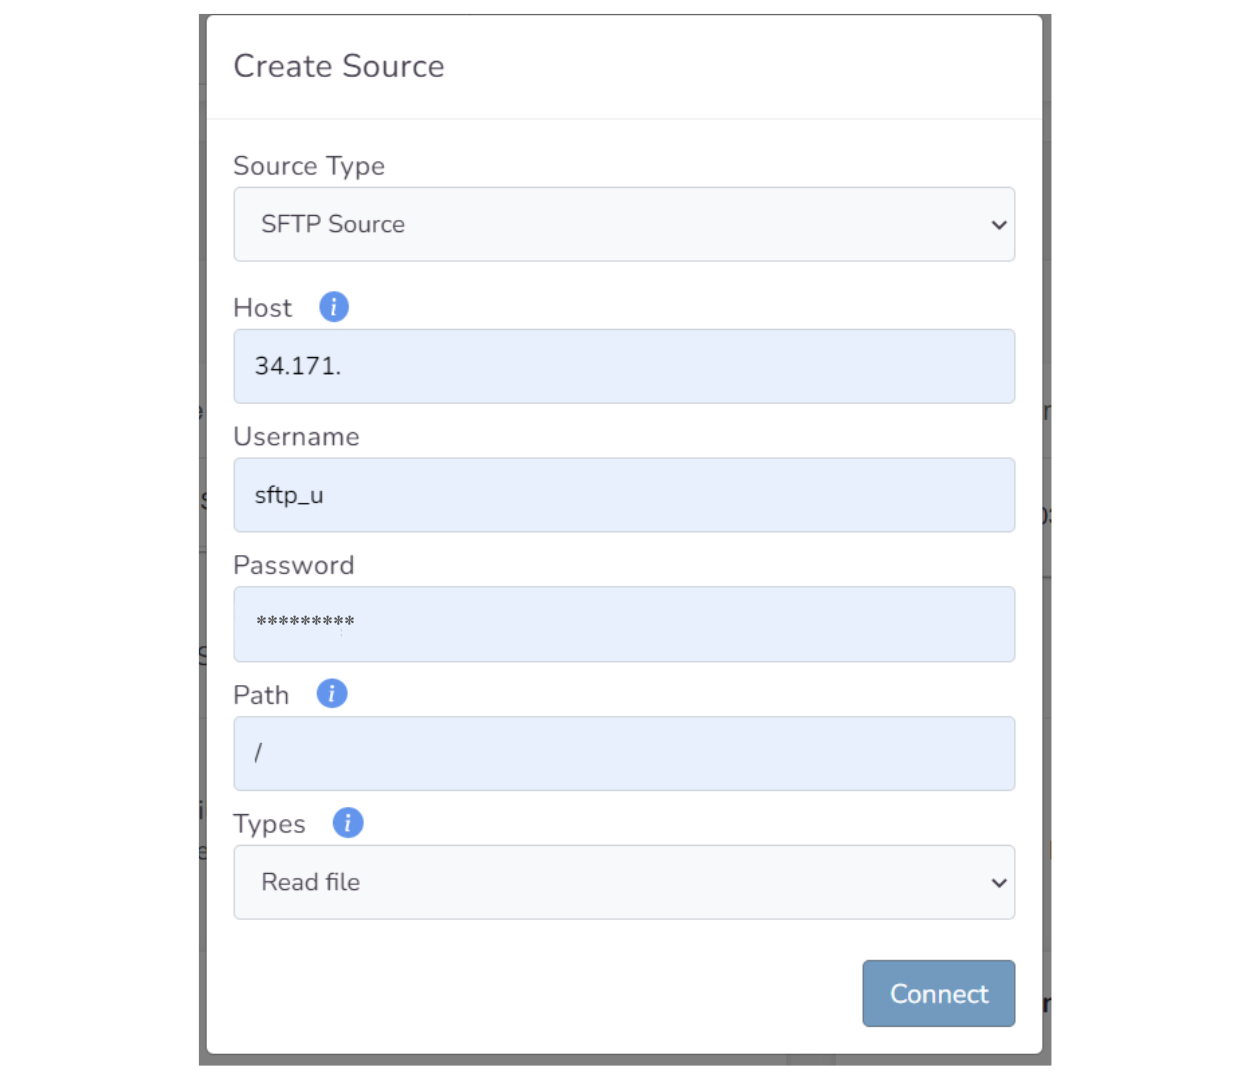
Select SFTP Source as the source type on the screen that comes up. Fill in the fields by specifying the Host, Username, Password and Path field of your file, respectively. In the last box, specify which file or directory you want to be read and click the Connect button.
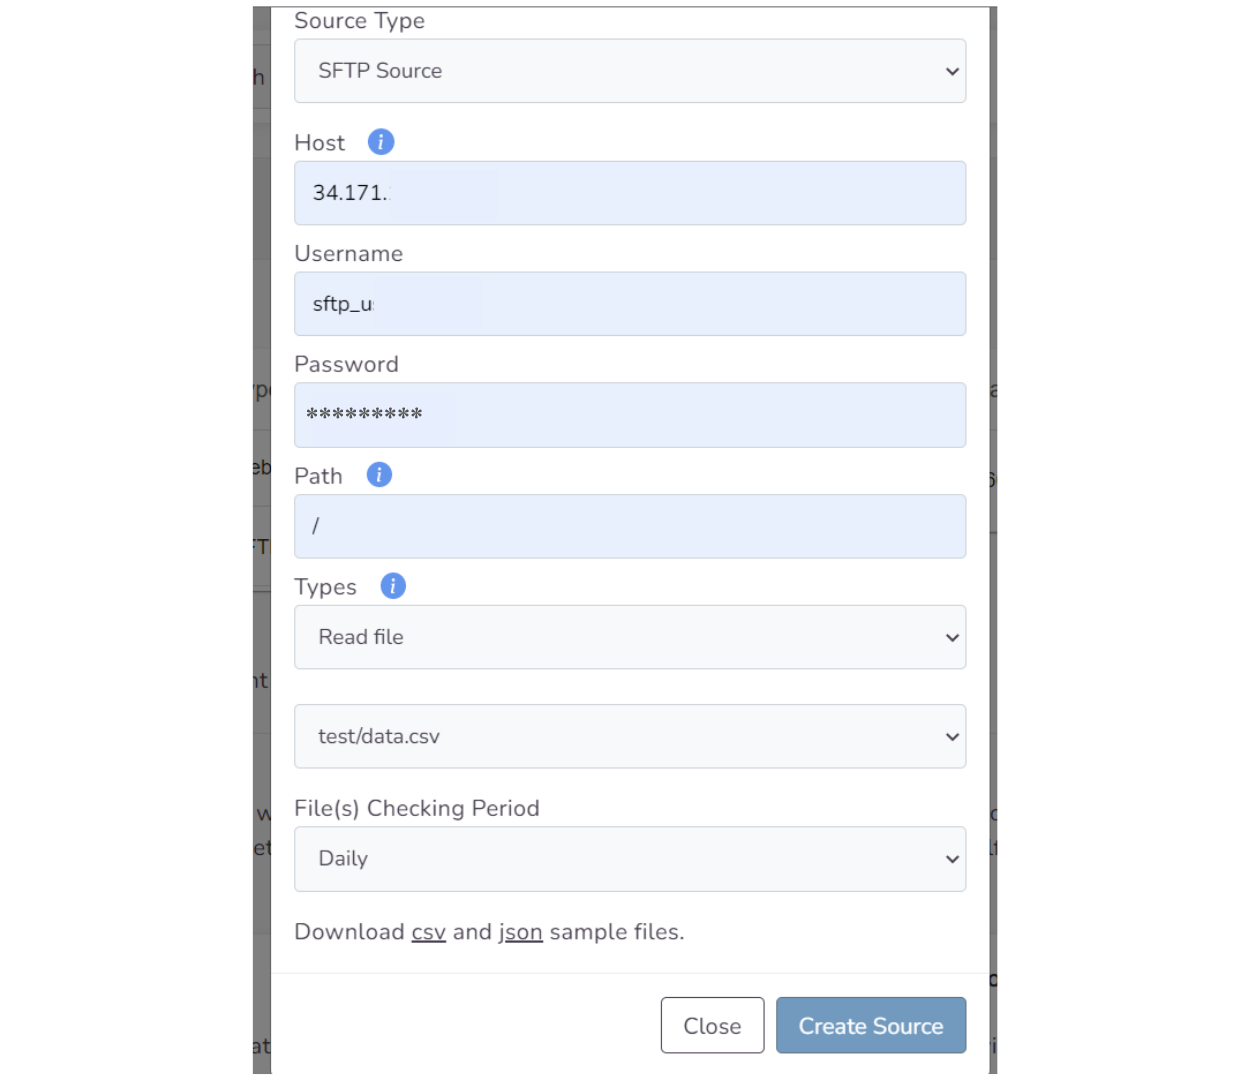
If you enter your information correctly, you will be able to access it shortly, and you can create your source by selecting the directory or file and specifying how often you want to check it. You have the option of Daily, Weekly and Monthly as the file(s) checking period.
With the source created, that's all you need to do! You have added the new SFTP Source to your Tracker. You can perform signal sending with the destination you choose.
