Facebook CAPI Setup
The better your data, the better your ads ROI!
With SignalSight, you don’t need to develop server side applications to integrate with Conversion API. No coding, no maintenance, and it’s super fast!
How to Find Pixel ID on Facebook?
To find your Pixel ID, you need to enter Events Manager. After logging into Events manager, select the Pixel you want to view from the data sources in the left-hand menu. Your Pixel ID will be displayed in the upper right corner of the screen that appears.
You can check Basic CAPI Installation for an example of the Transition Guide.
Creating a Tracker
A Tracker is an abstraction that connects one or more sources and destinations. It acts as a bridge between the source and destination, allowing the signal from the source to flow through to all connected destinations.
With the help of trackers, you can efficiently manage and monitor
your signal flows, ensuring that your data is accurately tracked and
optimized for better performance. By leveraging the functionality of
multiple trackers, you have the flexibility to establish unique
tracking configurations for diverse sources and destinations. This
allows you to effectively tailor your tracking strategies to the
specific needs of each campaign, enabling you to maximize the
accuracy and efficacy of your data collection and analysis efforts.
The tracker provides real-time insights into the performance of your
marketing campaigns. By utilizing trackers, you can have more
control over your data, leading to improved targeting, better
customer engagement, and ultimately, increased conversions.
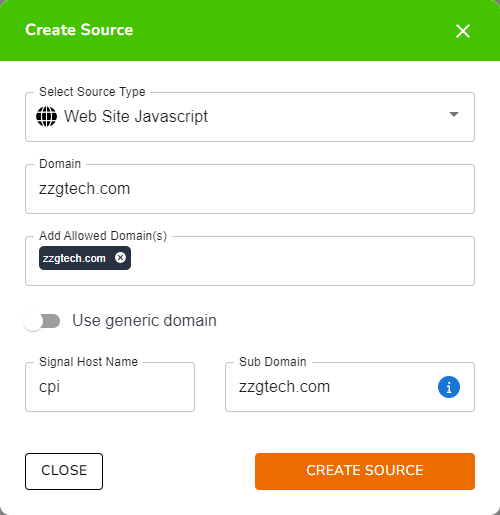
As there is no tracker present in your business account, you will be directed to the wizard screen. Here, you will be prompted to create your first source and destinations.
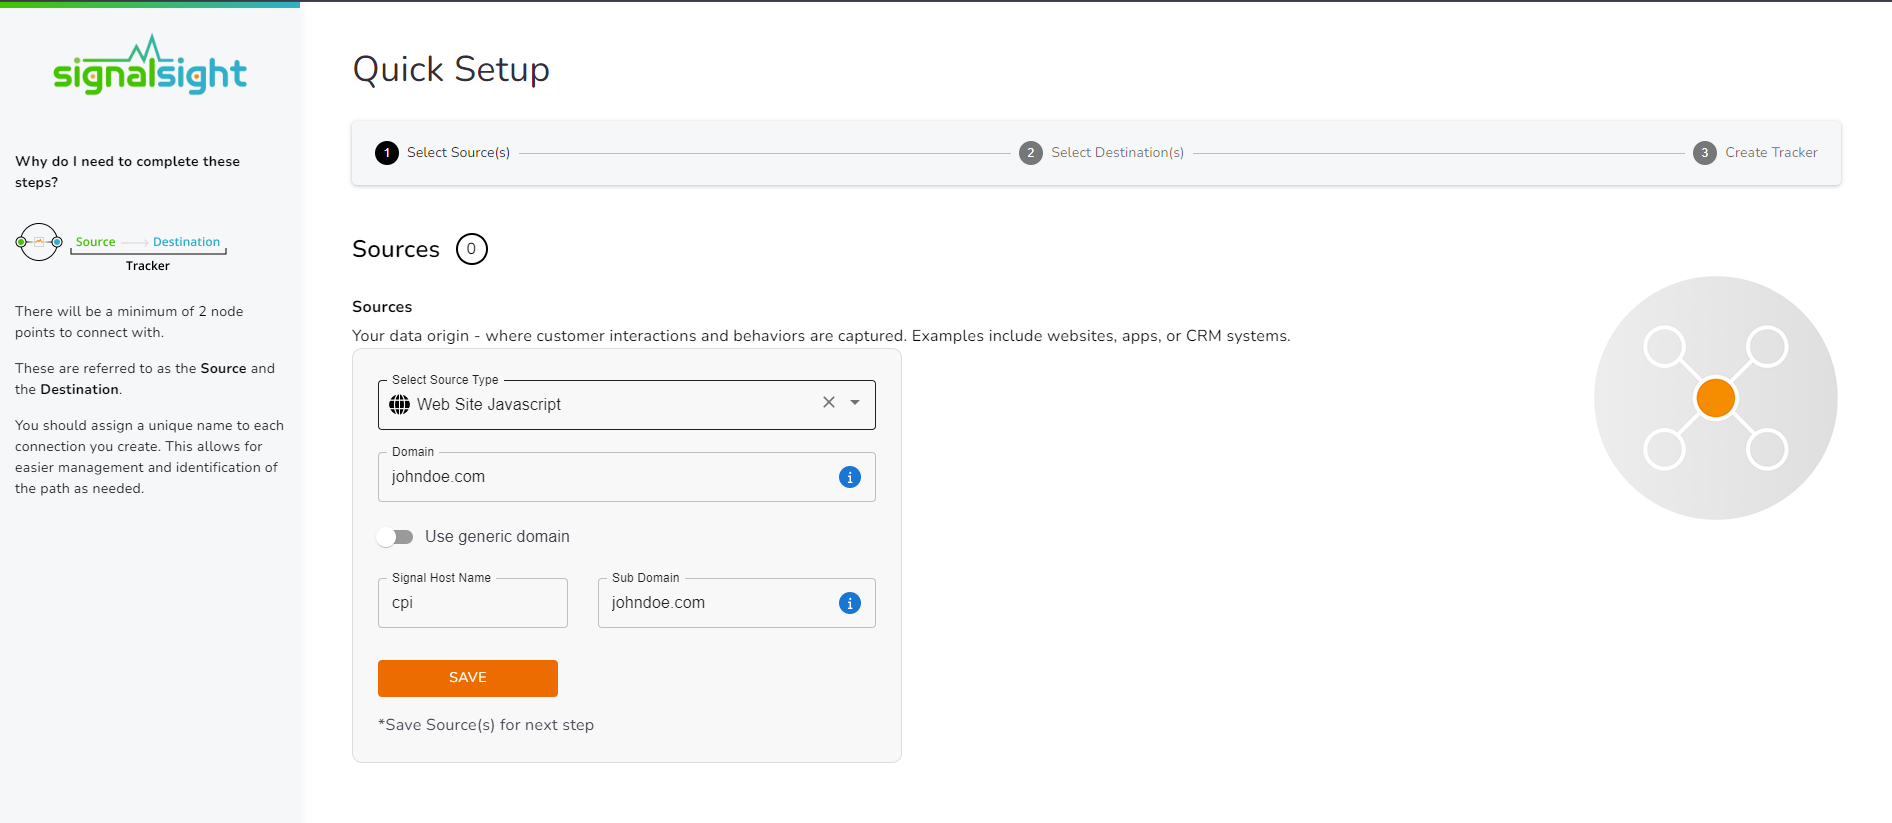
You can select the domain name on which you will implement the Conversions API. If you opt to use your own subdomain, you can proceed by providing the subdomain host name.
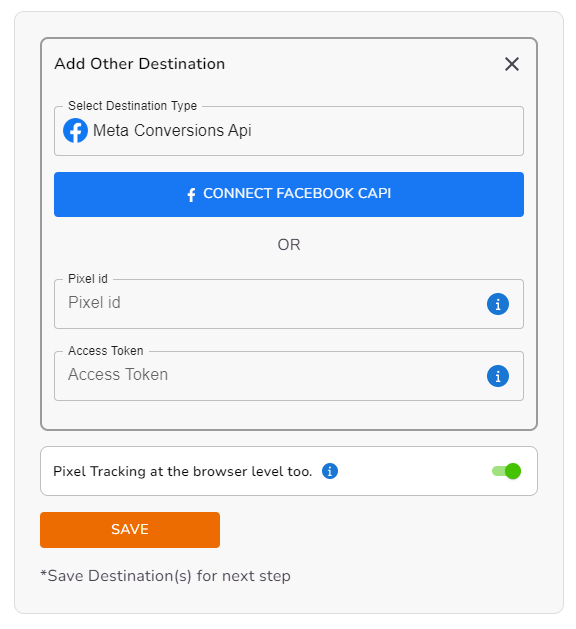
In the Destinations section, simply provide the meta pixel ID and Access Token you will use in the CAPI implementation and then save it.
The 'Pixel Tracking at the browser level too' option allows you to create both the Meta Pixel destination and the CAPI destination. As a result, you can successfully receive signals from both the browser and the server side.
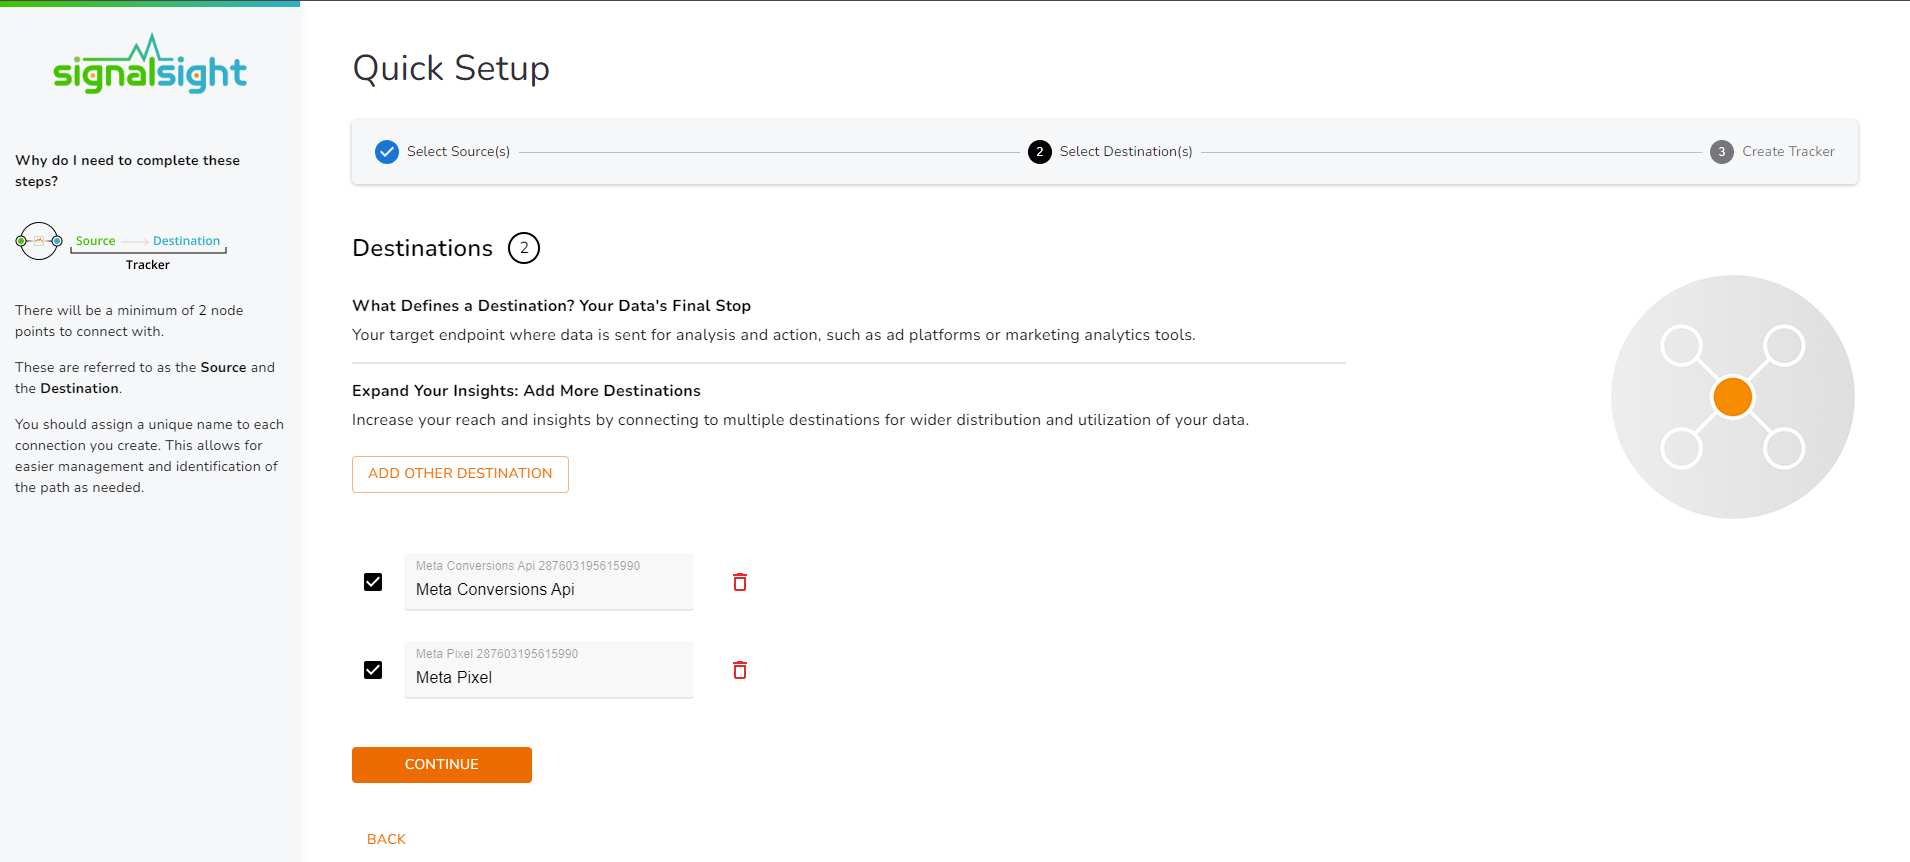
If you have successfully created Meta Pixel and Meta CAPI destinations, you can now move on from this step.
Why should you create a subdomain?
SignalSight users can improve their data resiliency by creating their own subdomain. By doing so, the user's code becomes the first party on their website, enabling them to send more signals without being obstructed by browsers and ad blockers. Using a custom subdomain enhances the efficiency of integrating SignalSight with your website compared to using a generic domain.
How to Create a Subdomain?
Here's a step-by-step guide on how to create a subdomain. Although the steps may differ in each service provider's control panel, the basis of subdomain creation remains the same.
- Log in to your domain registrar or web hosting account. This is where you purchased your domain name, and it's where you'll create your subdomain.
- Look for the "DNS Management" or "Domain Management" section. This is where you can create and manage subdomains.
- Find the option to create a new subdomain. This is usually located under a menu called "Subdomains," "DNS Records," or something similar.
- Enter the name of your subdomain in the field provided. For example, if your main domain is "example.com," you could create a subdomain called "subdomain.example.com."
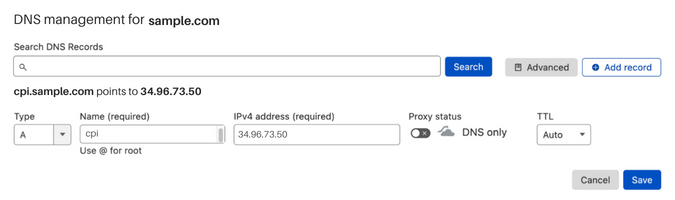
- Select the type of record you want to create. Usually, this will be an "A Record," which maps the subdomain to a specific IP address.
- Enter the IP address you want to map your subdomain to. This could be the IP address of your web server, a load balancer, or another service you're using.
- Save your changes. Depending on your domain registrar or hosting provider, you may need to wait a few minutes or hours for your subdomain to become active.
Apply your subdomain to Signalsight
After completing the process and creating your subdomain, be sure to enter the subdomain you created in the appropriate field in source when you create a tracker.
Facebook Generate Access Token
You can create acces tokens under the settings tab of the
pixel you want implement CAPI in your Business Manager account.
Step 1 - Go to your business pixel.
Step 2 - Assign a Pixel to your system user (you also have an option to create a new system user at this stage).
Step 3 - Go down to the Conversion API header and click on the "Generate access token" link.

After providing a name for your tracker, you can review the source and destination, and complete the wizard.
The tracker has been successfully created. You can now click the Continue button to go to the tracker detail screen and make additional adjustments.
The Tracker detail page is shown bellow. On this page, you can add new sources or destinations, as well as perform actions such as stopping or removing them. To implement the Conversions API code, you can use one of the two buttons at the bottom of the image. You can either use the "Send Document" button to send the document to your technical team for proper installation instructions, or you can implement it yourself using the "GTM/FRONTEND Modification Guide".
You can check Basic CAPI Installation for an example of the Transition Guide.
Consent management and data privacy
To stay compliant in regard to data protection, you should only activate script if users given consent within your Consent Management framework.