Odoo Source Guide
Odoo CRM stands as a holistic platform for managing customer relationships, simplifying interactions, consolidating customer information, and enriching communication avenues for businesses. With its intuitive interface, customizable features, and integration capabilities, it enables enterprises to effectively oversee leads, pipeline progress, and customer engagements across the entirety of the sales process.
Through Signalsight's Odoo CRM source, you gain the opportunity to leverage leads within your CRM effectively across various desired destinations, ensuring a more successful utilization of your leads.
Get Started
Firstly, we can begin by logging into your Signalsight account. If you don't have a Signalsight account yet, you can easily create one through this link. With a quick and simple wizard consisting of a few steps, you can complete the tracker.
Creating a New Tracker
To create a new tracker and harness the power of Odoo CRM with Signalsight, follow these steps sequentially:
- From the left-hand menu, navigate through Signal > Trackers.
- Click on the "Create Tracker" button located in the top-right corner to initiate the wizard.
Odoo CRM Source Creation
The first step involves creating a Source within the Signalsight platform, where we select Odoo CRM from the various available sources. To connect to Odoo CRM, we'll need the Base URL, Database, Username (Mail), and finally, the token information. If you're unsure how to obtain this information, you can refer to the section titled "How to Get Base Url, Database, and Token?" Once you've gathered this information and filled in the necessary fields, you can proceed by clicking the "Connect" button to initiate the mapping process for the source.
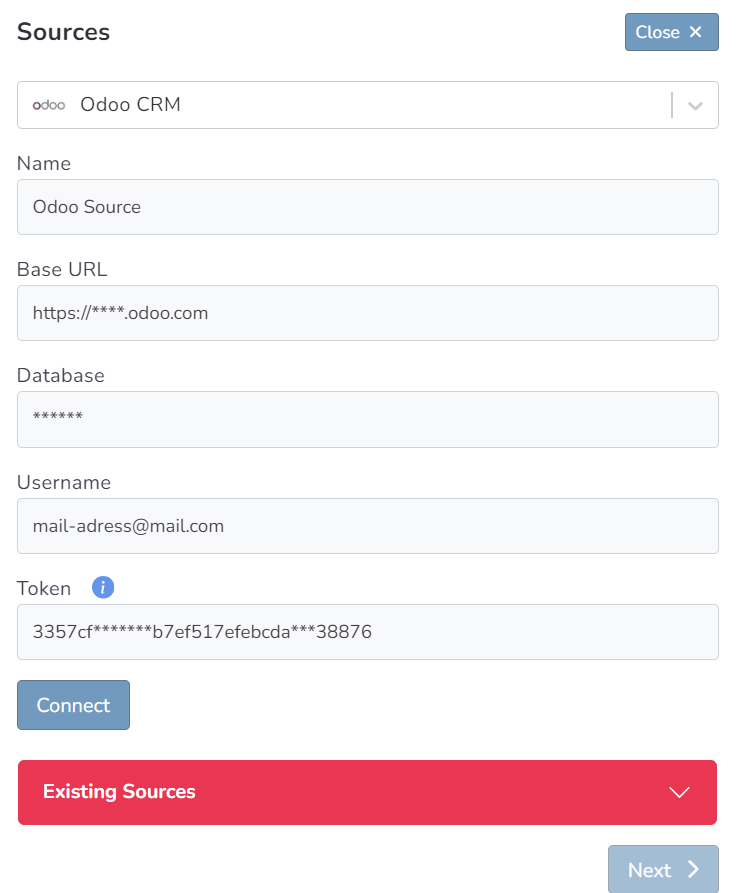
How to Get Base Url, Database and Token?
To discover your Base URL in Odoo CRM, simply log in to your Odoo account, and you can copy the initial section of the URL. So a url like https://*****.odoo.com will be your Base url.

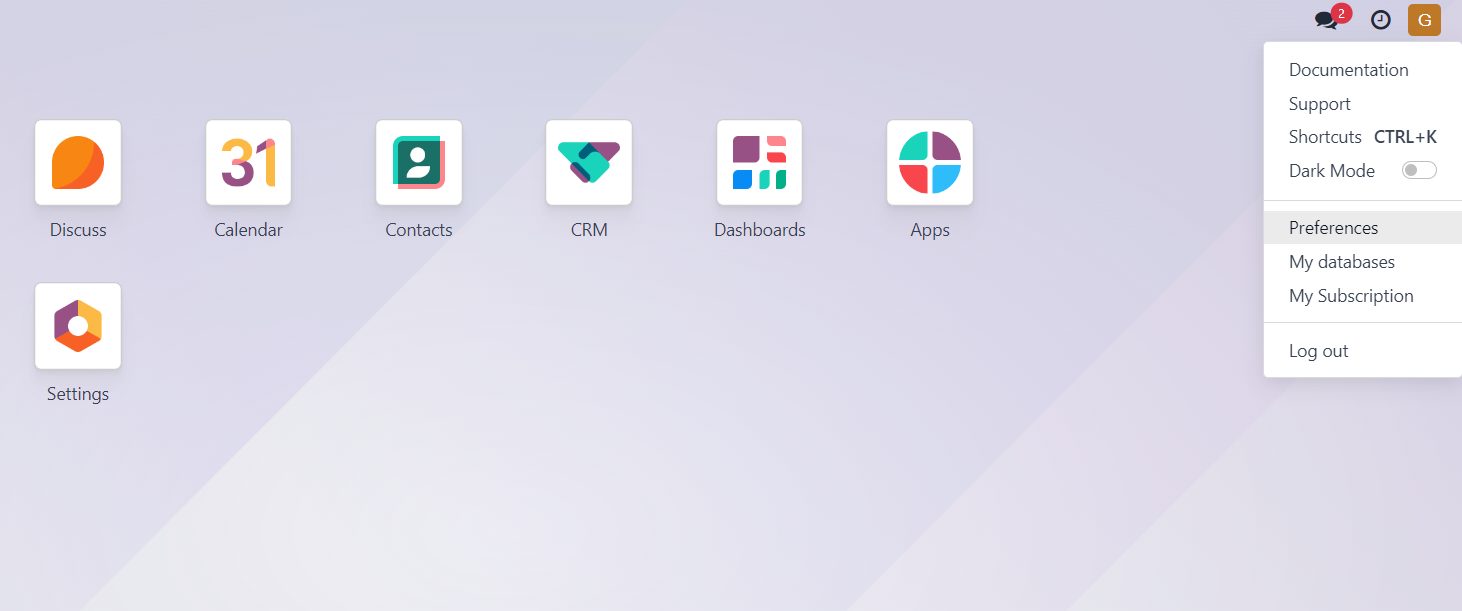
After clicking on the icon in the top right corner, navigate to the "Preferences" section in the menu to access the username and token information.
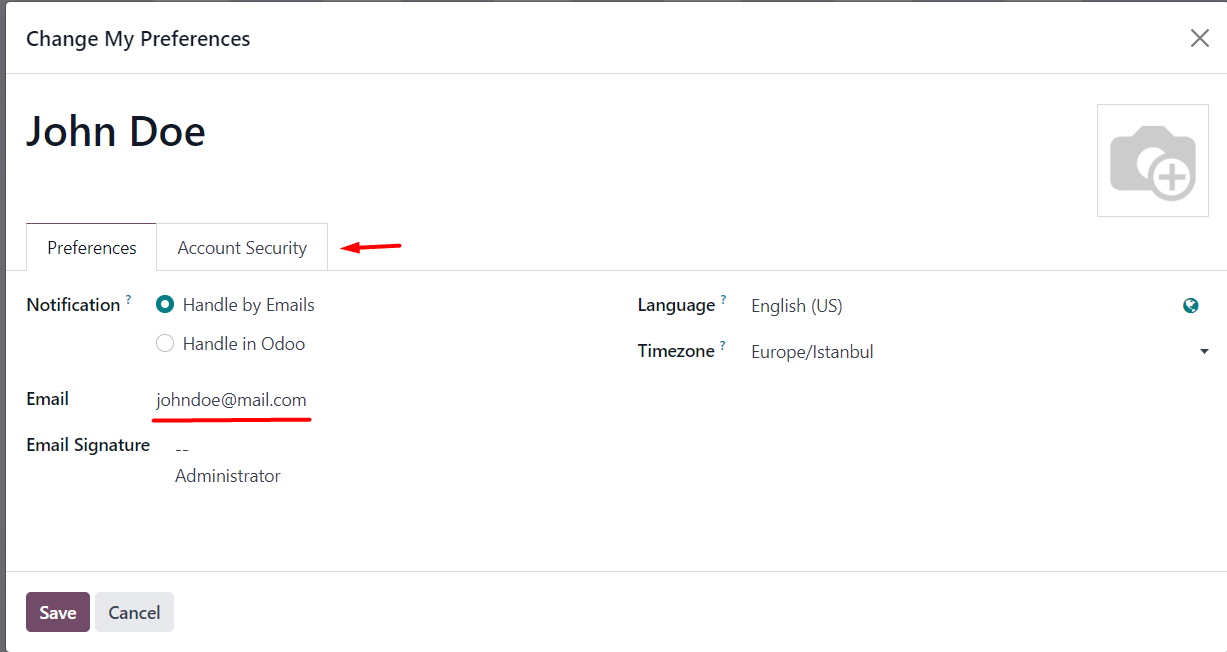
The Email information on the first screen that opens is also your Username information. For token information, go to the 2nd tab Account Security in the Preferences popup.
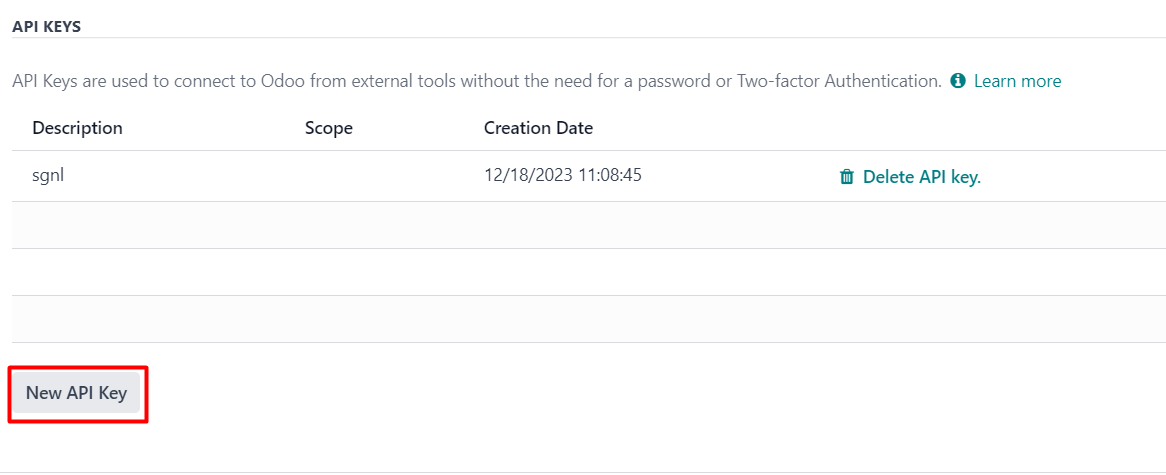
Head to the "API Keys" section under the second tab, and create a new token by using the "New API Key" button. Remember, since you won't be able to retrieve the token later, ensure you save it in a secure location. After assigning a name to the token, save it accordingly.
"My Databases" section contains your database information. Simply copy the text displayed under "your-database-name" from the screen after clicking on "My Databases" and paste it into the relevant field in Signalsight. This will provide the necessary database information.

Odoo CRM Mapping
You can leave the Prefix field empty if you prefer. In this case, transmissions will use Lead Statuses such as 'Qualified Lead' or 'Junk.' However, if you opt for the 'CRMLeads' prefix, the format will be 'CRMLeads-Junk,' following a structured naming convention. For Conversion Leads, it's crucial to ensure mapping with valid leadgen ID information.
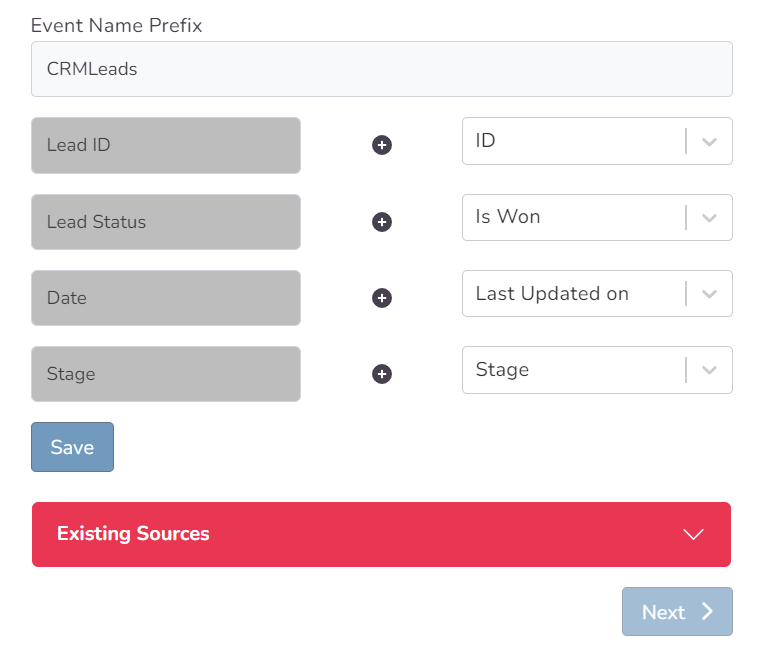
Choosing a Destination
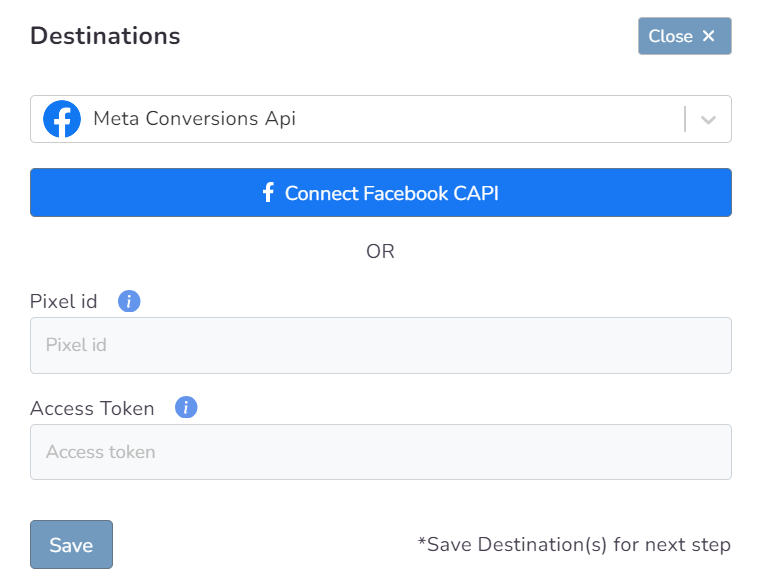
Here, you can decide which destination or destinations you'll connect to your chosen Salesforce resource. By using one or multiple destinations simultaneously, you can easily enhance your functionality. Once you've filled in the relevant fields for your chosen destination (or used automatic setup if available), complete the destination step to proceed to the next stage.
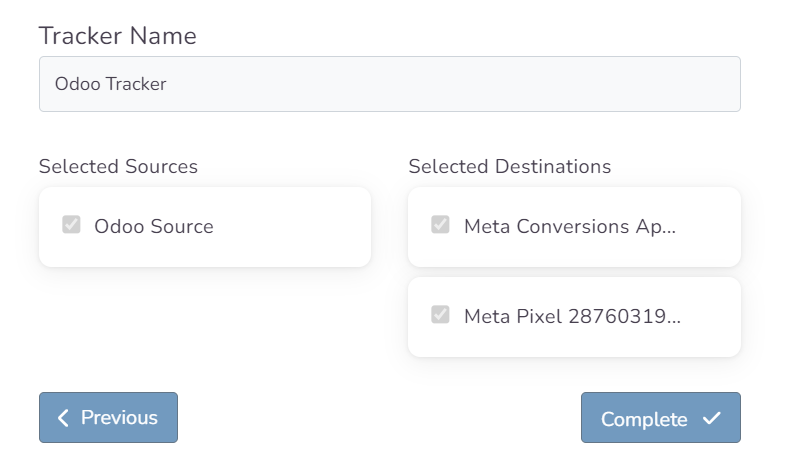
In this step of the Wizard, you can give your tracker a name, view the selected source and destination just below, browse the summary, and complete the process.
With the completion of the tracker, you can view your source and destination on the tracker detail screen.

You can enter your Tracker at any time to update the mapping you've done in your CRM source, view data history with the history feature. However, you should not forget that organizing mapping for advertisements whose learning process has been completed may cause this learning process to start over again. Additionally, with the "Edit Mapping" you can not only update the mapping but also modify the CRMLeads prefix that will precede your event names. Through the testing feature, it displays an example lead data if there's been a lead generated within the last 7 days.
