Snapchat CAPI Setup
With its range of various apps, SignalSight allows you to enhance your conversions across multiple platforms by supporting multiple sources and destinations. Furthermore, it provides the capability to send events containing user parameters, without duplication, from the server for numerous advertising platforms.

Get Started
To activate the Snapchat CAPI process, you first need to log in to Signalsight.io. If you don't have an account yet, you can create one at https://console.signalsight.io/dash/login?service=free and then set up your business.
Once logged in, you will be presented with the dashboard screen. If you have already created a tracker, you can include Snapchat Pixel and CAPI as new destinations for that tracker. Alternatively, you can create a new tracker to solely leverage the power of Snapchat CAPI.
Setting up Snapchat CAPI in a New Tracker
If you want to proceed with incorporating Snapchat CAPI setup in a new tracker, you can access the Tracker Creation Wizard by selecting "Trackers" from the left menu and then clicking on "Create Tracker". Alternatively, you can directly click on the "Tracker Creation Wizard" option.
Creating Source
In the Tracker Creation Wizard, the first step is to create a source. Here, by selecting "Web Site JavaScript" in the traditional setup, you can take advantage of the benefits of server-side CAPI for activities on your website.

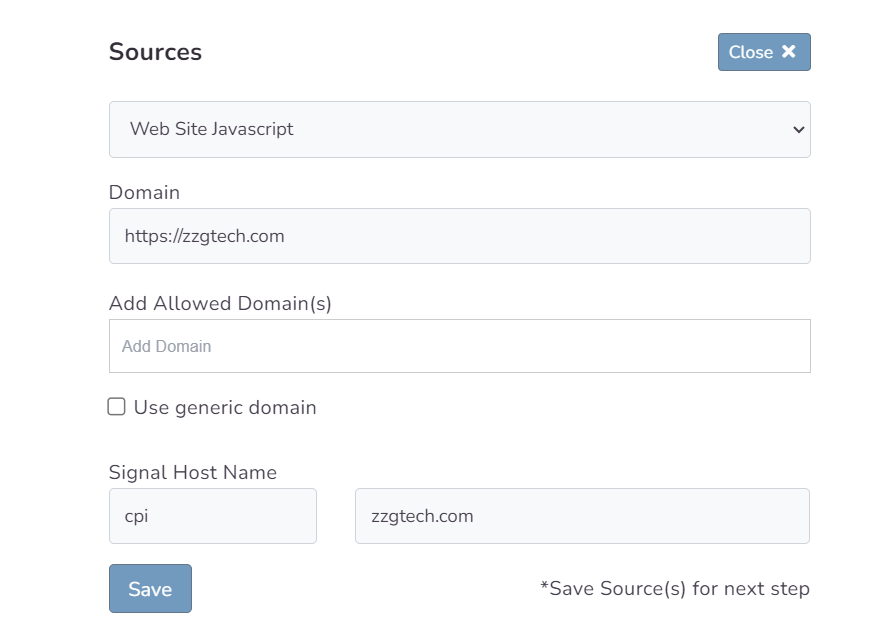
The option "Use generic domain" allows you to quickly perform the setup using a domain specifically assigned to you without making DNS adjustments. Alternatively, you can disable "Use generic domain" and provide a custom domain entry as an alternative.
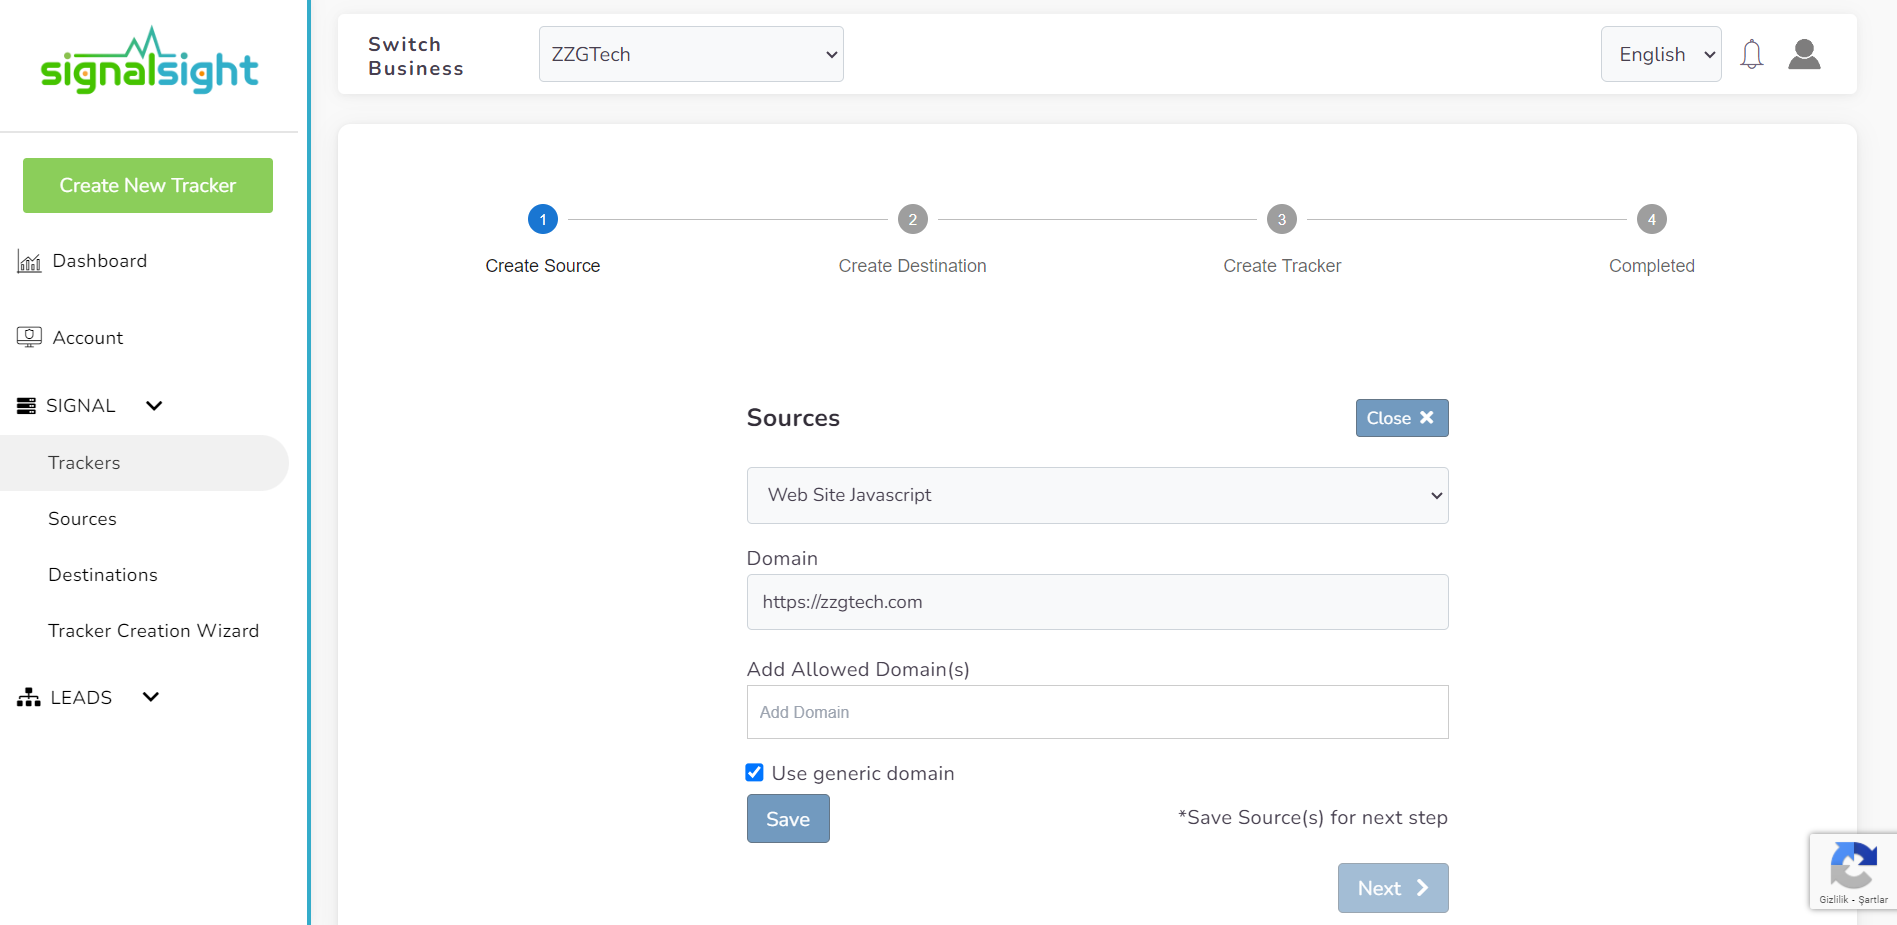
Note: It is recommended to use a custom domain for better and more efficient setup. Additionally, please ensure that you have correctly set up your DNS settings as provided or will be provided to you.

Once you have completed the source creation process, you can proceed to the next step by clicking on the "Save" button, followed by the "Next" button.
Creating Snap Destinations
After creating the source, in the second step, you can select the Snap Pixel from the list of destinations offered by SignalSight. Then, you will provide the Pixel ID for the Snapchat CAPI setup that you wish to perform.
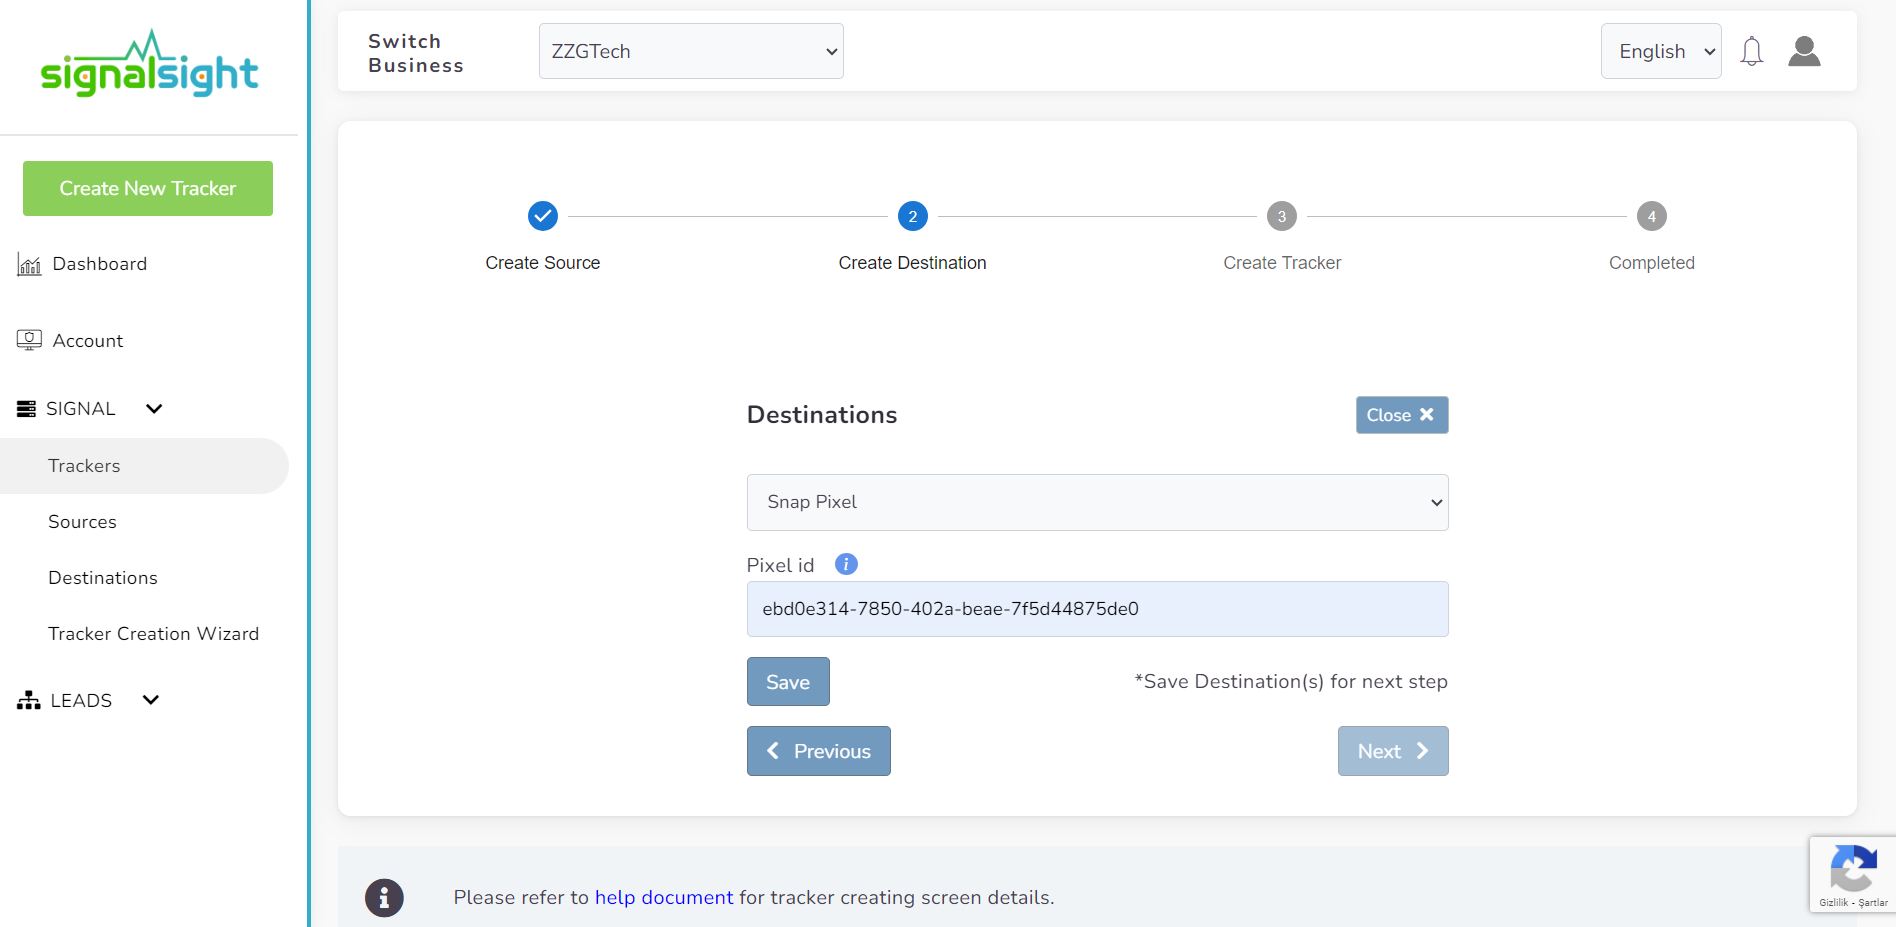
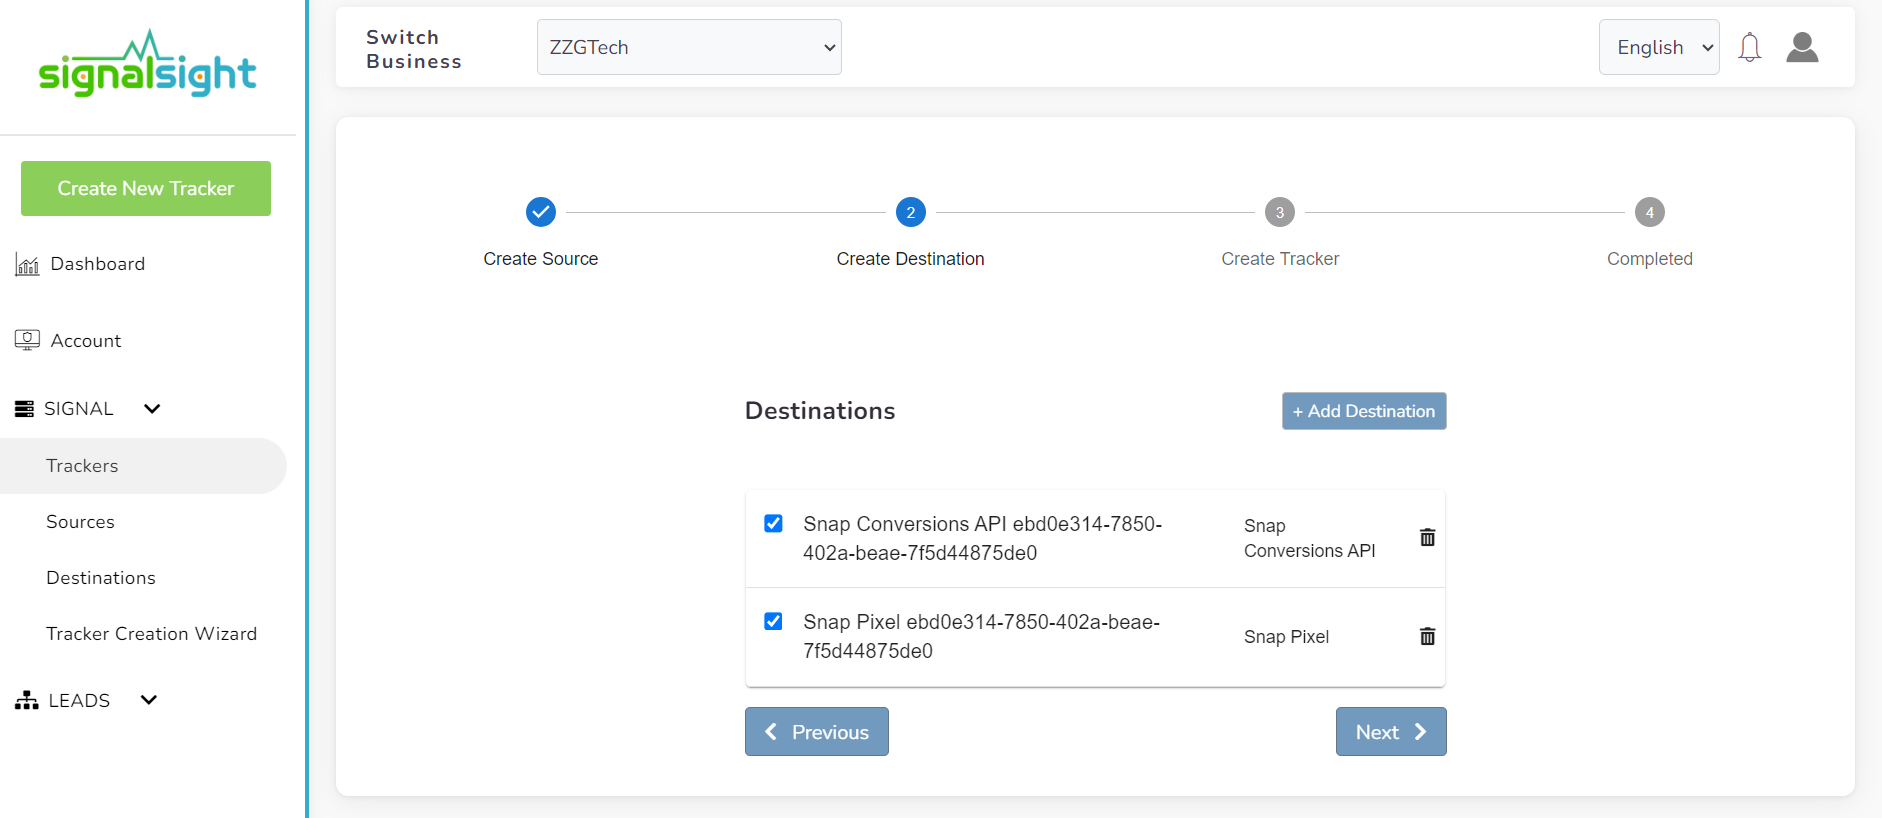
After entering the Pixel ID and clicking "Save" you will be presented with a screen similar to the one below. Since we are not only setting up the Snap Pixel but also configuring CAPI, click on the "+ Add Destination" button.
If you want to learn what your Pixel ID is, you can get help from this heading.
After selecting the Snapchat Conversions API destination, entering the Pixel ID and access token information, and saving the settings, both of our destinations are now ready to be included in the tracker. Clicking "Next" will take us to the tracker customization screen.
To learn how to generate an access token, you can refer to this heading.
In the 3rd step of the wizard, you can give a name to the tracker and view a summary of the tracker, including the source and destinations. By clicking the "Complete" button, you can finish the wizard and proceed to the tracker details page.
On this screen, you can add or remove different sources and destinations at any time according to your needs.
How to Find Your Pixel ID on Snapchat
As the first step, you should go to the Snapchat Ads Manager page and log in. This will take you to your dashboard screen. From the top left corner of the dashboard, click on "Manage Ads", then navigate to "Assets", and select "Pixels".
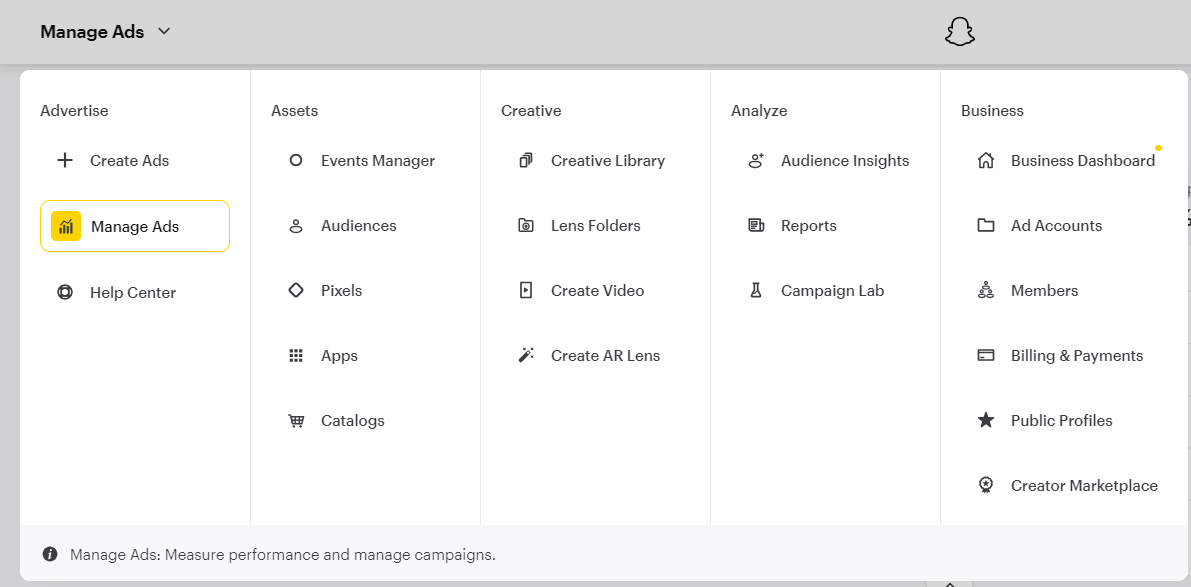
Here, you can browse through your pixels and view the associated Pixel IDs.

How to Generate an Access Token on Snapchat
To create Snapchat CAPI as a destination in SignalSight, you need the Pixel ID and Access Token information. To generate an access token in Snapchat, you can follow the steps below in order.
- Log in to Ads Manager. Then click the menu in the top corner and select Business Details.
- Once on this page, under the OAuth App section, you will now see a new section called the Conversions API Tokens. Here you can click on the Generate Token button to generate a new token.
- You can copy the generated Snapchat access token and use it during the destination creation step in SignalSight.
Adding Snapchat CAPI to an Already Existing Tracker
In SignalSight, trackers have the flexibility to use various sources and destinations simultaneously. In this regard, you can add multiple sources to Snapchat CAPI and include multiple destinations like Snapchat CAPI from a single source as well. If you have a tracker in SignalSight and you want to add a new destination, click on "Trackers" under the "SIGNAL" section in the left menu.

Click on the tracker to which you want to add Snapchat CAPI from the Trackers page. This will take you to the tracker detail screen.
On the tracker detail screen, you can create new sources and destinations, as well as add or remove previously created sources and destinations from the list, according to your needs.
To benefit from Snapchat CAPI integration, you need to add both Snapchat Pixel and Snapchat Conversions API destinations. Therefore, click on the "Add New Destination" button located under the destinations section.
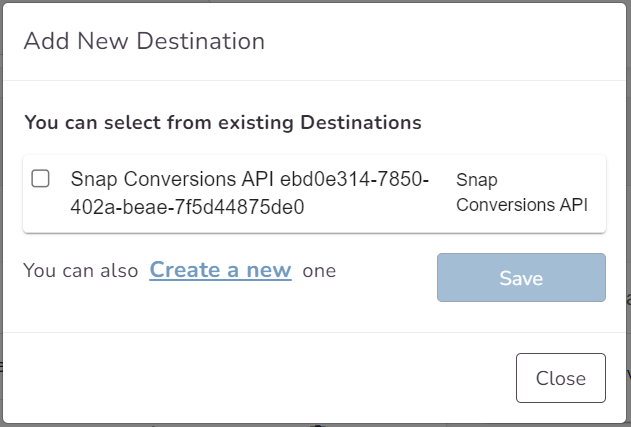
In the opened popup, you can see your previously created sources and select them from the list. If the destination you are looking for is not in the list or if you want to add more destinations, you can click on "Create a new" to create a new destination.
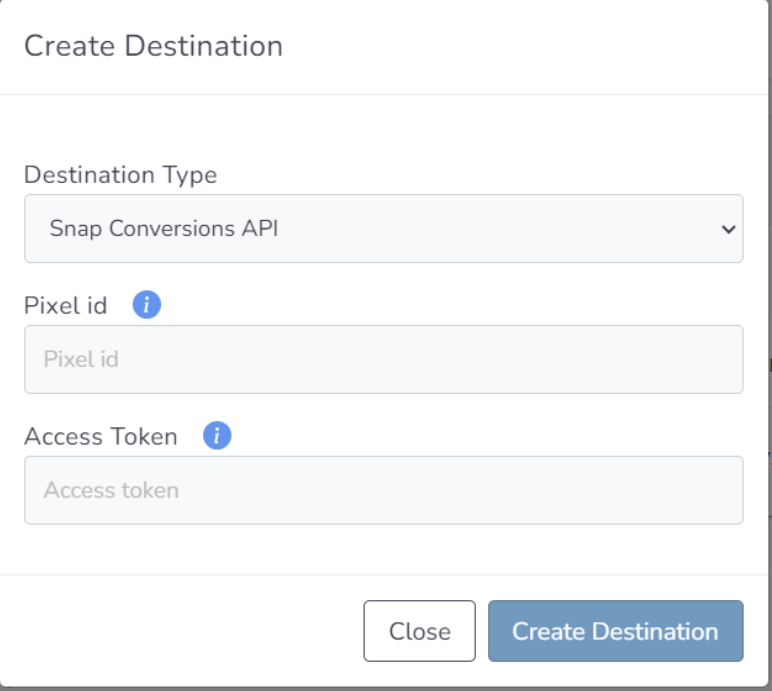
You select "Snap Pixel" as the Destination Type and enter the Pixel ID. Then, you repeat the same steps to create "Snap Conversions API" as the next destination. Here, the Pixel ID and Access Token information will be required. You can obtain these details from your Snapchat account.
Congratulations! You have successfully added Snapchat integration to your tracker. You can now take advantage of the benefits brought by Snapchat CAPI.
GTM/Frontend Code Activation Transactions
Caution! Familiarity with Tag Manager is necessary for this step. If you are not the designated tag manager, please seek assistance from the appropriate parties.
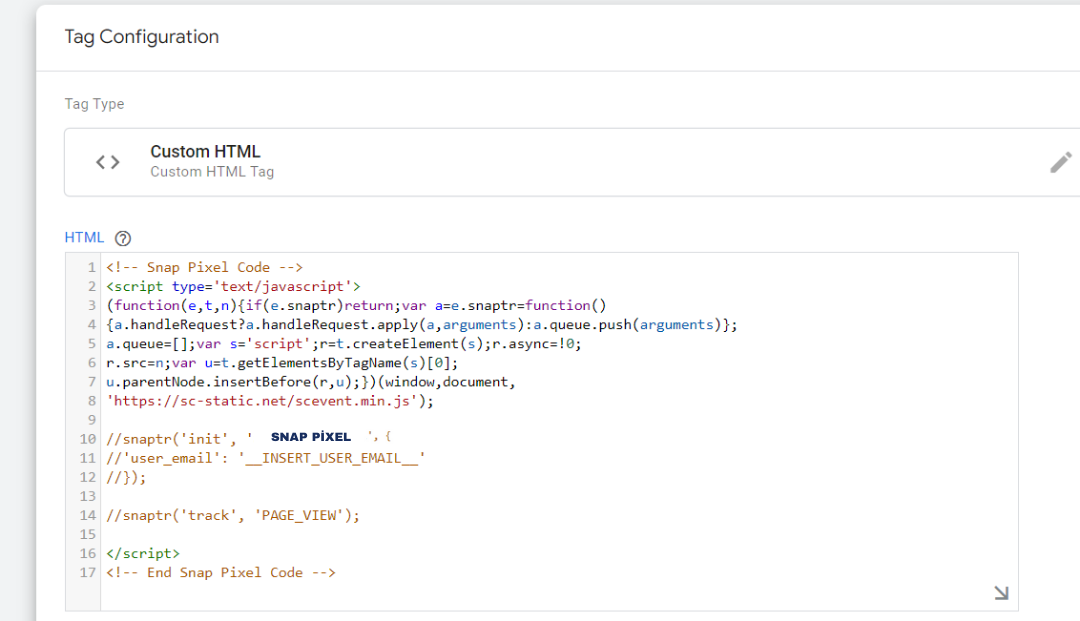
To view your Snapchat tags, navigate to your Tag Manager application and search for Snapchat tag (snaptr).
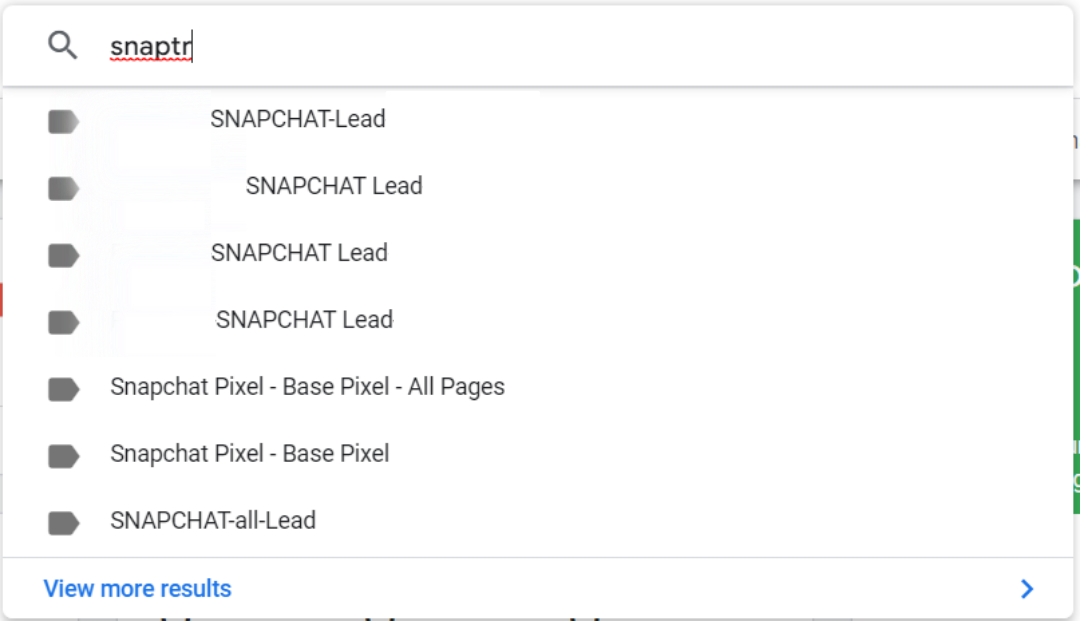
Please comment out the two lines starting with "snaptr" in the Snapchat Base code tag by adding "//" at the beginning of each line, and then click the "Save" button.
Stop all your other Snapchat tags by going into detail and clicking the "Pause" button on Tag Manager.
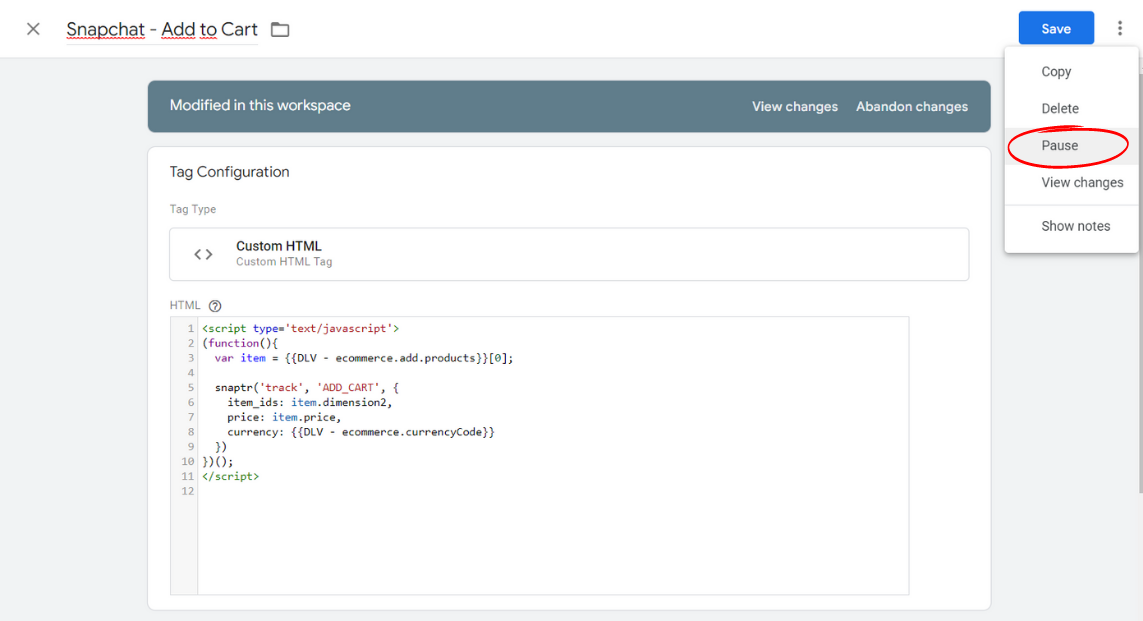
Signalsight - Activating Snap Script
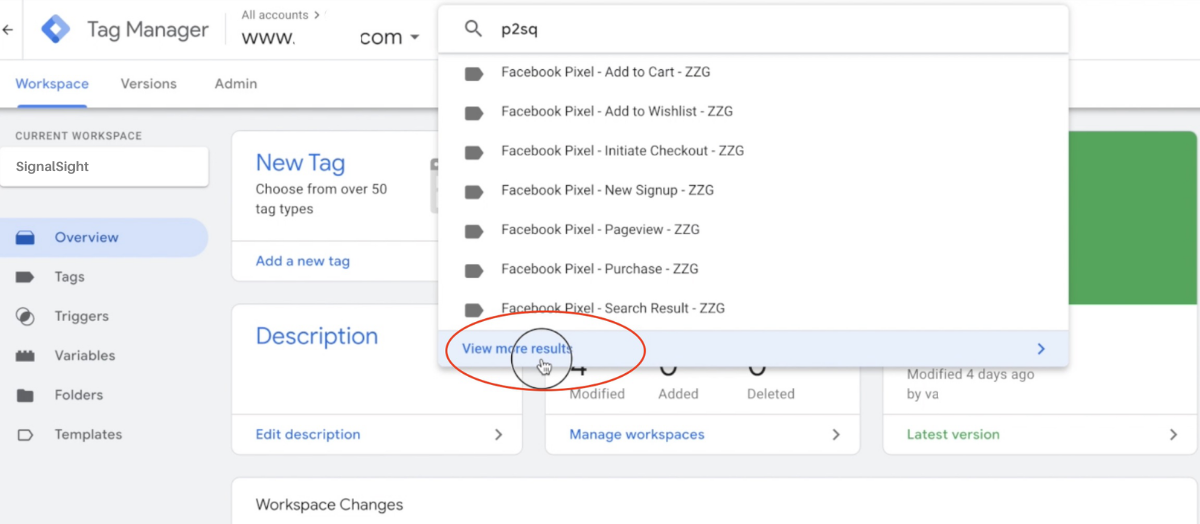
Locate your active Signalsight tags by searching for "p2sq" on the Tag Manager screen. To view all tags containing "p2sq" click the "View more results" button.
 Verify that your Snap CAPI events are activated by clicking the "Preview" button, to confirm that the modifications you have made on the tag manager screen are accurate.

In the line where the Signalsight loader code is loaded, add the phrase “-sc” after the version number.

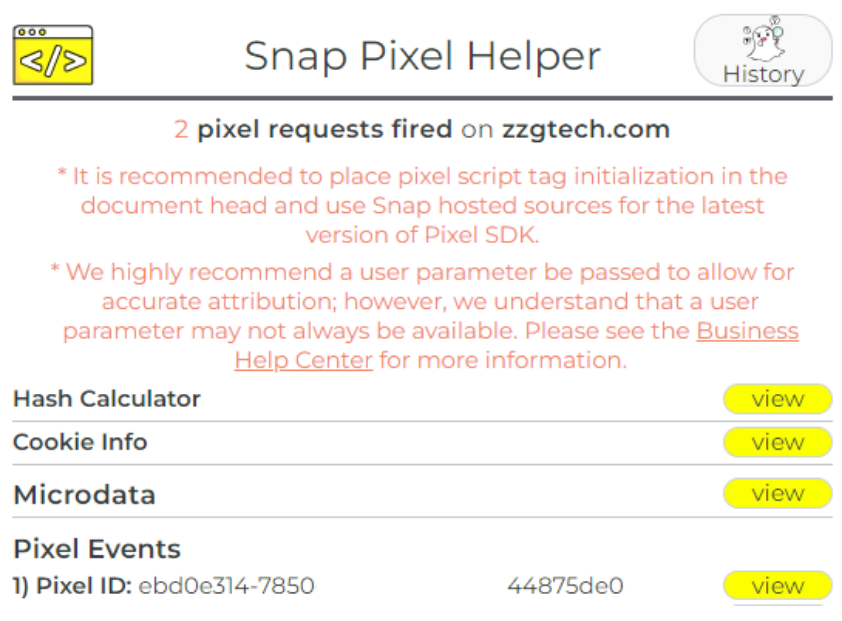
You can use the Snap Pixel Helper tool for testing.
Consent management and data privacy
To stay compliant in regard to data protection, you should only activate script if users given consent within your Consent Management framework.
