Spreadsheet Source Guide
Harness the power of spreadsheets in your tracking process with the Spreadsheet Source feature. This guide will walk you through the steps to utilize spreadsheet data in your existing trackers.
Get Started
To get started, log in to SignalSight and begin creating your tracker. If you don't have a SignalSight account yet, you can register by following this link: https://console.signalsight.io/dash/login?service=free. Once you have registered, you are ready to kickstart the tracker creation process and unlock the full potential of SignalSight.
Spreadsheet Source in New Tracker
To begin creating a tracker, you have two options:
- Click on the title "Tracker Create Wizard" in the left menu.
- Alternatively, click on the "Create Tracker" button located in the upper right corner of the trackers page.
Once you click on either of these options, you will be prompted to provide information such as source and destination details, as well as the name of your tracker.
Source as Spreadsheet
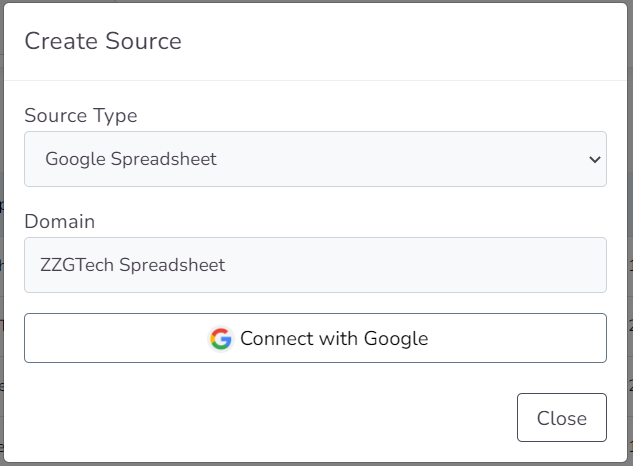
In the first step of creating a tracker, you will be prompted to create a source. Select "Google Spreadsheet" as the source type. Provide a descriptive name for the source and enter relevant information in the first input field, irrespective of the domain.

To initiate the access process, click on the "Connect with Google" button. This will open a pop-up window where you can begin the authentication and authorization process to connect your Google account with SignalSight.
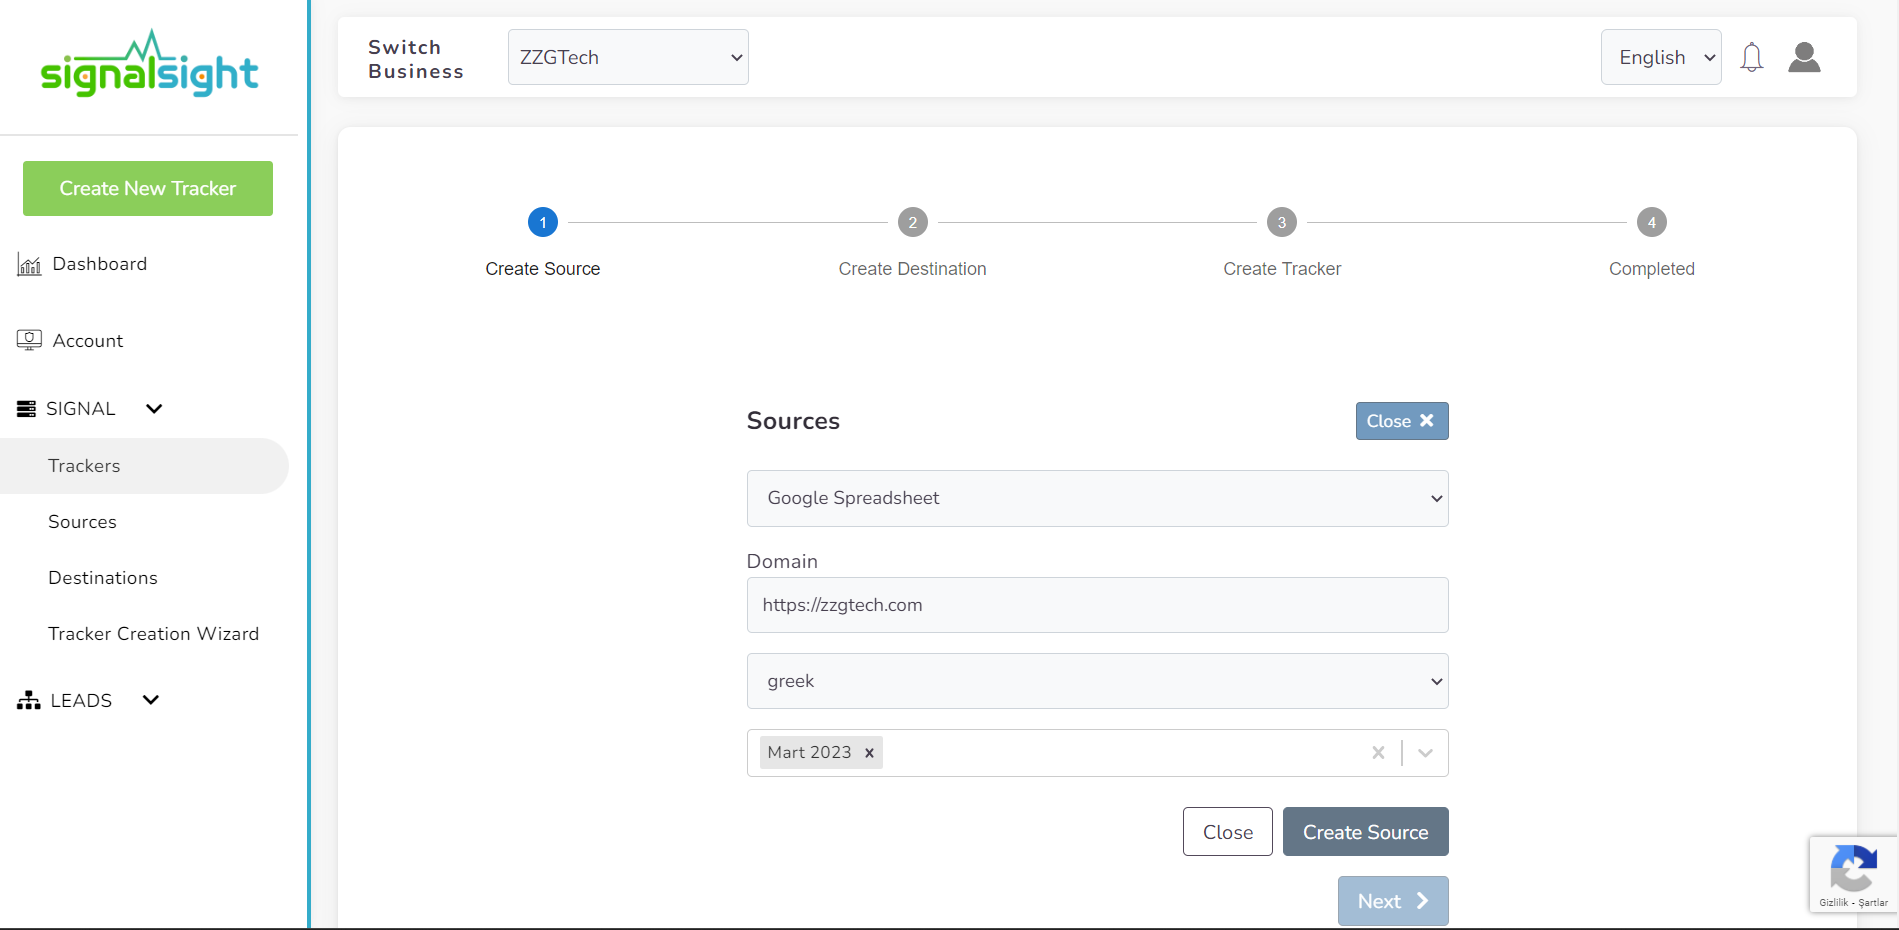
After granting the necessary access permissions, you can proceed by selecting the desired sheet from the available options. Choose the sheet that you want to use as the source for your tracker, and then click on the "Next" button to proceed to the next step in the tracker creation process.
Destination Selection
In this step of the wizard, you need to ensure that the Google Sheet source is linked to one or more destinations. SignalSight provides you with a range of destination options to choose from. You can proceed by selecting one or multiple destinations that best suit your requirements.
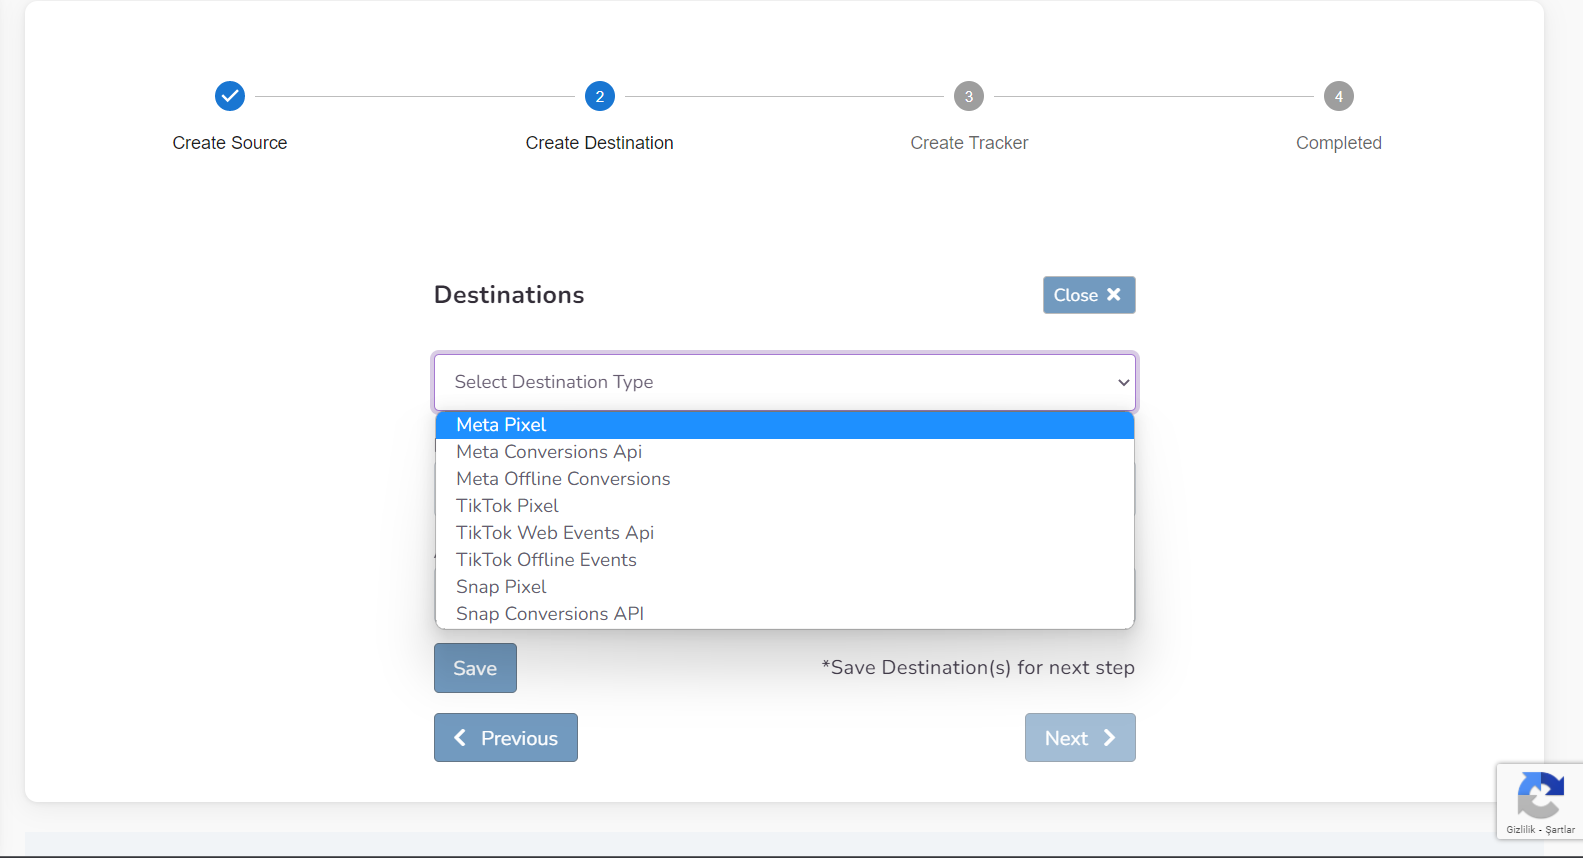
After selecting the desired destination(s) for your tracker, click on the "Save" button to save your selection. Next, you will be directed to the tracker naming stage. Proceed by clicking on the "Next" button once again. This will take you to the next step in the tracker creation process where you can provide a name for your tracker.
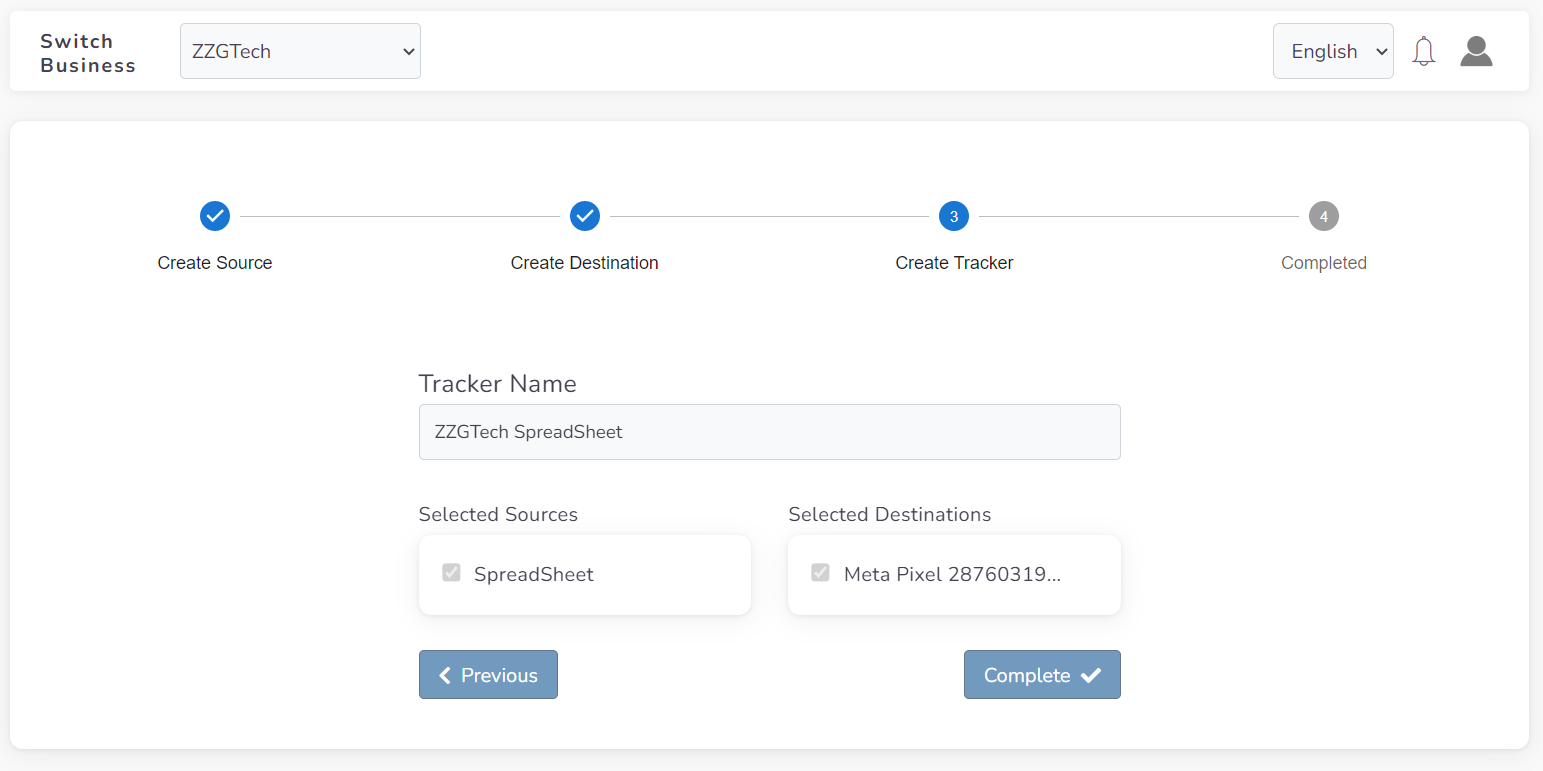
After giving the tracker a name, you can conclude the wizard process by clicking the "Complete" button. Congratulations! You have successfully created a tracker using Google Spreadsheet as the source.
Remember, you have the flexibility to make edits, remove sources or destinations, and add new sources or destinations at any time on the tracker detail page. Simply navigate to the detail page of the created tracker, and from there, you can manage and customize your tracker as needed.
Spreadsheet Source for Existing Trackers
With SignalSight's Spreadsheet Source feature, you can take your existing trackers to the next level. Seamlessly integrate spreadsheet data into your tracking workflow and gain valuable insights. Unlock the potential of your existing trackers with the Spreadsheet Source option. To add the Spreadsheet source to a specific tracker, follow these steps:
- Click on "Trackers" from the left menu. This will take you to the Trackers page.
- On the Trackers page, locate and select the tracker to which you want to add the Spreadsheet source. You can click on the tracker's name or any associated action icon to access its details.
By clicking on the tracker, you will be directed to the tracker detail page where you can manage and customize the tracker settings, including adding the Spreadsheet source.
So you will see the tracker detail page. Click the “+ Add New Source” button to add a new source on this page.
You must enter a Domain / Name information by choosing Google Spreadsheet from the popup menu. Connect the Google account by following the authentication process and granting the necessary access permissions. Once connected, you will be able to choose from the available spreadsheets in your Google account. Select the desired spreadsheet from your account to add it as the source for your tracker.
You can select one or more specific pages from the spreadsheet by using the dropdown menu. This allows you to include those selected sheets as part of your source in SignalSight. By choosing the relevant sheets, you can ensure that the desired data is captured and utilized for your tracking purposes.
By completing these steps, you will successfully add a Google Spreadsheet as a source to your tracker.